In this tutorial, we will show you how to fix lag and boost FPS in Bluestacks. This way will work in most games such as Call Of Duty Mobile, PUBG Mobile, Free Fire.
You may also like: How to optimize Windows 10 for low end PC
Fortunately, you can enjoy an immersive gameplay experience with the help of BlueStacks, an Android emulator that makes it possible to play Android games within Windows. BlueStacks provides an amazing performance boost and runs games six times faster than a Samsung Galaxy S9 +. However, many users have still stated on forums that BlueStacks is laggy and runs slow on PC or laptop.
Bluestacks vs Nox – Which one is the best?
For example, when I tried to run a game such as PUBG Mobile in BlueStacks, it’s almost unplayable due to the lags.
Do you want to know why is Bluestacks so slow and how to make Bluestacks faster? Due to poor performance, you will get to a lot of problems while using Bluestacks and playing games on it. Sometimes your games lag in the middle of the game that ruins your gaming experience badly. So this article will show how to speed up Bluestacks in Windows 10.
Bluestacks is slow: How to make Bluestacks faster in Windows 10
Method 1. Update BlueStacks
First of all, make sure that you have the latest version of BlueStacks installed on your Windows PC. BlueStacks 4 is eight times faster than the previous version, so we highly recommend using the latest version so that you can get the best performance.
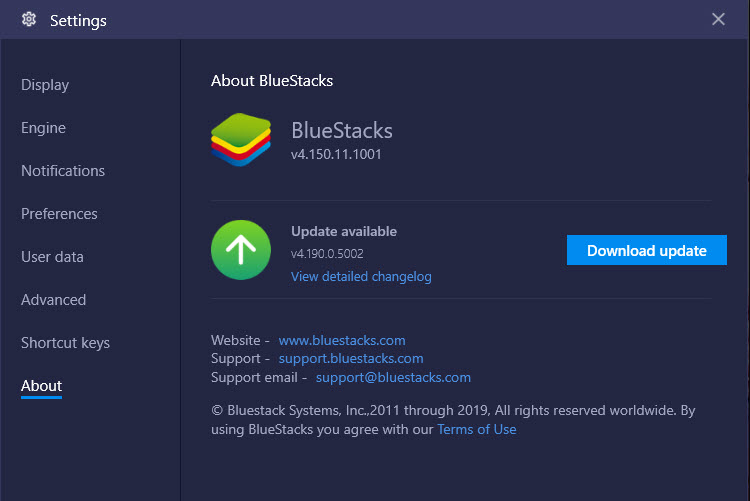
You can also download BlueStacks 4 latest version from this source.
We have a video tutorial for fixing lag and boost FPS in Bluestacks 4 Emulator
Method 2. Best Settings For Bluestacks Lag Fix
There are many in – Bluestacks settings such as allocating more processor, more ram, changing the DPI settings, and more for Bluestacks to run more perfectly.
If you have a low-end PC and you are playing the game on higher settings, then definitely Bluestacks will lag. Thus, you have to lower those settings to boost FPS in the Bluestacks emulator.
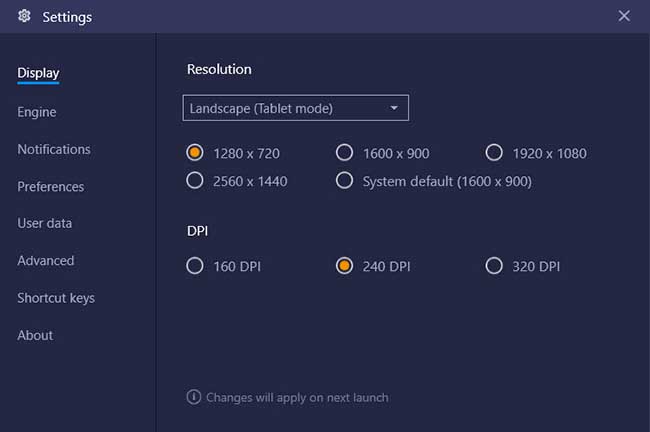
1. Bluestacks Display settings
– Resolution: your monitor resolution
– DPI: 160 or 240
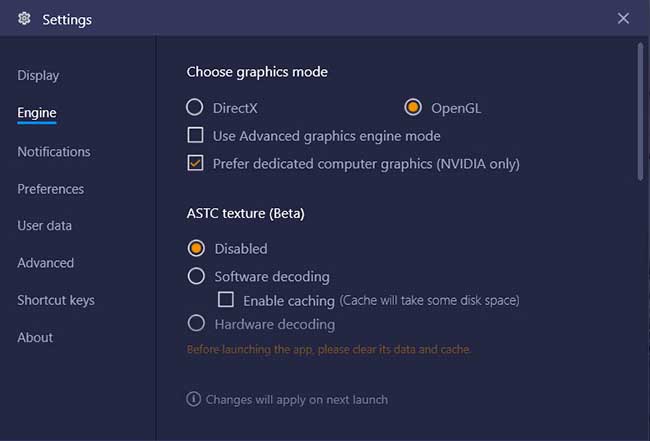
2. Bluestacks Engine Settings For Gaming
– Graphics Mode:
- OpenGL or DirectX.
- Use Advanced Graphics Engine: Enabled.
– GPU Settings
- Prefer dedicated computer graphics: Enabled (NVIDIA only).
- ASTC Texture: Hardware Decoding.
– Performance: Custom
– CPU Cores
- Choose the number of CPU cores you have.
- FPS: 60 FPS is the best for most games.
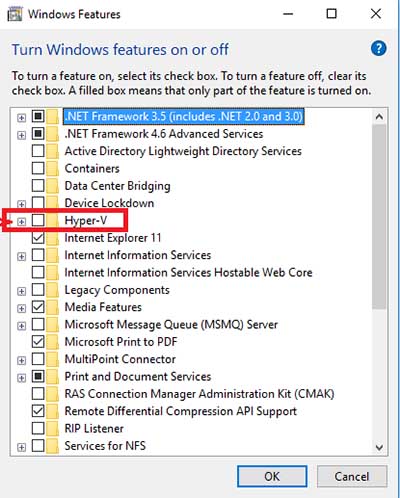
Method 3. You’ll have to disable Hyper-V and other hypervisors
Since BlueStacks uses virtualization technology, when other hypervisors like Hyper-V, VMWare, VirtualBox are running, it may impair your ability to run optimally.
Here are the steps to disable Hyper-V on your PC:
1. Navigate to Control Panel > Programs > Turn Windows features on or off.
2. Untick Hyper-V in Windows features.
– For Windows 10 Pro 64-bit edition:
- Hyper-V
- Windows Hypervisor Platform
– For Windows 10 Home (Version 1809)
- Virtual Machine Platform
- Windows Hypervisor Platform
– For Windows 10 Home (version 1803)
- Windows Hypervisor Platform
3. Click OK and restart your PC.
Or you can easily disable Hyper-V on your PC using an exe file. Download and double-click the exe from here.
Method 4. Disable Antivirus software
Some antivirus features can interfere with virtualization and cause serious performance degradation. You must disable these features which will help to speed up Bluestacks dramatically. Here are the steps to disable your antivirus program:
1. Double-click the icon that represents your antivirus program such as Avast, AVG, McAfee, Norton, etc.
2. Navigate to your Antivirus dashboard, select on the Real-time protection tab and disable it
3. After that, open Task Manager by pressing Ctrl + Alt + Esc on your keyboard.
4. Switch to the Process tab and click on the Description tab.
5. End all the process which are related to your antivirus program.
See also:
- How to turn off AVG antivirus temporarily
- How to disable McAfee real time scanning temporarily
- How to disable Avast Antivirus temporarily
- How to disable Norton Security temporary
- How to disable ESET Smart Security 9 temporarily
- How to pause protection in Kaspersky Antivirus
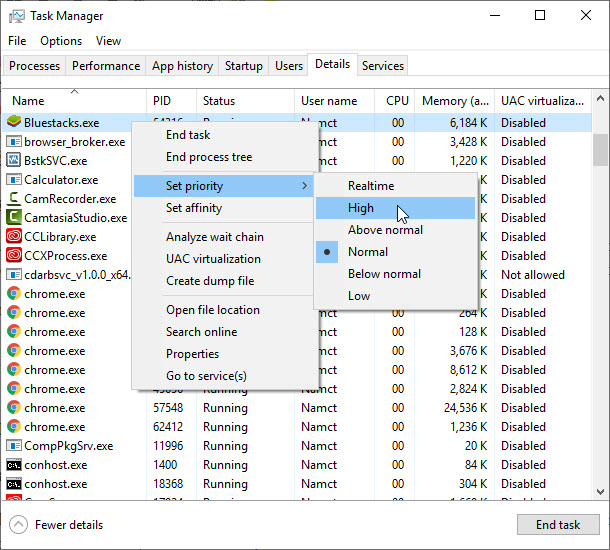
Method 5. Change Bluestacks to High Priority
Changing Priority of Bluestacks can help the OS to allocate more resources like Memory, etc. for the emulator. By default, Bluestacks runs on “Normal” priority mode. Hence you will have to change the priority of Bluestacks to “High” mode which will help the system to give more resources to the emulator. Also, it helps a lot to fix lag and boost FPS in Bluestacks emulator.
Here are the steps to change the priority of Bluestacks:
1. Open Bluestacks emulator.
2. Start Task Manager.
3. Switch to the Details tab, find the Process related to Bluestacks. Set its Priority as High.
See also: How to set a program to high priority permanently in Windows
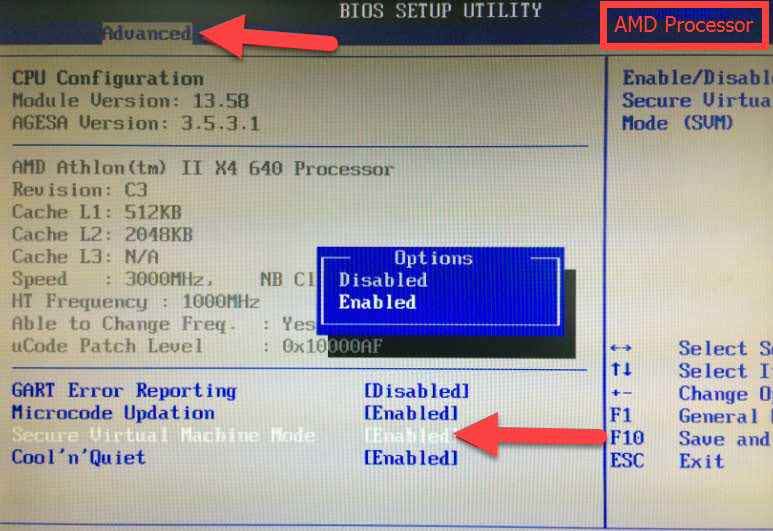
Method 6. Enable “Virtualization Mode” in your system
Virtualization is one of the best ways to increase the performance of your system a lot. It depends on your motherboard and graphics card specification.
To enable or check Virtualization mode for your system, follow the steps below:
Step 1. To begin, download LeoMoon CPU-V to detect your CPU’s capability.
Step 2. Check result it supports virtualization
Step 3. After that, go to BIOS mode to enable virtualization
1. Press a designated key repeatedly (depends on your machine vendor, e.g. Del or F2 works for most Dell) to enter into BIOS setup page when system powers up.
2. Locate virtualization technology (aka AMD-V and Intel VT) and enable it.
Method 7. Increase the pagination size of your system
There are certain memory and disk spaces that are needed for the system to run Bluestacks emulator smoothly. But, the memory and disk spaces allocated to the system is always less. So, you must adjust the size of the pagination files. To do that, follow these steps below:
1. Right-click on “This PC” icon and click on “Properties”.
2. In the left sidebar, select on “Advanced System Settings”.
3. Navigate to the Advanced tab, click on the “Settings” in the Performance section.
4. Switch to the Advanced tab, under the Virtual memory section, select on “Change …”.
5. Untick the “Automatically allocated virtual memory” option. Moving on, click on the “Custom Size” and type the virtual size for your pagination file.
6. Now. set initial size and maximum size to the same.
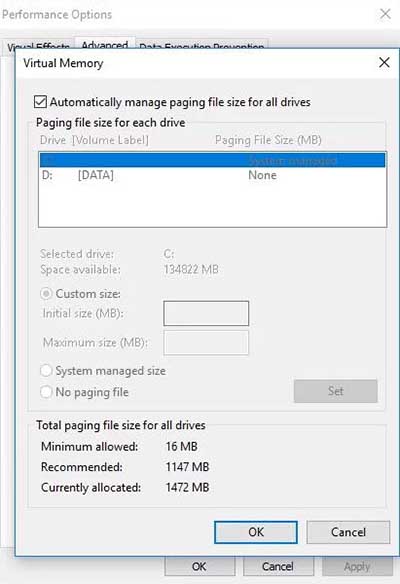
Note: Always consider the size of the files around 50% of your RAM size.
7. Restart your system.
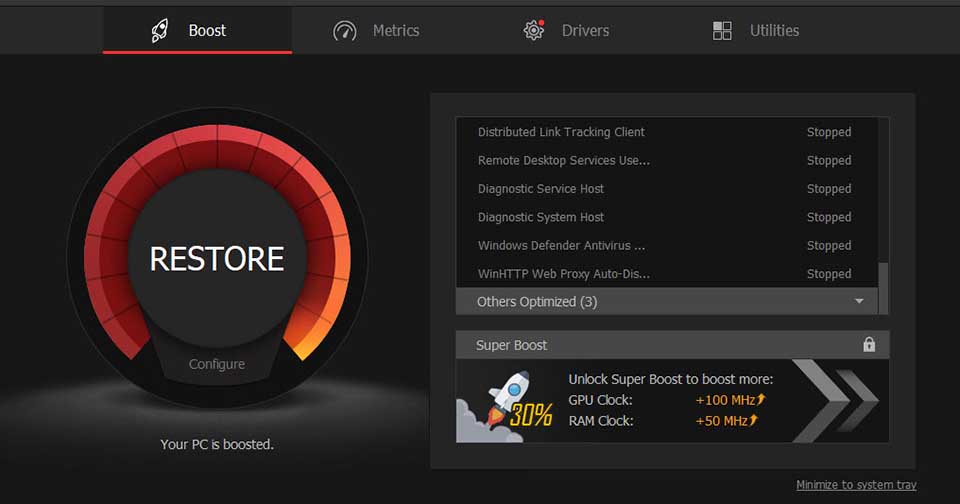
Method 8. Install Advance Gaming Booster in PC
Smart Game Booster is an easy-to-use yet efficient game optimization utility, essential for any gamer who wants a smoother gaming experience.
Main Features of Smart Game Booster:
- Optimize your PC in seconds.
- Boost FPS and display FPS in-game.
- Monitor CPU & GPU temperature.
- Free up more space for your game.
The key feature which helps to boost the performance of Bluestacks is through disabling all the unnecessary background process running simultaneously in the system.
Also, it helps to clean the RAM usage, Performance Utility, etc.
To setup your advance gaming booster in your PC, follow these steps:
1. Download the Smart Game Booster from this page.
2. Install the driver booster application in your PC.
3. Scan the PC for the first time.
4. Once the scanning finishes, it will list all the outdated settings.
5. Just enable the featured settings
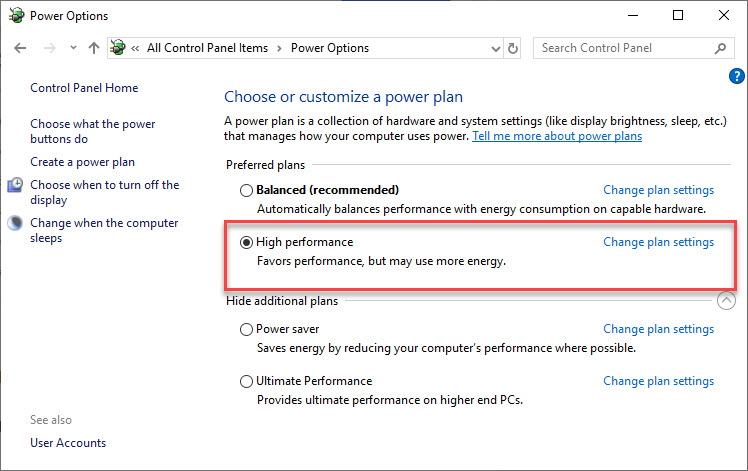
Method 9. Adjust power plan setting
Adjust your power plan setting to speedup Bluestacks. Here are the steps to change to High-Performance mode:
1. Open your “Control Panel” and search “Power Plan” in the search box.
2. Select on the Power Option and set the power plan to “High-Performance” mode.
Tips: On the laptop, just click on the battery option in the taskbar and change the mode to maximum performance.
3. Click Save or click OK changes.
Method 10. Update your outdated drivers to the latest version
Make sure you frequently update to the latest drivers version if available. Upgrading your outdated graphics drivers helps to reduce most of the rendering lags in the Bluestacks emulator.
There are so many software available on the internet which helps to update all your outdated drivers to the latest version by just clicking the Update All button. You can try Driver Easy, which is free and always update their driver’s database every week.
Read also: 11 Best Free Driver Updater Tools
Here are the steps to update all your outdated drivers:
1. Download and install Driver Easy on your PC.
2. After installation, launch Driver Easy and click the Scan Now button. Driver Easy will then scan your computer and checks the outdated drivers.
3. Once the scanning is completed, click Update All to automatically download and install the correct version of all the driver that are missing or out of date on your system.

4. Restart your PC after installation and all done.
Method 11. Upgrade your computer
Upgrading to a computer with more RAM and faster CPU (with hardware-assisted virtualization) can boost Bluestacs performance significantly. A large, crisp display with a good trackpad or mouse can also significantly improve experience.
BlueStacks 4 will work on systems that fulfill the minimum systems requirements.
- OS: Microsoft Windows 7 and above.
- Processor: Intel or AMD Processor.
- RAM: Your PC must have at least 2GB of RAM. (Note that having 2GB or more disk space is not a substitute for RAM).
- HDD: 5GB Free Disk Space.
- You must be an Administrator on your PC
- Up to date graphics drivers from Microsoft or the chipset vendor.
However, for a superior gaming experience, Recommended System Requirements are mentioned below.
- Recommended system requirements.
- OS: Microsoft Windows 10.
- Processor: Intel or AMD Multi-Core Processor with Single Thread PassMark score > 1000 and virtualization extensions enabled in the BIOS (see help). Click on this link to find the single thread Passmark score of your PC’s processor.
- Graphics: Intel/Nvidia/ATI, Onboard or Discrete controller with PassMark score >= 750. Click on this link to find the Passmark score of your PC’s graphics controller.
RAM: 8GB or higher. - HDD: SSD (or Fusion/Hybrid Drives).
- Internet: Broadband connection to access games, accounts and related content.
- Up to date graphics drivers from Microsoft or the chipset vendor.
- We do not recommend installing the BlueStacks App Player if you have a virtual machine, e.g., Microsoft Virtual PC, VMWare Workstation, or Oracle Virtualbox, installed on the same PC.
Conclusion
Fixing Bluestacks lag is quite simple and easy. You can fix lag in Bluestacks just by following the above-mentioned solutions. If the above solutions did not work for you, then you should upgrade your PC a little bit.


")


