In this tutorial, learn how to temporarily turn off McAfee Security Center on Windows 10.
McAfee is one of the best antivirus programs for protecting your sensitive data and business computers from malware and other unwanted programs or attacks. After turning the program on, it scans every file for potential threats to your computer and block files that contain malicious code.
At times, however, it can be overprotective at times and block a clean, legitimate file if it thinks it contains a virus. In situations like these, we would recommend you disable the McAfee virus protection temporarily.
How to Disable McAfee Total Protection in Windows 10
Here are the steps to temporarily disable McAfee Total Protection on a Windows PC.
1. To begin, click the Windows logo, or open the Start menu, type “Mcafee” into the Start box next and select McAfee ® TotalProtection.
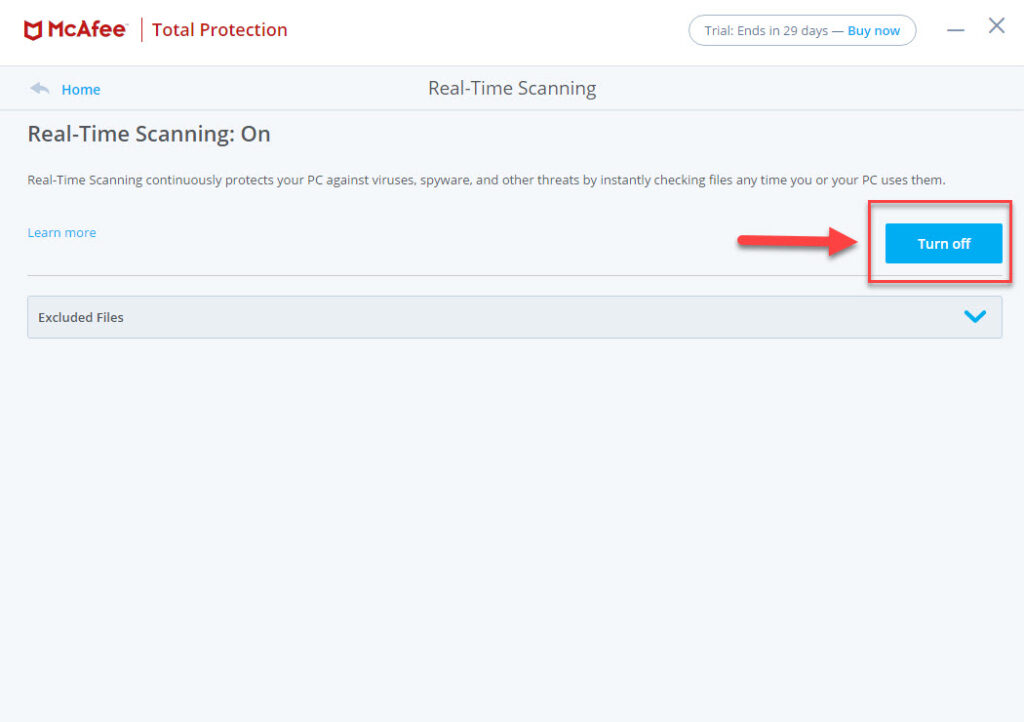
2. Go to the PC Security tab, click the “Real-Time Scanning” link, found in the left menu pane.

3. The Real-Time Scanning dialog window appears, overlaying the McAfee Total Protection dashboard. Click the “Turn off” button to disable active scanning.
4. Pick an option in the “When Do You Want to Resume Real-Time Scanning” drop-down box. You can choose to resume when you restart your computer or resume in 15, 30, 45 or 60 minutes. If you choose “Never“, the virus protection feature will not work until you enable it manually.
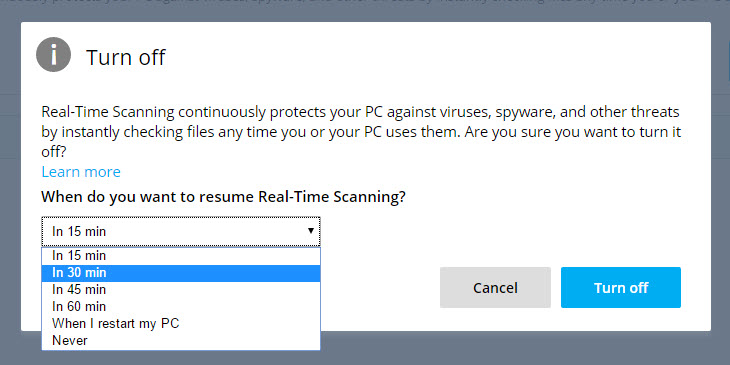
5. After selecting the time limit, click the “Turn Off” button to turn off the protection.
To disable McAfee Firewall as well, repeat the steps above and select Firewall instead of Real-Time Scanning in Step 2.
Now all your services at Mcafee are disabled.
In this video, we are gonna show you how to disable McAfee Antivirus on Windows 10 PC for Temporary:
That’s about it.


")

 & Mac OS")
