In this tutorial, learn how to download and install VMware Workstation 15.5 Pro on Windows 10 for new users or students.
See also:
Let me explain first what is VMware Workstation?
VMware Workstation is one of the widely used virtualization programs for Microsoft operating systems. VMware Workstation enables you to create, run, and manage multiple virtual machines even from different platforms (e.g. macOS or Linux), or even older versions of Windows (e.g. Windows 98, Windows 2000, Windows XP, etc.) on a single computer running Windows 10 or earlier.
For new users or students, a virtual machine can be a good tool to test or run the apps they don’t want to install on their main computer a.k.a. host machine. What’s more, Virtual machines help you to evaluate the new releases of the operating systems without making any changes to your host computer.
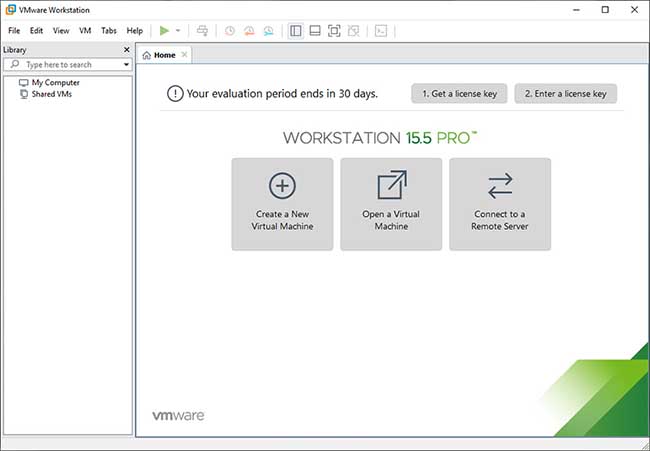
VMware Workstation 15.5 Pro
This post will show you how to install VMware workstation 15.5 Pro on your Windows 10 PC. Installing the software is fairly easy and simple. Let’s get started.
Keeps in mind that, VMware Workstation Pro is not a freeware and you can purchase it from the VMware Store. They do give 30 days trial, but if you are searching for a free version of the software, we would recommend you use VMware Player, which is free for personal use and paid for business use.
How To Download and Install VMware Workstation 15.5 Pro in Windows 10
All you have to do is to download the installer from the website, run it and follow the instructions. Here are the steps:
Step 1. Download VMware Workstation 15.5 Pro for Windows
Visit this site to download the latest version of VMware Workstation Pro for Windows 10/8/7.
Step 2. Once downloaded the Workstation 15.5 Pro installer file, double click to launch the application.
Notes: You should see User Access Control (UAC) dialog box. Click Yes to continue.
Step 3. When you start the installation, a VMware Workstation setup wizard dialog box appears. Click Next to continue.
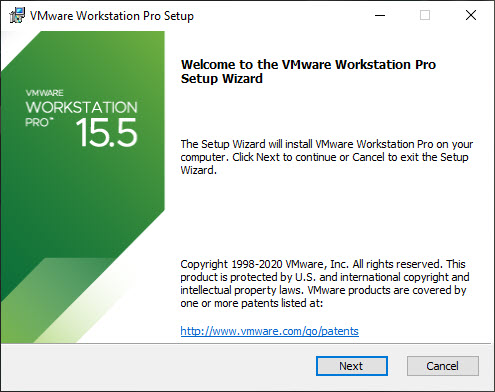
VMware Workstation 15.5 Pro Installation – Setup Wizard
Step 4. Now, you should see End User Licence Agreement dialog box. Tick “I accept the terms in the Licence Agreement” box and then click Next to continue.
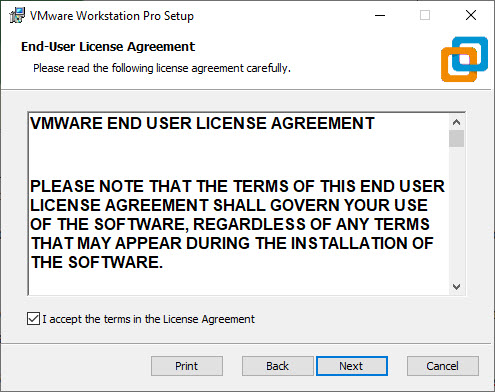
VMware Workstation 15.5 Pro Installation – End User Licence Agreement
Step 5. Next, choose the folder in which you would like to install the software. Tick the “Enhanced Keyboard Driver” box and click Next. This enables the keystrokes and special key combinations such as Alt + Ctrl + Delete work correctly and differently for the virtual machine and host computer.
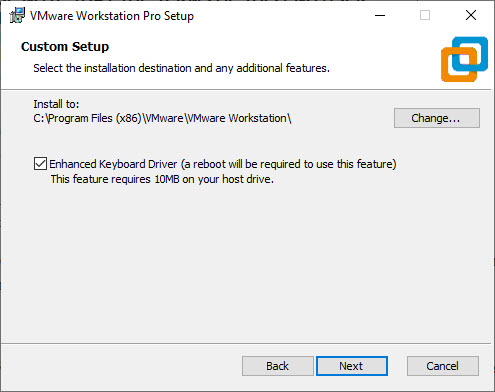
VMware Workstation 15.5 Pro Installation – Choose Installation Folder
Step 6. On the next screen, configure user experience settings. I normally untick “Check for product updates on startup” and “Join the VMware Customer Experience Improvement Program”. Click Next.
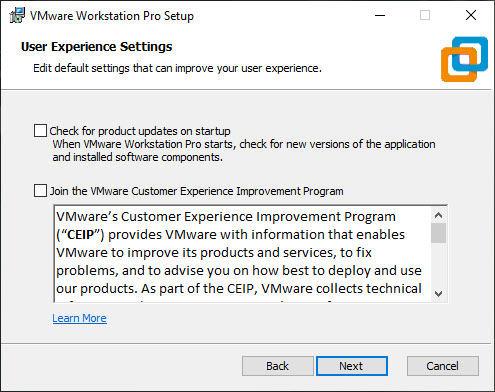
VMware Workstation 15.5 Pro Installation – User Experience Settings
Step 7. In this dialog box, select the place you want the shortcut icons to be placed on your system to launch the application. Please tick both the options, Desktop and Start Menu Programs Folder. Click Next.
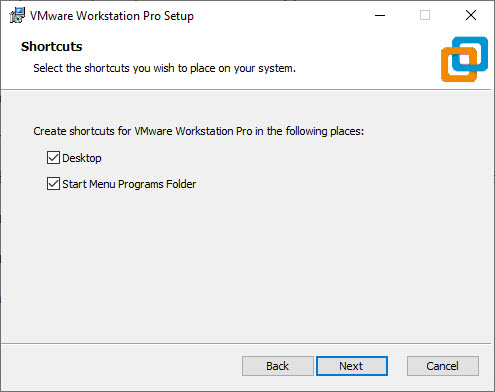
VMware Workstation 15.5 Pro Installation – Shortcut Selection
Step 8. This time you see the begin installation dialog box. Click Install on the Ready to Install VMware Workstation Pro window.
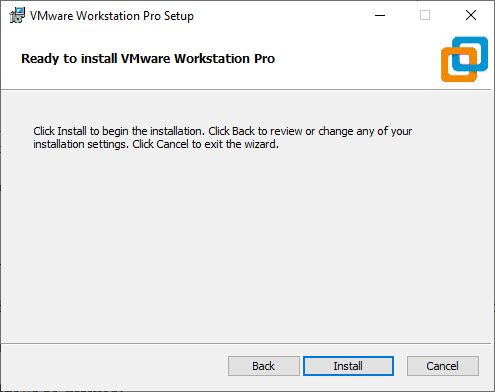
Ready to Install VMware Workstation 15.5 Pro in Windows 10
Step 9. Wait for the installation until it should be completed, click Finish when done. You may be asked to restart your computer. Click on Yes to restart.
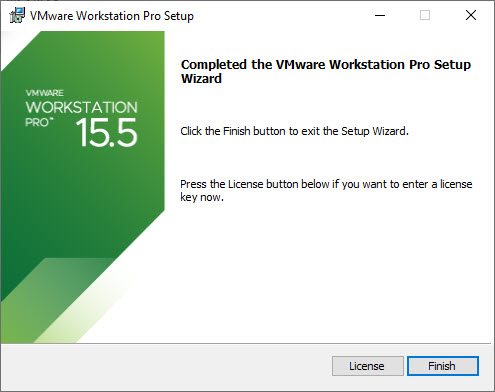
VMware Workstation 15.5 Pro Installation – Installation Complete
Step 10. After the installation completes, the VMware Workstation Pro shortcut icon appears on the desktop. Double-click it to launch the application. If you see the dialog box asking for the licence key, enter the license key or click on trial. If you don’t have the license key, you will have 30 days trial.
Lastly, VMware Workstation Pro will be ready to use and run on your Windows 10 desktop.
This video shows you how to install VMware Workstation 15.5 Pro on Windows 10 systems.
Hope something helps you.

")


 & Mac OS")
