In this article, I will talk about an error that mostly appears after you boot into Windows: “There was a problem starting C:\Windows\System32\LogiLDA.dll. The specified module could not be found.” This error message could pop up after you install a Feature Upgrade or upgrade your Windows version to Windows 10
This error happens due to the incompatible version Logitech software, more specifically Logitech Download Assistant. the file LogiLDA.dll is a software component of Logitech Download Assistant. This .dll file is located in the C:\Windows\System32 folder. It contains the data, resources and program code of Logitech Download Assistant. This belongs to the Logitech mouse, one of the most commonly used mice among the Windows 10 users.
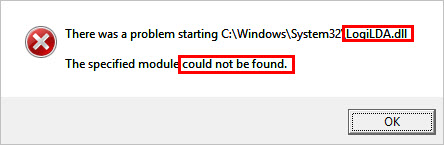
There was a problem starting C:\Windows\System32\LogiLDA.dll. The specified module could not be found.
See more: How To Fix “The specified module could not be found” Error In Windows 10
If you’re also getting this problem and you do not know how to fix, try below mentioned suggestions and check if they helps.
You can refer how to fix missing DLL files in Windows 10 from this post.
How to Fix LogiLDA.dll Errors in Windows 10
Method 1. Remove Logitech from Startup
In order to fix this problem, we would recommend you disable LogiLDA from Startup in Task Manager. After disabling LogiLDA from Startup in Task Manager, Logitech Download Assistant won’t run during startup to check for newly released Logitech updates. To do that, follow these steps below:
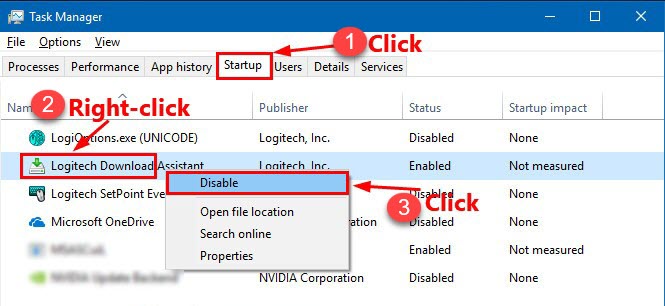
1. Open Task Manager by pressing Ctrl, Shift and Esc on your keyboard.
2. Go to the Startup tab. Find Logitech Download Assistant, then right-click it and select Disable. This will disable LogiLDA from Startup.
3. Restart your Windows.
Method 2. Erase the Logitech Download Assistant Key from Registry Editor
If this problem reappears after you disabled LogiLDA from Startup, you may need to delete the Logitech Download Assistant key from Registry Editor. To do so, follow these steps below:
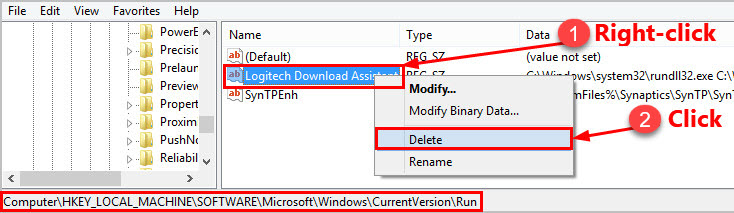
1. Open the Run prompt (Windows Key + R), then put regedit and click OK. Open Registry Editor.

2. Navigate to:
HKEY_LOCAL_MACHINE\Software\Microsoft\Windows\CurrentVersion\Run
3. Locate Logitech Download Assistant and delete the entry.
4. Restart your PC.
Or, you can delete the Logitech Download Assistant registry key with a batch file. Here is how to do it:
1. Enter “notepad” in the search box and click Run as administrator. This will open Notepad as Administrator.
2. Copy and paste below lines into Notepad:
echo Start
echo #
echo ######################## Default dirctory for x86 x64 ########################
echo #
echo this command is default system32 directory for x86 OS or x64 OS
cd %windir% & cd system32
reg delete “HKCUSoftwareMicrosoftWindowsCurrentVersionRun” /v “Logitech Download Assistant” /f
reg delete “HKLMSOFTWAREMicrosoftWindowsCurrentVersionRun” /v “Logitech Download Assistant” /f
echo #
echo ######################## Change the dirctory for x64 ########################
echo #
echo this command is x86 application’s registry for x64 OS
cd %windir% & cd syswow64
reg delete “HKCUSoftwareMicrosoftWindowsCurrentVersionRun” /v “Logitech Download Assistant” /f
reg delete “HKLMSOFTWAREMicrosoftWindowsCurrentVersionRun” /v “Logitech Download Assistant” /f
echo End
3. Click File > to open the window below..
4. Select All Files from the Save as type drop-down menu. Type “Logitech.bat” as the batch file title.
5. Select to save the batch file to the desktop. Click Save.
6. Right-click the Logitech.bat file on the desktop and click Run as administrator.
7. Restart your PC.
DOWNLOAD the Logitech.bat file click here.
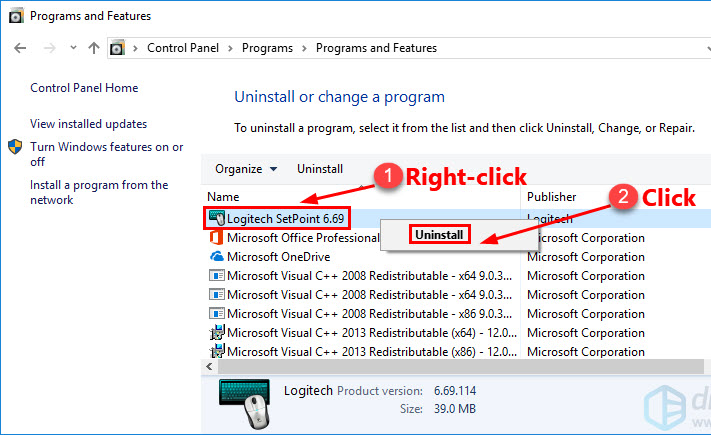
Method 3. Remove the Logitech SetPoint Software
Uninstalling Logitech Download Assistant from Windows startup might also fix the logilda.dll error.
In fact, removing SetPoint might be enough to fix the problem. To do that, follow these steps below:
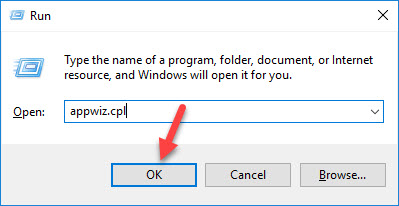
1. Press Windows Key + R and type appwiz.cpl in the Run dialog box. Click OK.
2. Find Logitech SetPoint and select the listed SetPoint software, and click the Uninstall button.
3. Restart your PC.
Reinstalling the Logitech SetPoint software with the latest version will usually fix the logilda.dll error. Visit this site to download the latest SetPoint software. After that, open SetPoint’s installer to install the software to Windows.
VIDEO TUTORIAL:
You may also like: How to uninstall apps and programs on Windows 10
Those are 3 ways that will obliterate the logilda.dll error message window. Note that you can also remove the Logitech Download Assistant from Windows startup with system optimizers that include startup managers, such as System Mechanic or CCleaner.
Hope something helps you.


")


