
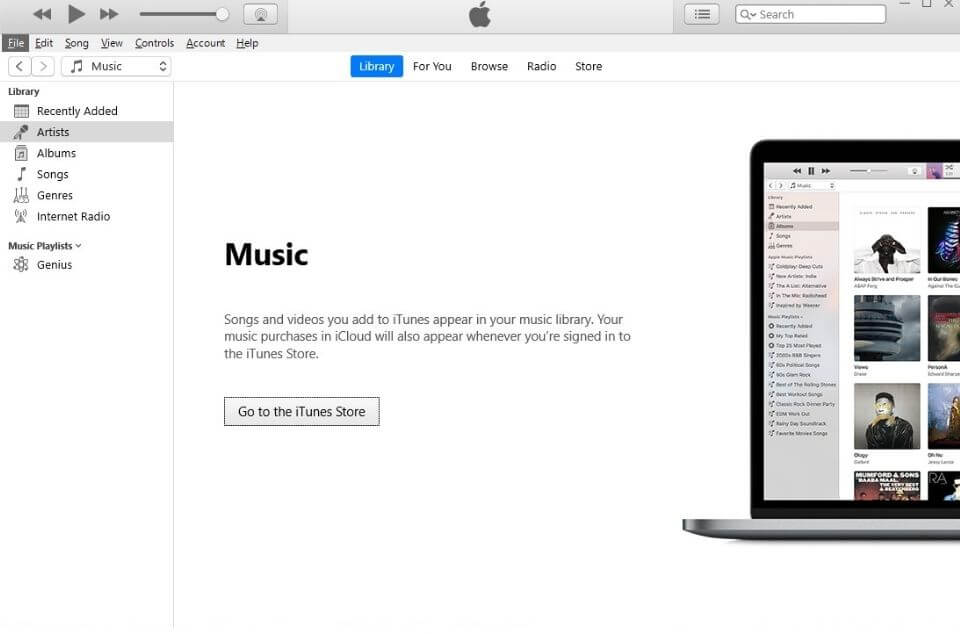
iTunes remains one of the most popular media management tools for Apple device users, even on Windows. Whether you want to sync your iPhone, manage your music library, or access Apple TV+, getting iTunes running on Windows 11 is quick and completely free. In this guide we walk you through two official methods — the Microsoft Store and the direct Apple download — so you can pick whichever suits you best.
System Requirements
Before downloading iTunes, make sure your PC meets the minimum requirements:
| Component | Minimum Requirement |
|---|---|
| Operating System | Windows 11 (64-bit) – all editions |
| Processor | Intel or AMD, 1 GHz or faster |
| RAM | 2 GB (4 GB recommended) |
| Storage | 400 MB free space (more for your media library) |
| Screen Resolution | 1024 × 768 or higher |
| Internet | Required for download and Apple services |
Windows 11 is only available in 64-bit, so compatibility is virtually guaranteed on any modern machine.
Method 1 – Download iTunes from the Microsoft Store (Recommended)
The easiest and most recommended way to install iTunes on Windows 11 is through the Microsoft Store. This version updates automatically and integrates seamlessly with Windows.
Step 1 – Search for the Microsoft Store in the search bar and open it. Alternatively, click the Microsoft Store icon on the taskbar on your Windows 11 PC to access it quickly.
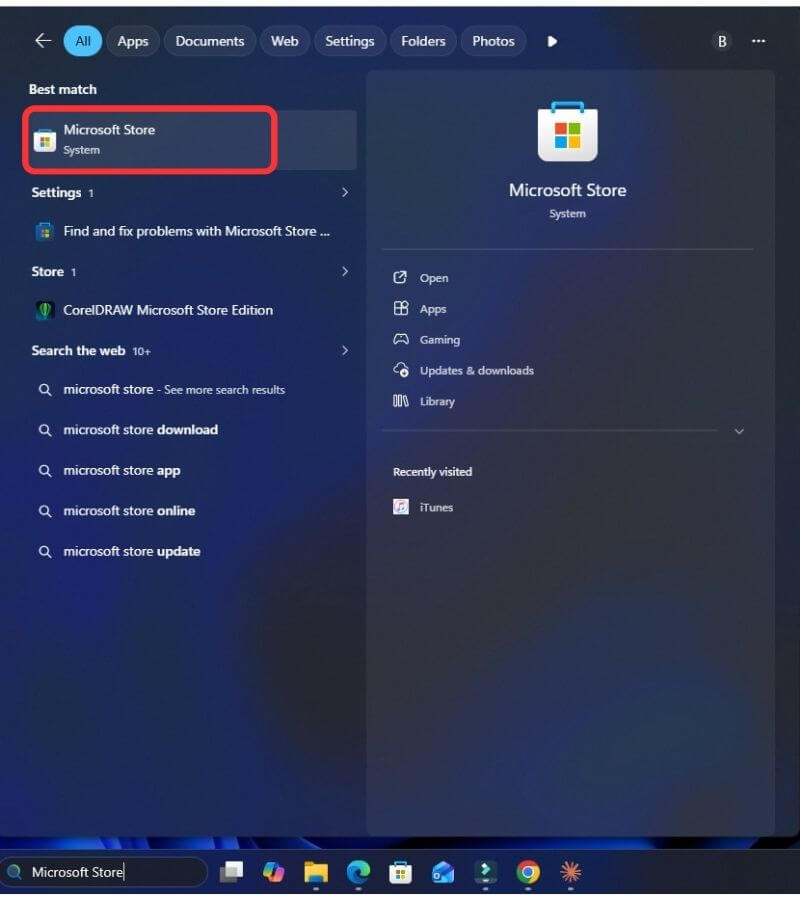
Step 2 – Click the search option, then type “iTunes” in the Microsoft Store search bar.
Step 3 – Click the blue Get button. If you have previously installed iTunes, the button may say Install instead. You may be prompted to sign in with a Microsoft account — this is free and only used to authorize the download.
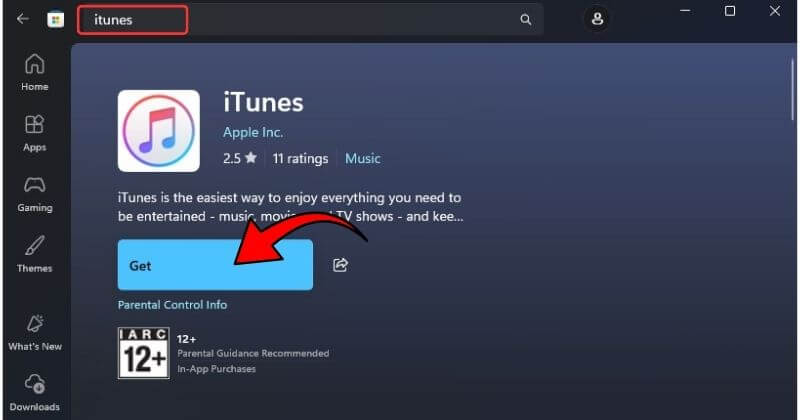
Step 4 – The download is roughly 170–200 MB. A progress bar will appear inside the Store. You can minimize the window and continue using your PC — the installation runs in the background.
Step 5 – Once installation finishes, click the Open button inside the Microsoft Store, or find iTunes in the Start menu. Windows 11 may also pin it to your taskbar automatically.
Method 2 – Download iTunes Directly from Apple’s Website
If you prefer the traditional installer — or if the Microsoft Store is unavailable on your PC — you can download iTunes directly from apple.com. This version installs additional Apple drivers (Bonjour, Apple Mobile Device Support, etc.) that some users need for advanced device connectivity.
Step 1 – Open your web browser and go to: https://www.apple.com/itunes/
Step 2 – Scroll down until you see the “Looking for other versions?” section, then click the Windows link.

Step 3 – After that, you will see the option to download iTunes. Click on “Download iTunes for Windows now (64-bit)” to continue. This downloads the iTunes64Setup.exe installer file (approximately 200 MB).
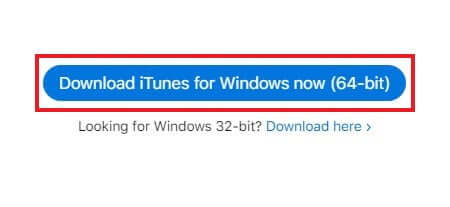
Note: There are two download options available: one for 64-bit systems and another for 32-bit systems. If you’re unsure which version your PC uses, check out our guide on how to find your system type. If the required version doesn’t download properly, try downloading a different version of iTunes instead.
Step 4 – Once the download is complete, open your Downloads folder and double-click iTunes64Setup.exe. If a User Account Control (UAC) prompt appears asking “Do you want to allow this app to make changes to your device?”, click Yes.
Step 5 – The iTunes Setup Wizard will open. Click Next on the setup window.
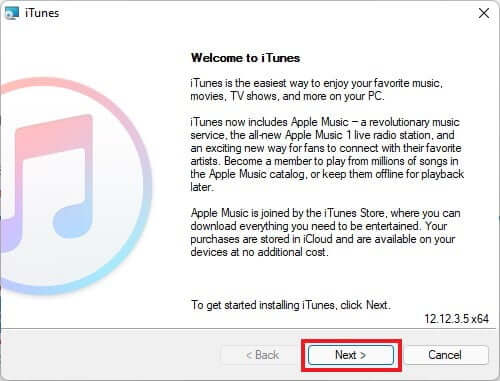
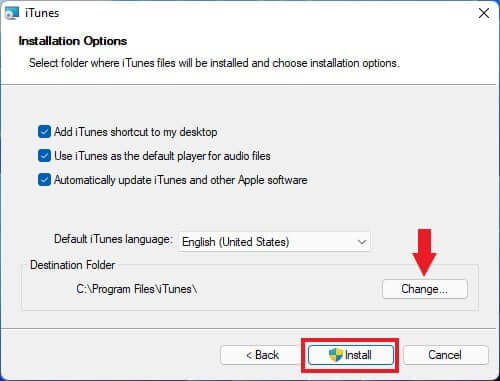
Step 6 – In the Installation Options window, choose the folder where you want to install iTunes and select your preferred installation settings. If you prefer, you can leave everything set to default and click the Install button to begin installing iTunes.
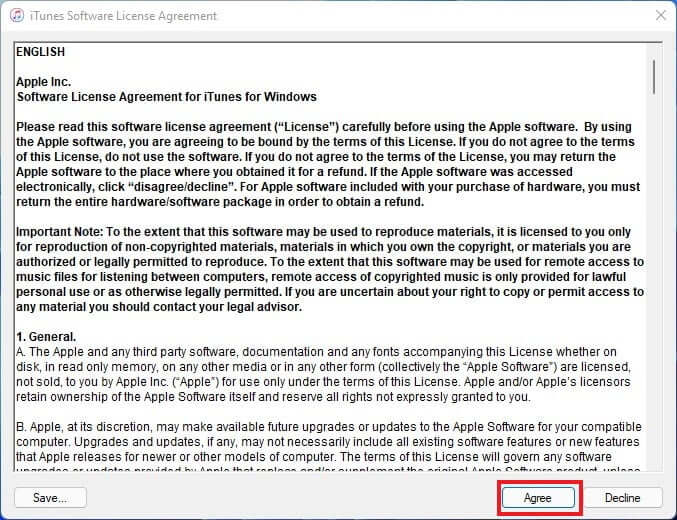
Step 7 – Once the installation process is complete, click on Finish and Agree the license agreement.
How to Uninstall iTunes on Windows 11
If you ever need to remove iTunes — for example, to do a clean reinstall — follow these steps:
- Open Settings.
- Go to Apps → Installed Apps.
- Search for iTunes in the list.
- Click the three-dot menu next to iTunes and select Uninstall.
- Repeat the process for any remaining Apple components: Apple Software Update, Apple Mobile Device Support, Apple Application Support (32-bit), Apple Application Support (64-bit), and Bonjour.
- Restart your PC.
Note: Uninstalling iTunes does not delete your music library or purchased content. Your media files remain in the Music\iTunes folder in your user directory.
Conclusion
Getting iTunes up and running on Windows 11 is a straightforward process regardless of which method you choose. The Microsoft Store method is the quickest and most hassle-free option for the majority of users, while the direct Apple download gives you more control and installs the full suite of Apple drivers — useful if you rely on advanced device connectivity features.
Once installed, you can manage your music and video library, sync your iPhone or iPad, create and restore backups, and access Apple Music — all from your Windows 11 desktop. If you run into any trouble along the way, the troubleshooting steps above should resolve the most common issues.
Have a question or found a different method that works for you? Leave a comment below, and check out more free app guides at windows10freeapps.com.

![How to Configure Proxy Settings on Android Devices [FREE]](https://windows10freeapps.com/wp-content/uploads/2024/12/setting-up-a-proxy-for-a-wi-fi-network-1-150x150.jpeg "How to Configure Proxy Settings on Android Devices [FREE]")


