In this article, we will provide you how to download and install Snagit on Windows PC.
Read more: Download Bandicam for Windows 10
Let me explain first what is Snagit?
Snagit is a screenshot tool for Windows and OS X, first released in 1990. It allows you to capture a part of the screen or all of it. Furthermore, they may edit the screenshot afterward using a simple image editor that is included with the software.
Snagit for Windows 10/8/7
You may ask, What is the difference between Snagit and Snipping tool?
The best part about Snagit is that it lets you create both videos and images, while the Snipping Tool only enables for images. With Snagit, you can grab pretty much any type of screenshot – a region, window, and full-screen on Windows and Mac.
You may also like:
- Snagit vs Camtasia
- Greenshot vs Snagit
How To Download and Install Snagit on Windows 10/8/7
1. First, click here to download Snagit for Windows 10/8/7.
2. Once the file is downloaded, go to the folder that contains the “snagit.exe” file and double-click on the file to begin installing Snagit.
3. Select the desired language from the dropdown.
4. Tick the “I accept the License Terms” checkbox and then click click Options to customize the settings. Click Install.
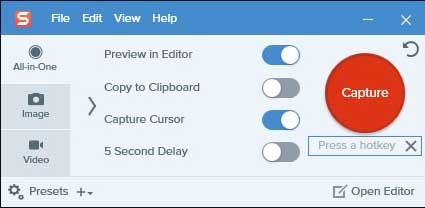
5. After the installation of Snagit is complete, click Start capturing.
Now Snagit is installed and ready to use.
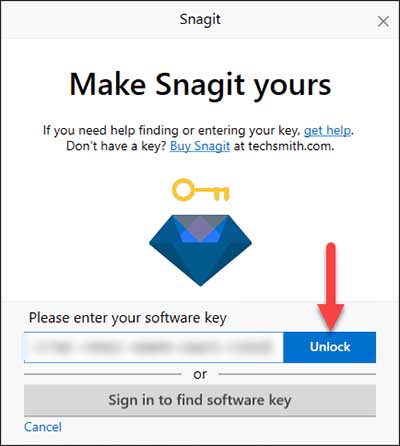
To enter Snagit key for Windows, follow these steps:
The free trial of Snagit is a fully functional 15 day trial. If you decide to purchase, there is no need to download and install Snagit (Windows) again. You simply need to unlock the trial with your software key.
1. Launch the main Snagit capture window.
2. Select Help > Enter Software Key…
3. Type the Snagit key and click Unlock.
How to use Snagit to capture video on PC
Snagit allows you turn screenshots into videos with annotation and narration. Here are the steps:
1. First, choose an area to record. To do that, click the Capture button and then choose your particular window, the entire screen, or a custom region.
2. Select audio and webcam settings
The video toolbar enables you to select audio and webcam settings. Make sure that system audio or microphone are turned on and working properly. Click the record button to begin.
3. Pause while recording
While recording, you can pause and resume capture video at any time, switch between the webcam and screen recording with the webcam button, and even change audio settings. When you’re done recording, press on the stop button.
4. Make easy video edits
The video appears in the Snagit Editor. Use the video controls to preview the video. To trim unnecessary sections of your video, drag the red or green handles to make a selection, and then click Cut.
5. Share your video
See also: How To Screenshot on HP Laptop
Once your video is completed, use the Share menu to send the video to the web or save it to your computer.
System Requirements For Snagit:
- Processor: 2.4 GHz single core processor (dual core i5 required for video capture).
- RAM: 1 GB of RAM (4 GB required for video capture).
- Hard Disk: 400 MB of hard-disk space for program installation.
- Video Card: NA.
- Supported OS: Windows 10, Windows 8/8.1, Windows 7, macOS Catalina 10.15, Mac Mojave 10.14 or High Sierra 10.13.
That’s about it.

 & Mac OS")

")

 & Mac OS For Free")
