In this tutorial, learn how to install the fonts you desire in Windows 10.
Windows 10 comes preloaded with a ton of stylish fonts, but they might not be what you are searching for. However, you can easily install any font you want in Windows 10. Here’s a look at how to install a font in Windows 10
How To Install a font on Windows 10
Step 1. Download your font and extract it from its zip file if required.
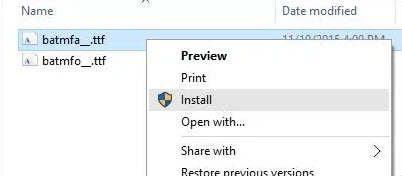
Step 2. Once you have your font downloaded (.ttf files) and available, right-click it and select Install. That’s it.
Step 3. To check if the font is installed, go to the following path: Control Panel > All Control Panel Items > Fonts.
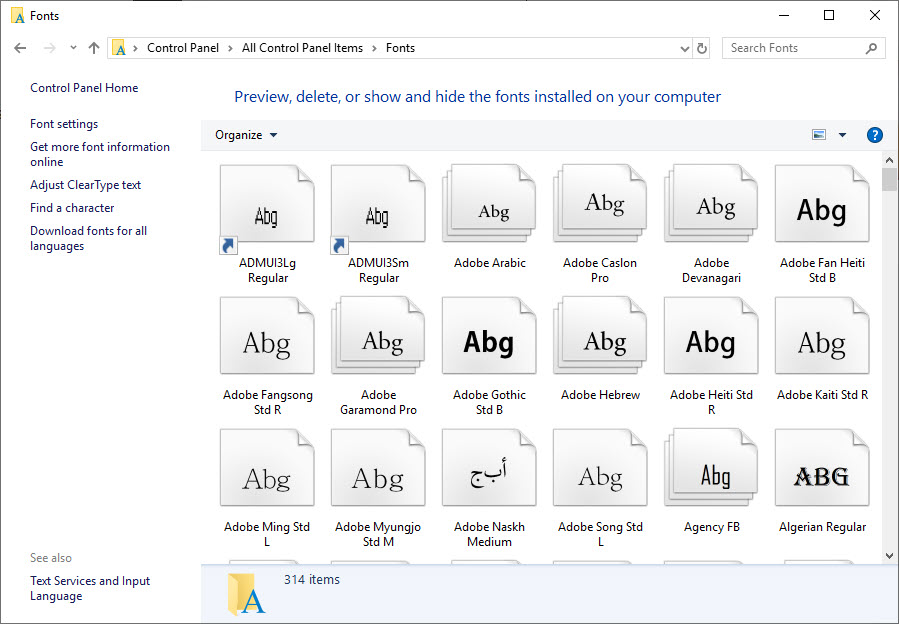
In here, you should see your fonts listed in the Font Control Panel. If you don’t find it and have a lot of them installed, just type in its name in the search box to look for it.
VIDEO TUTORIAL: How to install a new font in Windows 10
That’s about it.
Related Posts:
 & Mac OS") Download CamHiPro For PC (Windows 11/10) & Mac OS
Download CamHiPro For PC (Windows 11/10) & Mac OS") How to Mirror iPhone to Windows 11 for Free (3 Best Methods)
How to Mirror iPhone to Windows 11 for Free (3 Best Methods) How to Download and Install iTunes on Windows 11
3 Methods to Extend C Drive in Windows 11/10 (Easily)
 4 Best Tools to Convert MOV to AVI In High Quality
How to Delete All Partitions Windows 11/10
