This guide shows you how to optimize your PC or laptop. Especially, these tips improve the performance of your GPU and CPU for video games.
How To Optimize Windows 11 for Gaming (2022) Increase FPS and Performance!
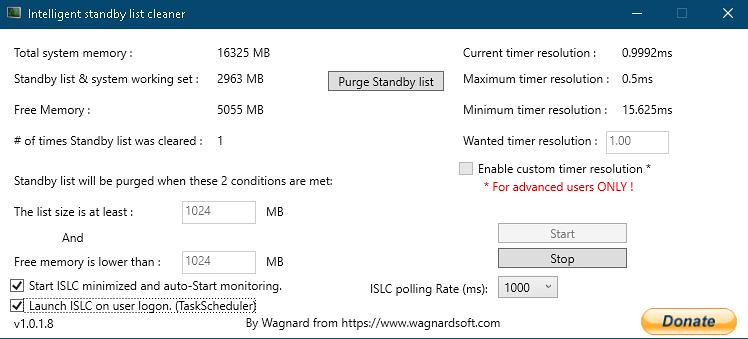
Step 1) Intelligent Standby List Cleaner – Memory Leak Fix
When the memory standby list exceeds 1000mb (1gb), the “Intelligent standby list cleaner” application will monitor and clear it. It will assist players in resolving stuttering issues in games.
1. Download the Intelligent standby list cleaner
2. Execute the 7-zip file.
3. Save the file to a folder.
4. Navigate to that folder.
5. Start the “Intelligent standby list cleaner ISLC” program.
6. Check the “Start ISLC minimize and auto-start monitoring”
7. Check the “Launch ISLC on user logon” as well.
8. Now, press the Start button and then Minimize.
Step 2) Power Options
If the CPU cooler is not enough, you can skip this setting. Processor temperature may increase by 5-6 degrees.
1. Open Control Panel. Select Power Options.
2. Click the Additional power settings
3. Select the Power saver on the Preferred plans tab.
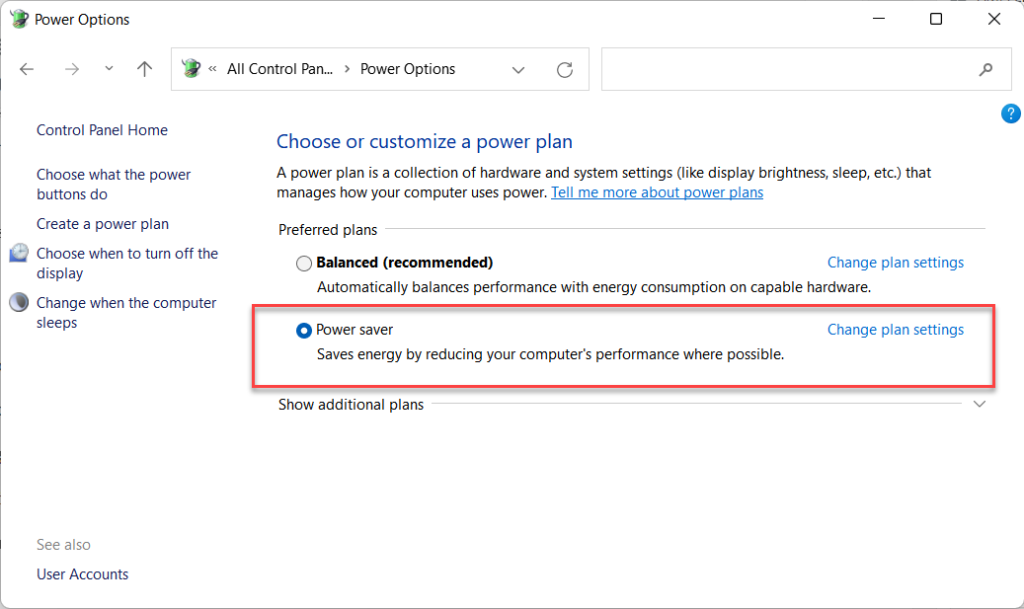
4. After, click the Change plan settings link next to High performance.
5. Tap on the Change advanced power settings
6. Find Processor power management in the incoming list, click the + icon on the left side.
7. Set Minimum processor state and Maximum processor state to 100%
8. Click on the OK to save changes.
Step 3) Game Mode
To disable Windows 10 game mode, follow these steps:
1. Open the Start menu by clicking the Start icon. Then click the Settings button.
2. Select the Gaming option.
3. Set the “Record game clips, screenshots, and broadcast using Game Bar” option to Off on the Game Bar menu.
4. Set the “Record in the background while I’m playing a game” option to Off on the Captures tab.
5. Set the “Game Mode” to Off on the Game Mode tab.
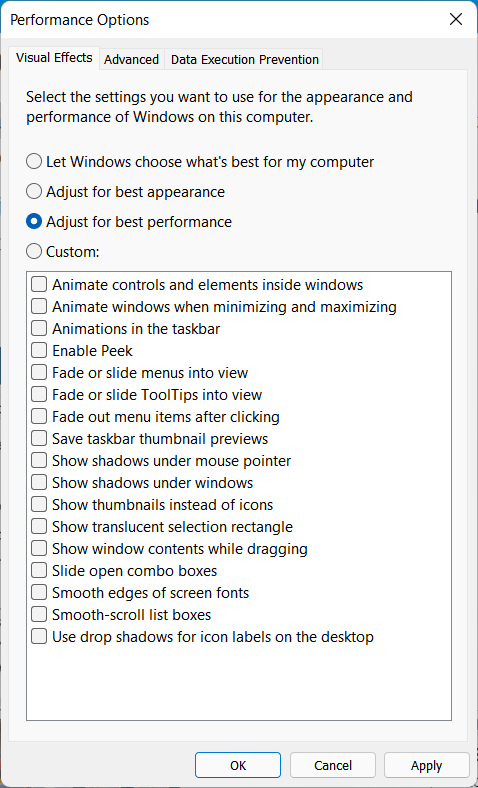
Step 4) Windows Performance Options
1. In the Windows search section, type performance and then select Adjust the appearance and performance of Windows from the results.
2. In the Performance Options window that appears, select the Adjust for best performance option.
3. Click OK
Step 5) Cleaning Temporary Files
1. Press the Windows logo and the R keys at the same time, type %temp% in run box. Click OK.
2. Delete it all in the newly opened Temp folder. You can bypass undeleted.
3. Press the Windows logo and R keys all at the same once more, type temp in run box. Click OK.
4. Delete all of that in the folder that arrives.
5. Press the Windows logo and R keys all at the same once more, type prefetch in run box. Click OK.
6. Delete all of that in the Prefetch folder that arrives.
7. Last but not least, empty the Recycle Bin.
Step 6) SSD
If you have a Solid-State Drive, I suggest implementing the game on it or moving the game files to it.
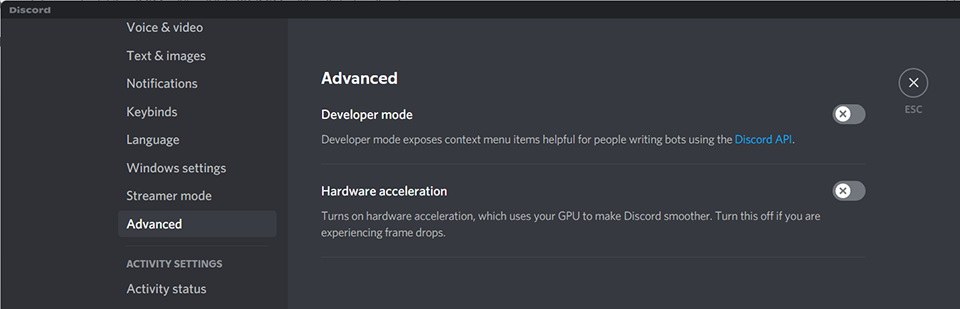
Step 7) Optimize Your Discord
Disable Hardware Acceleration and the in-game overlay when you’re using Discord.
1. Launch Discord.
2. Click on the User Settings.
3. Then go to the App Settings section, select Advanded.
4. Uncheck the Hardware Acceleration checkbox.
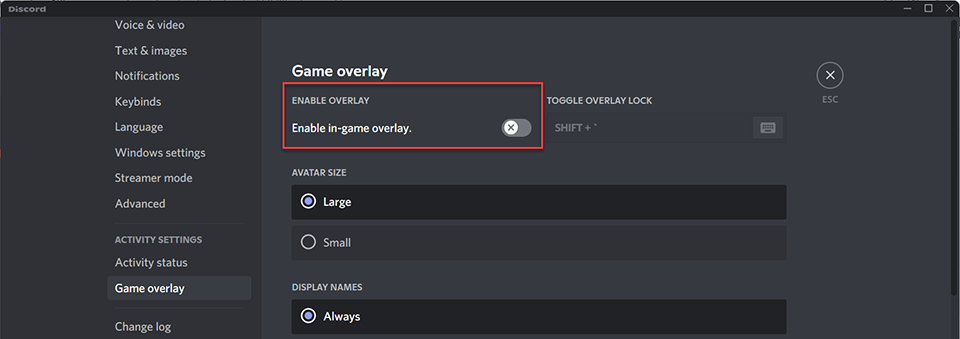
5. Navigate to the Game Overlay on the App Settings tab.
6. Assure the “Enable in-game overlay” box is unchecked.
Step 8) Optimize Your Google Chrome
You’ll need to update this setting if you’re currently using Google Chrome.
1. Navigate to Chrome’s settings page.
2. Select the Advanced option.
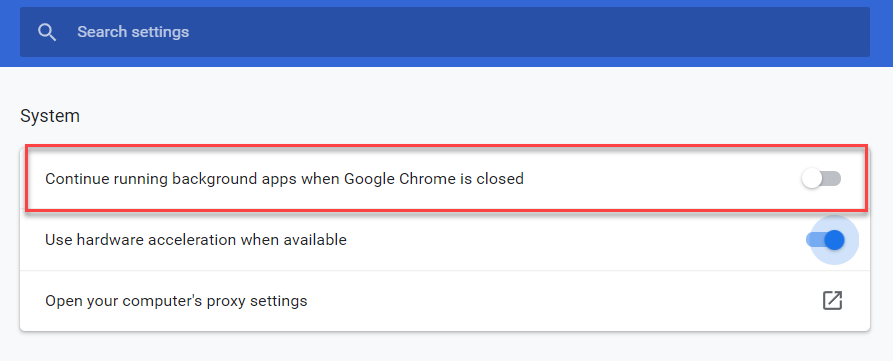
3. Navigate to the System tab.
4. Last, uncheck the box next to “Continue running background apps when Google Chrome is closed.”
Step 9) Background Processes
Close every unneeded app, such as Chrome, Spotify, and OneDrive. Also, if Discord is inactive, you should exit it. You can also use CCleaner to go through your starting and planned routines and disable anything you deem superfluous.
Step 10) CPU Core Unparking – Reducing Stutter
Quick CPU (CPU core parking manager) is an application that prevents Windows from reducing the role of your CPU. Unparking CPU cores provide games ready control to your processor.
I’ve never heard of this application being a source of contention. Nonetheless, you bear whole responsibility!
1. Download the Quick CPU
2. Install Quick CPU Unzip (x64 folder) after downloading
3. Active the Quick CPU.
4. Change the “System power plan” setting to “High performance” (or Ultimate)
5. Set the “Core parking index” to 100%.
6. Set the “Turbo boost index” to 100%.
7. Set the “Frequency scaling index” to 100%.
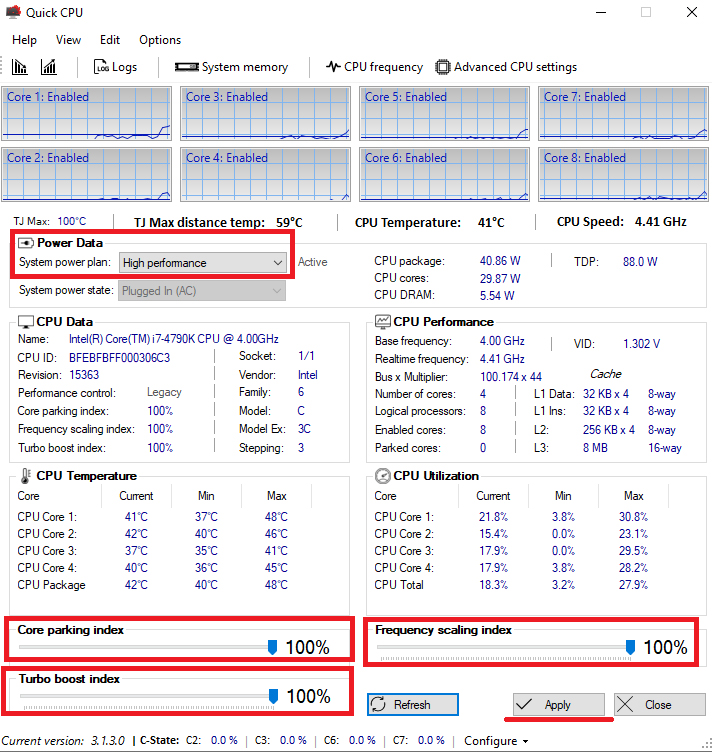
8. Click Apply.
Step 11) CPU Limiter – High CPU Usage Fix
If your CPU usage is approaching 100 percent while playing games and you are encountering freezing/stuttering problems, you can limit your CPU.
1. Start downloading and installing the Process Lasso.
2. Launch the Process Lasso application.
3. Start playing the game.
4. Navigate to the Process Lasso tool and look for your game’s exe in the “All processes” list.
5. Right-click your game’s exe and select CPU Limiter.
6. Set “When CPU use is” to 98.
7. Set “Reduce by this many CPU cores” to 1.
8. Set the “For a period of” below “Reduce by this many CPU cores” to 1.
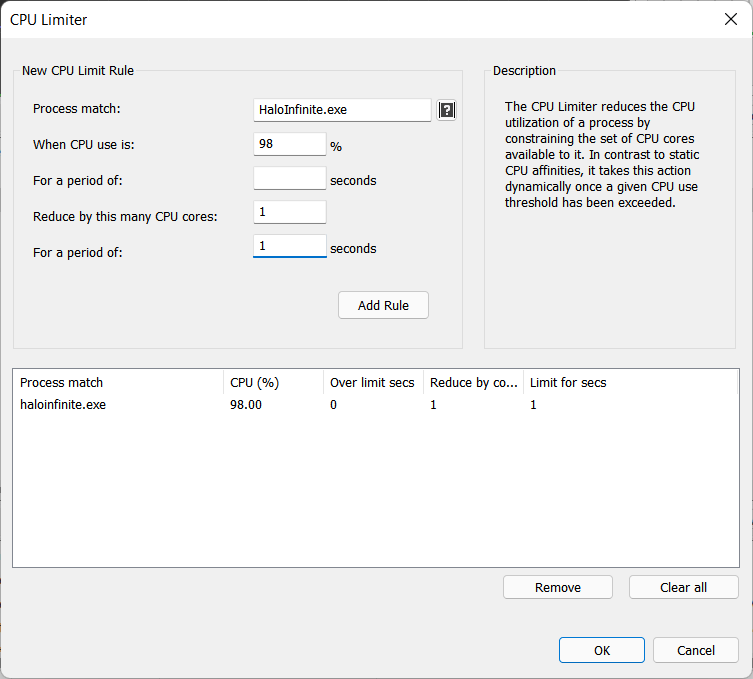
9. Click the Add Rule key.
10. Finally, press the OK key to begin playing the game.
Step 12) Update Your Graphics Drivers
You could perhaps keep your graphics drivers up to current on your PC.
Individuals who own an NVIDIA graphics card can download and install the latest drivers here.
Anyone with an AMD graphics card can download and install the latest drivers here.
13) NVIDIA Control Panel Settings
1. Launch NVIDIA Control Panel.
2. Navigate to the tab Adjust image settings with preview.
3. Click “Use my preferred emphasizing” button (If you have a mid & high end pc, Let the 3D application decide).
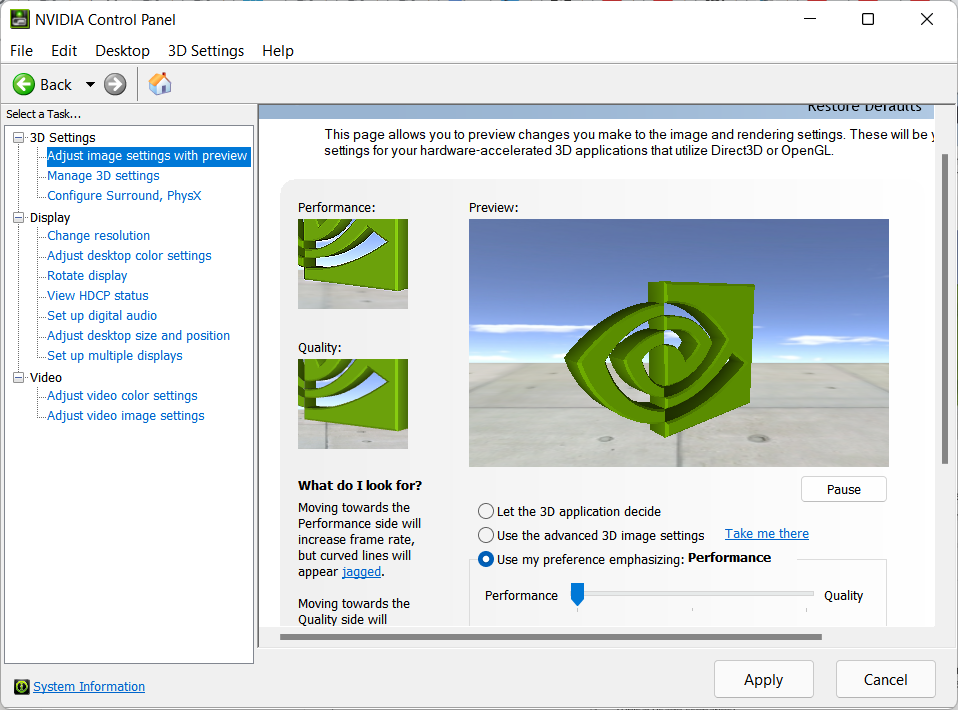
4. Set the bar to Performance.
5. Click Apply
14) AMD Radeon Settings
1. Launch the AMD Radeon Settings application.
2. Select the Gaming tab.
3. Then select Global Settings.
4. Navigate to the Anti-aliasing mode and select Override application settings.
5. Make sure you have the 2X selected when you click on the Anti-aliasing level.
6. Go to the Anisotropic Filtering Mode and enable it.
7. Afterward, make sure you’ve picked the 2X after tapping on Anisotropic Filtering Level.
8. Select Performance from the Texture Filtering Quality drop-down menu.
9. Now, select the Wait for Vertical Refresh button and click the Always off.
10. Select the Override application settings option after clicking on the Tessellation Mode.
11. Finally, select 32x or below as the Maximum Tessellation Level.
15) Full-screen Optimizations & High DPI in Windows 10
1. Navigate to the location where the game is installed.
2. Right-click the game’s exe Select Properties.
3. Click on the Properties button.
4. On the Compatibility tab, select “Disable full-screen optimizations” option.
5. Then, click the “Change high DPI settings” option.
6. Tick the “Override high DPI scaling behavior” box under the “High DPI scaling override” section.
7. Select the “Application” option from the “Scaling performed by:” drop-down menu.
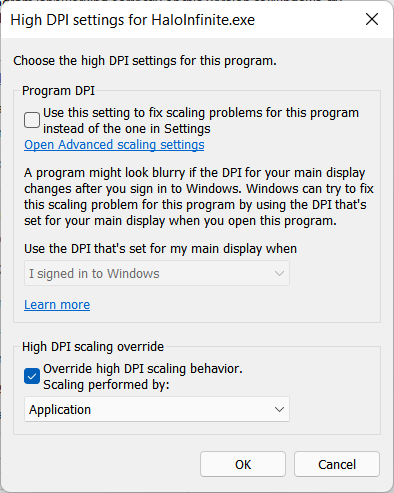
8. Click OK and once again.
16) Increase Priority
You must change this setting each time you play the game.
1. Start the game.
2. To minimize the game, hit the ALT and TAB keys at the same time.
3. Launch the Task Manager.
4. Select the Details tab.
5. Identify the game’s exec in the list.
6. Set priority to High by right-clicking on the exe.
If you facing stuttering in the game after doing this, do not use the High priority setting. Normal is the default setting.
In this video, we are gonna show you how to optimize Windows 11 for gaming increase FPS and performance:
That’s about it.

")
 & Mac OS")

