If Steam is not opening or starting correctly or closing immediately after launching, this article is useful for you.
Sometimes, Steam refuses to open or launch and then games won’t either. This may happen due to a few number of reasons. Here I am going to go through the most common causes of Steam not opening/starting in Windows 10 and top 5 methods for fixing them.
How To Fix Steam Not Opening/Starting in Windows 10
First Thing First
When stuff goes wrong, I highly recommend you should check whether the Steam servers are down or not before trying anything else. Go to Steamstat.us to find detailed info on servers are up, server loads, and more. If your regional server’s having problems, you may just have to wait it out. If not, try below mentioned solutions to overcome this situation.
Method 1. Ending all Steam related processes
In some cases, when you try to open/start Steam it may cause a small error whereby the process starts on your computer, but Steam doesn’t actually occur in your notification area. Hence, you need to end all Steam related processes, then try re-opening it again.
Step 1. Press CTRL + ALT + DELETE keys at the same time to open Task Manager.
Step 2. When the Task Manager window opens, click “More details” at the bottom-left (if that’s not been selected already), locate the following processes:
- Steam – Steam Bootstrapper
- Client Service
- WebHelper
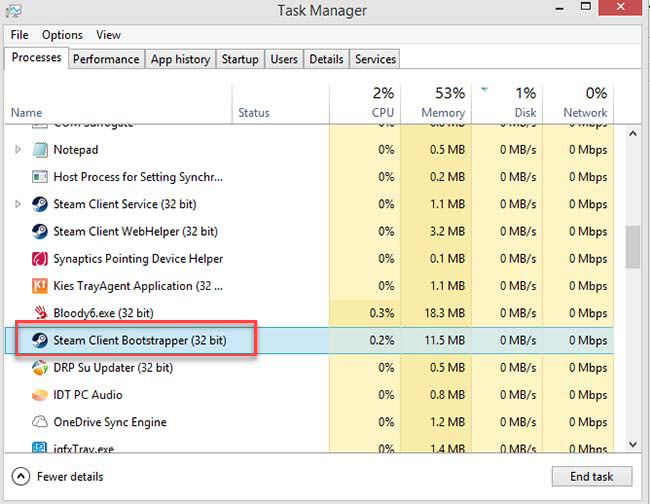
Step 3. Right-click all Steam processes you find here and select “End task“.
Now you can open/start Steam again and it should work.
Method 2. Delete the “beta” Client File
If you use a beta version of Steam, you may very likely get this problem. In order to fix this error, yon can simply Change your Steam to public release version. To do that, follow these steps below:
Step 1. Go to C:\Program Files (x86)\Steam\Package
Step 2. Find and delete beta file.
Step 3. Restart your Steam to check if it works.
Method 3. Failed to Load SteamUI.dll
The root cause of this problem is missing Steamui.dll file. So, Steam fails to look for the DLL file it needs to launch. To get rid of this problem, you can try the steps below:
Step 1. Go to your Steam installation folder. The default one is C:\Program Files (x86)\Steam
Step 2. Locate Steam.exe and then right-click it, then select Create Shortcut.
Step 3. Then right-click the shortcut, select Properties.
Step 4. In the Target box, add -clientbeta client_candidate to the end of the target directory.
“C:\Program Files (x86)\Steam\Steam.exe” -clientbeta client_candidate
Use this shortcut from now on to start Steam, and it will launch successfully.
See more: How To Fix Failed to load steamui.dll Steam Fatal Error
VIDEO TUTORIAL:
Method 4. Altering ClientRegistry.blob
You should be able to fix Steam not starting in Windows 10 by deleting some files and folders and updating Steam.
Step 1. Close Steam and end all Steam related processes.
Step 2. Browse to your Steam installation folder C:\Program Files (x86)\Steam
Step 3. Find and delete the ClientRegistry.blob file.
Step 4. Browse back to your Steam installation folder, then find the Steamerrorreporter.exe file.
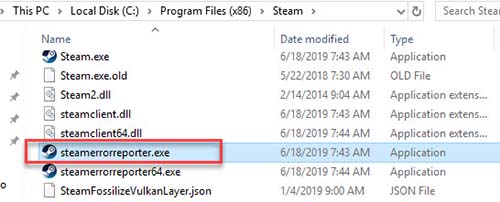
Step 5. Run the application and re-open Steam.
Method 5. Reinstall Steam
If the problem still persists, uninstalling and reinstalling Steam again will usually do the trick.
Step 1. Uninstall Steam by using your Uninstaller.
Step 2. You can download the Steam installer by click here.
Step 3. Double click the EXE installer program to install Steam on your computer.
Step 4. Restart your computer and then re-open Steam with administrator privileges.
Steam will now start downloading the missing files again and will start successfully upon completion.
Note: Uninstalling Steam will delete all userdata content and game.
Hope something helps you.

")

![How to Configure Proxy Settings on Android Devices [FREE]](https://windows10freeapps.com/wp-content/uploads/2024/12/setting-up-a-proxy-for-a-wi-fi-network-1-150x150.jpeg "How to Configure Proxy Settings on Android Devices [FREE]")
 & Mac OS")
