In this tutorial, learn how to fix error code 0x0001 in Nvidia GeForce Experience.
Nvidia GeForce Experience is a helpful application for the people who like gaming on graphic cards made by NVIDIA. However, some users reported error code 0x0001 while trying to launch the NVIDIA GeForce Experience utility. This post will take a look at how to get rid of the error 0x0001 for NVIDIA GeForce Experience on Windows 10.
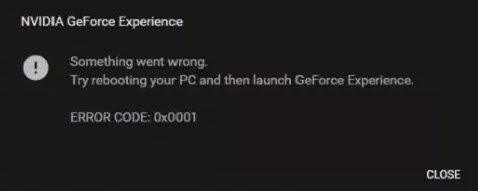
Something went wrong, Try rebooting your PC and then launch GeForce Experience, ERROR CODE: 0x0001.
But before you start, do try rebooting your Windows PC and then open GeForce Experience and check if it works.
– Check the NVIDIA Display Driver Services.
– Change all NVIDIA Container services to Local system account
– Update your NVIDIA Display Drivers or migrate to the BETA release.
– Uninstall and Reinstall NVIDIA Drivers
If you usually create a System Restore point, you can undo any modifications on your Windows PC, by performing System Restore. You can refer on how to restore computer using System Restore in Windows 10. In some scenarios, it is a very strong feature that will allow you to fix your Windows PC.
How To Fix GeForce Experience Error “ERROR CODE: 0x0001”
Solution 1. Check the NVIDIA Display Driver Services
1. Press Windows Key + R then type services.msc in the Run dialog box. Click OK to open Windows Services Manager.
2. A Services window will pop up. Look out for the following Services, and make sure that their Startup types are as follows:
– NVIDIA NetworkService Container – Manual
– NVIDIA Display Container LS – Automatic
– NVIDIA LocalSystem Container – Automatic
– NVIDIA LocalSystem Container – Automatic
– NVIDIA Telemetry Container service – Automatic
– NVIDIA GeForce Experience Service – Automatic (Delayed Start)
– NVIDIA Geforce Experience Backend Service – Automatic (Delayed Start)
3. Right-click on it and select Properties. If the service is not running already, click Start to start running them else first click Stop and then click Start to restart them.
Check if this fixes your problem.
Solution 2. Change all NVIDIA Container services to Local system account
1. Open Windows Services Manager.
2. A Services window will appear. Scroll through the list until you locate the Container services used by Nvidia (usually 3 or 4).
3. When you find them, right-click on each of them and click Proprieties.
4. In the Proprieties window, navigate to the Log on tab.
5. Under Log on as: make sure that Local System account is ticked and check the Allow service to interact with desktop option.
6. Click Apply > OK. Then restart your Windows.
After doing this, check if this fixes your issue.
Solution 3. Update the NVIDIA Display driver or migrate to the Beta release
One of the methods that you should be doing is updating your NVIDIA Display Drivers. To do that, you just visit their latest Display Driver Download Website and then download the NVIDIA driver.
1. Visit this website for the latest driver associated with your card.
2. Now, you will have 2 options: Manual Driver Search and Automatic Driver Updates.
– With the first option, you’ll have to choose your exact GPU and operating system and then click the Start Search button. A list of drivers will display with the version and release date under them.
– With the second option, click on the Download button and Nvidia will automatically detect your GPU and the latest driver available and download it.
3. Download and install the latest driver.
4. Restart your Windows PC for the changes to take effect.
If the issue still persists, you can also try to migrate to the Beta release.
– Visit the Nvidia GeForce Beta download page and download it.
– Go to Control Panel > Programs > click on Uninstall a program. Locate Nvidia GeForce Experience, uninstall it and restart your Windows PC.
– Lastly, install the Beta driver and the issue should be gone.
Solution 4. Uninstall and Reinstall NVIDIA Drivers
You can use Display Driver Uninstaller to uninstall your NVIDIA Display Driver.
You may aslo like: How to Properly Uninstall and Install an NVIDIA Graphics Driver
1. Download and install the latest DDU version from this source.
2. Launch DDU and in the right section, under Select device, select GPU > select Nvidia.
3. Click on the Clean and restart button.
4. Lastly, download and install the latest driver and latest GeForce Experience release from Nvidia’s official site.
VIDEO TUTORIAL:
We hope that one of these confirmed methods helped you fix the NVIDIA GeForce Experience error code 0x0001. If you don’t understand a certain step, or have any more suggestions, feel free to reach for the comments section below


![How to Configure Proxy Settings on Android Devices [FREE]](https://windows10freeapps.com/wp-content/uploads/2024/12/setting-up-a-proxy-for-a-wi-fi-network-1-150x150.jpeg "How to Configure Proxy Settings on Android Devices [FREE]")
")
 & Mac OS")
