Upgrading to Windows 10 is often a smooth process, but at times there might be some problems. One of the most nasty issues with Windows 10 is that the keyboard stops working after the update to Windows 10.
If you’ve bumped into the same problem, try these following methods to make your keyboard work again.
See also: How to Fix Laptop Keyboard Not Working in Windows 10
What to do if your keyboard stopped working on Windows 10 PC
FIX 1. Check your USB port is working
At times a USB port can just stop working after Windows 10 Update. So if your keyboard isn’t working, the first thing that you should do is to try connecting your keyboard to another USB port.
If your keyboard does work, the USB port itself is the cause of problem.
See more: How to Fix USB Port Issues
If you get the same results with different ports on your computer try connecting your keyboard on another PC. If your keyboard is not working properly on another machine, you will need to buy a new keyboard.
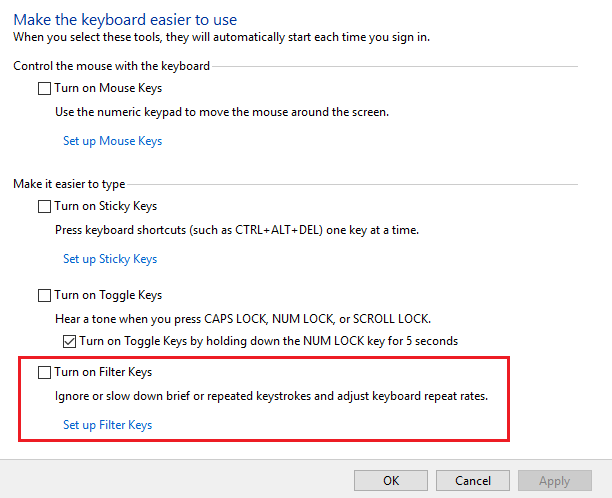
FIX 2. Turn off the Filter Keys feature
FilterKeys is an accessibility feature of Microsoft Windows. It tells the keyboard to ignore brief or repeated keystrokes. However, if it’s turned on, this setting has been known to cause some keyboards to stop working in Windows 10. So you should turn it off and check if that resolves the issue. Follow these steps:
1. Click on the Start button, then select Settings.
2. Then, select on Ease of Access.
3. Click Keyboard.
4. Uncheck Turn on Filter Keys and click OK to save changes.
FIX 3. Uncheck Allow the computer to turn off this device to save power
1. Right-click the Start button, then select Device Manager.
2. Once Device Manager appears on your screen, expand Universal Serial Bus controllers and right-click on USB Root Hub then click Properties. (If there are more than one USB Root Hub then do the same for each one).

3. Then, go to the Power management tab in USB Root Hub Properties.
4. Uncheck “Allow the computer to turn off this device to save power“.
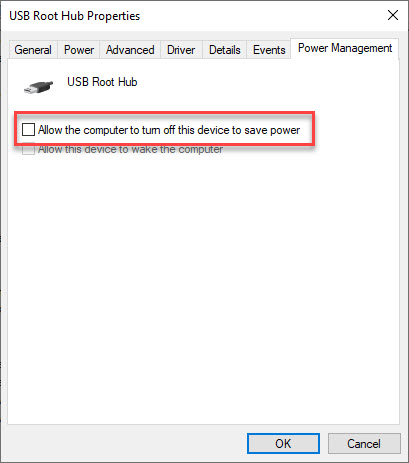
5. Click Apply > OK and reboot your system.
FIX 4. Reinstall your keyboard drivers
If your keyboard driver has developed a fault, your keyboard may stop working. To resolve the corrupted keyboard driver issue, follow these steps:
1. Right-click the Start button, then select Device Manager.
2. In the Device Manager window, expand Keyboards category, right click your keyboard device and click Uninstall.
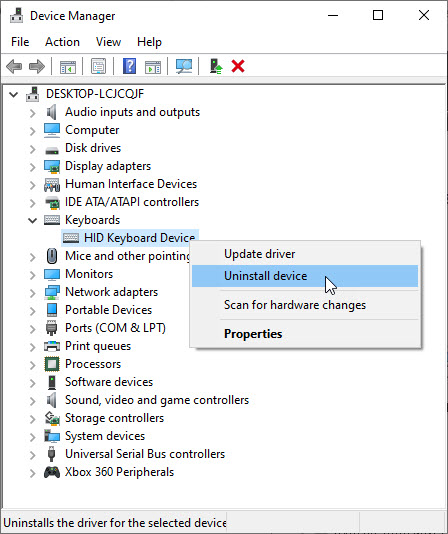
3. When prompted to confirm, click OK. Wait for some time, till the uninstallation completes.
4. Then, restart your computer.
Further, you can easily reinstall keyboard drivers from the manufacturer’s website.
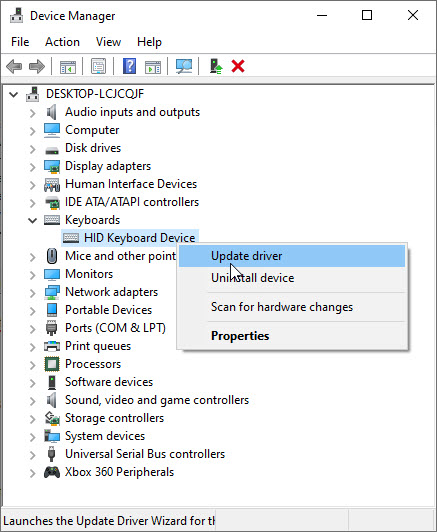
FIX 5. Update the Keyboard Drivers
If the problem persists, you can try updating your keyboard drivers to the latest available manufacturer-recommended versions.
1. Right-click the Start button, then select Device Manager.
2. In Device Manager, find your keyboard driver and right-click it and select Update driver.
3. On the subsequent prompt, click on “Search automatically for updated driver software“.
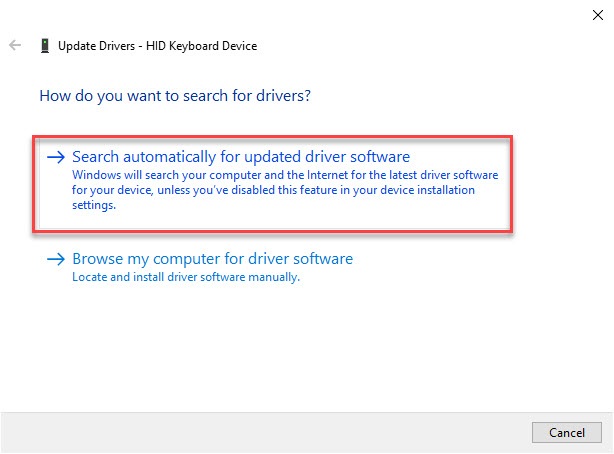
4. Now, just wait patiently until a new driver is found, install it.
5. Restart your system.
If you’re not confident playing around with drivers manually, you can do it automatically with Driver Easy. Driver Easy will automatically recognize your system and find the correct drivers for it. You don’t need to risk downloading and installing the wrong driver, you don’t need to know exactly what system your computer is running, and you don’t need to worry about making a mistake when installing.
In this video, we are gonna show you how to fix keyboard has stopped working on Windows 10.
All done! You have read the end of this article how to fix your keyboard not working on Windows 10. Let me know if some of them fixed the issue.

")
![How to Configure Proxy Settings on Android Devices [FREE]](https://windows10freeapps.com/wp-content/uploads/2024/12/setting-up-a-proxy-for-a-wi-fi-network-1-150x150.jpeg "How to Configure Proxy Settings on Android Devices [FREE]")


