In this tutorial, learn how to root Bluestacks 2 using the one-click root tool.
If you want to download and install Android applications on your PC or Mac, BlueStacks 2 is the solution, it is very easy to use and totally free. BlueStacks 2 is an emulator that allows Android apps and games to run directly on your computer, without the need to connect the device to a PC. This post will help you to get rooted Bluestacks 2 easily.
With rooted Bluestacks 2, users will not need to install any additional content, because it gives several of the preloaded applications to your PC.
How To Root Latest Version Of BlueStacks 2 2017 Version Using BS Helper
Step 1. Launch Bluestacks 2 and then install Root Checker to verify the rooting process. You can get it from Google Play Store.
Step 2. Download BS Easy Tool for rooting Bluestacks 2 from this source.
Step 3. Then, unzip the downloaded zip file to a folder. Double click the BSHelper.exe file to run this application.
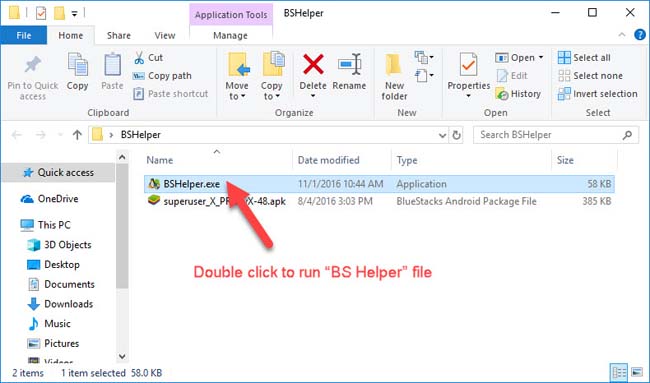
Double click to run “BS Helper” file
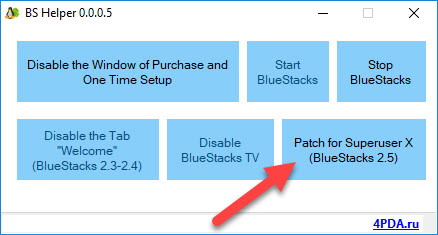
Step 4. When the BS Helper window appears, click on “Patch for Superuser X” button.
Step 5. When the process finishes, the success message will appear in the status bar. An then it will open superuser x in Bluestacks 2 App Player.
Step 6. Now you can reboot Bluestacks 2 and then check the root status using Root Checker.
This video will guide you on how to root BlueStacks 2 2017 without KingRoot
Hope something helps you.

 & Mac OS")
 & Mac OS For Free")


