Your Steam games can be played on more than just your computer. Yes, the usual way to move them is to sign in to another computer and download them again. Depending on your system, it could take a long time and be hard to do. But what if there was a simpler way to do it? That you can put Steam games on a hard drive that isn’t your computer. We’ll talk about how to play Steam games from an external HDD or SSD this time.
Yes! You can put Steam games on an external hard drive and play them on a different computer. You might want to know how to play Steam games from an external SSD if your main gaming system is broken or if you have guests who need to sleep in your game room but you want to play on your laptop. The SSD space on your laptop might already be full, but you might have a portable HDD with a lot of space lying around. You might want to download Steam games to an external hard drive because you just got a new gaming system or for any other personal reason. So, without further ado, follow these steps to play Steam games from an external SSD or HDD.
In this video, we are gonna show you how to install Steam games on an external hard drive or SSD:
You can put Steam games on an external hard drive in two ways. First, you can put the games on your external drive directly. Second, you can move the Steam games you already have on your internal drive to the external drive. But it’s not as easy as just copying them word for word.
Method 1: Install Steam Games Directly on External Drive
First, let’s talk about the first way. Not much is different about the fact that your drive is outside of your computer. Your external SSD or HDD will still be seen by the computer as a normal drive, just like if you had a separate Drive D partition. With that, you can change the default download location to the external drive, as most apps let you do.
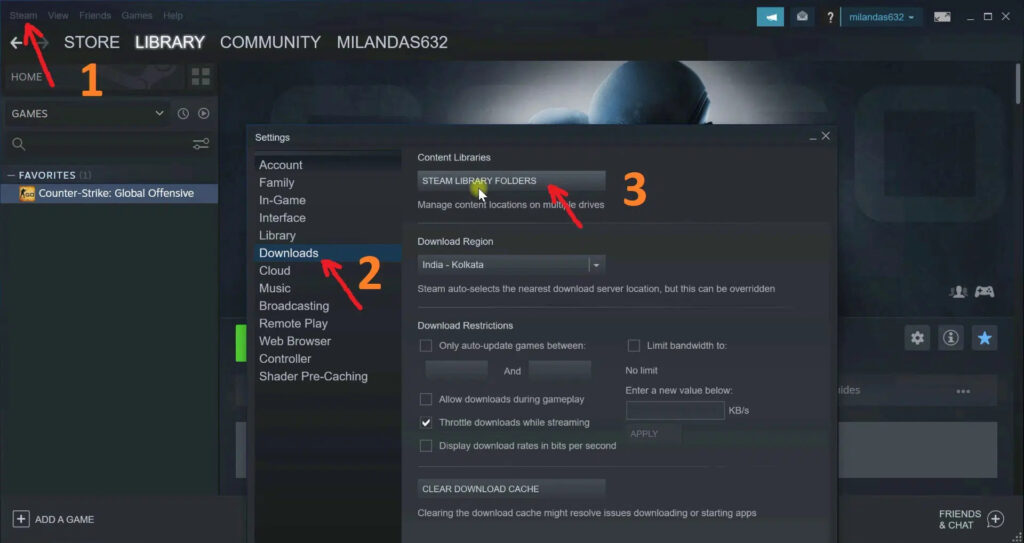
Step 1: Add Your External Drive to Steam
Click on the Steam menu in the top left corner of the screen. Click “Settings,” and then click “Downloads.” Select “Steam Library Folders.”
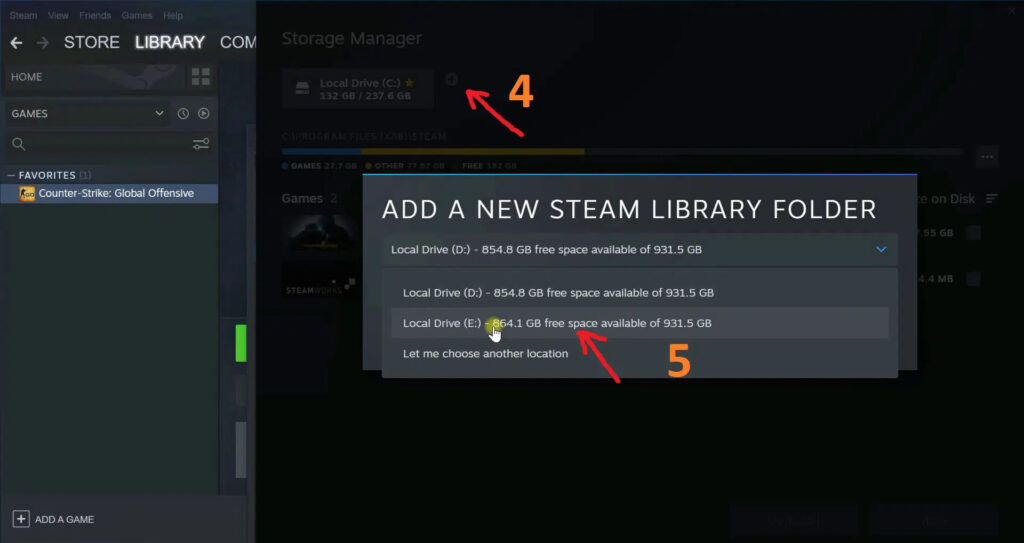
Then you add your external drive. Any external drives you have attached to your computer will be found. Choose the drive that you want to use.
Steam doesn’t store drive letters and Steam library paths in your online profiles. Instead, it saves them in each Steam client. You don’t have to worry about your drive letter or volume label. But it would be nice to be able to change the name of your volume label so that your external Steam drive is easy to find, and it would also be great if all of the Steam library paths on all of your systems were the same. You can change the drive letter or volume label by going to File Explorer, right-clicking on the external drive, selecting Properties, and renaming the volume label in the General tab.
See also: How To Move Steam Games To Another Hard Drive
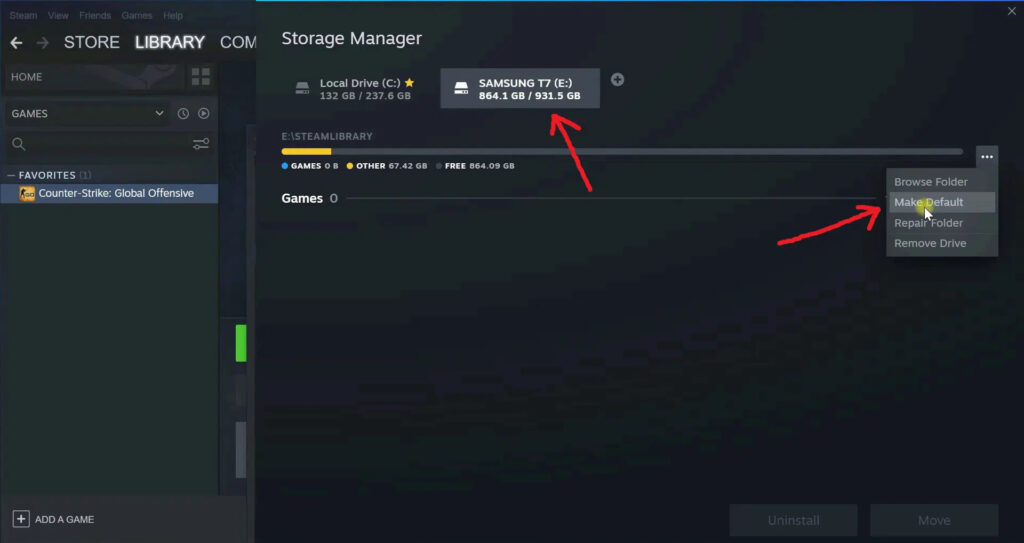
Step 2: Set External Drive as Default Download Location
Set the default download location to the chosen drive. After that, Steam will make a folder called “Steam Library” on the external drive. Close the Settings menu.
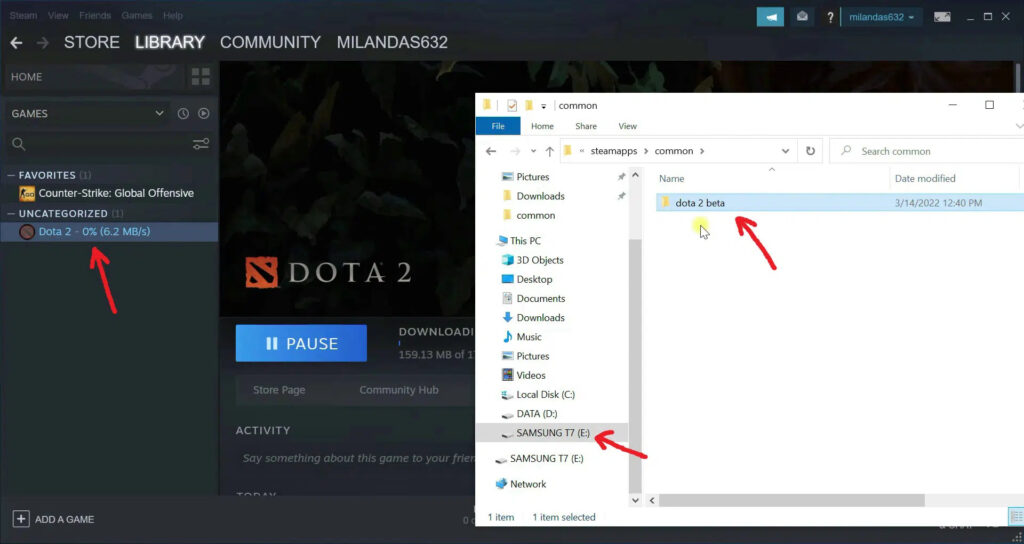
Step 3: Download Steam Games
You can now go to the Store and download any game you want. The game will then be put on the external drive. While the game is installing, you can go to your Steam Library folder outside of Steam and see how the game folders are filling up with files.
After that, you can play the games like you always do. One thing to keep in mind is that an external SSD with a USB 3.1 connection is recommended, even though it costs a bit more. This will help reduce lag and loading times.
Method 2: Transfer Existing Steam Games to an External Drive
What about the Steam games that are already on the hard drive? And you’re about to run out of space, or you just want copies that can be played on the external drive. It’s not easy, but here’s how to do it. Follow the steps you’ve already taken.
1. First, navigate to your internal drive’s Steam Installation folder. Something like: C:\Program Files (x86)\Steam\steamapps\common
2. Choose one game folder, copy it, and paste it into the external drive’s common folder.
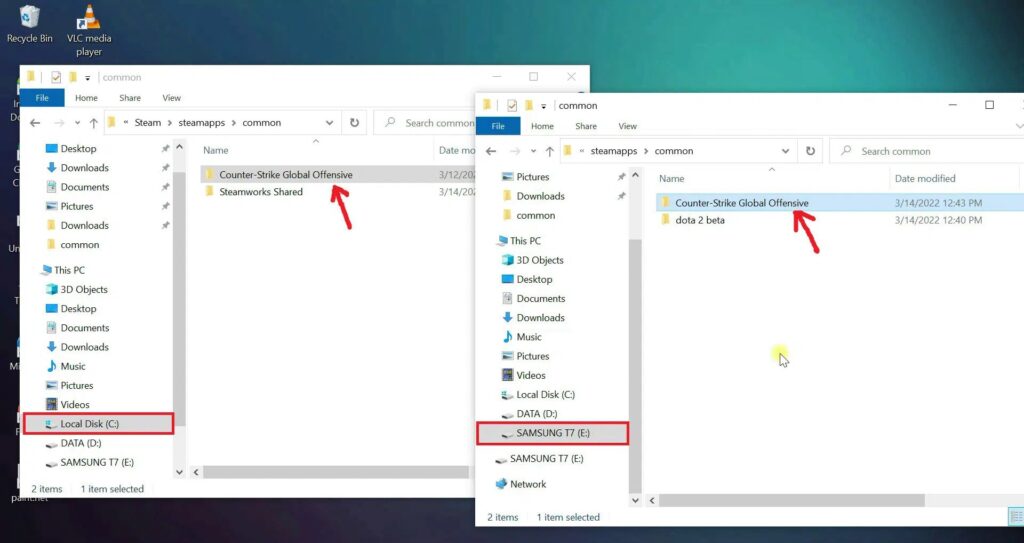
3. Then, navigate to the internal drive’s Steamapps folder. The game’s appmanifest number.acf file needs to be copied. Then copy it and paste it into the same folder on the external drive.
If you’re not going to copy all of your games to the external drive, you should know which manifest file to copy. In the file name of the manifest file, there will be a certain number. Go to the game’s page in the Steam store to find out. Right-click anywhere and select “Copy Link Location.” Copy the URL and paste it into a text editor, such as Notepad. You can match the number on the URL with the number in the manifest files. Copy the file, then paste it into the external drive’s steamapps folder.
4. Make sure the Steam client is installed on another PC or laptop where you want to play the games you’ve moved. Sign in to your account on Steam.
5. Usually, you’d have to re-download the games, as you’ll see when you look through the library. But now, we don’t have to download the games again, which would be the long process we’re trying to avoid. Let’s plug in the outside drive.
6 Plug the external drive into the new computer. Go back to where you set up Steam. Set the new Steam Library as the default by pointing it to the folder on your external drive.
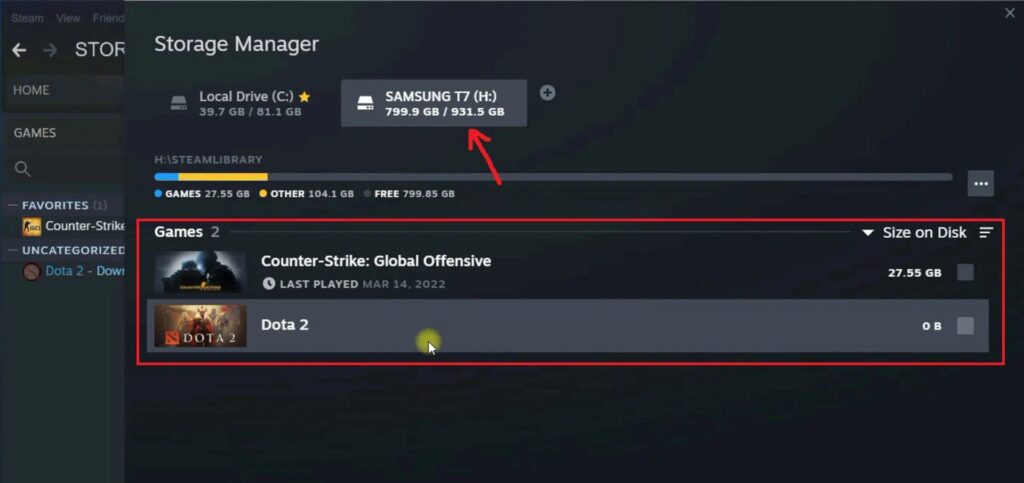
7. After that, you can play the games you chose to store elsewhere by pressing the Play button on the game. Repeat this process for any other computers you may have.
So, that’s the end of it. You can now install Steam games on an external SSD or HDD and play them from that drive. Enjoy!
![How to Configure Proxy Settings on Android Devices [FREE]](https://windows10freeapps.com/wp-content/uploads/2024/12/setting-up-a-proxy-for-a-wi-fi-network-1-150x150.jpeg "How to Configure Proxy Settings on Android Devices [FREE]")


")
