In this post, learn how to get Android apps running on your PC using Windows Subsystem for Android (WSA) and Amazon App Store. Also, you can even download Android app APK files and run them effortlessly.
In terms of design and user convenience, Windows 11 is considerably superior to previous versions. However, Microsoft didn’t stop there; it also made it miles ahead of any prior version of Windows in terms of interoperability.
With Windows 11, you may use the Amazon Appstore to install Android apps on your Windows PC. You may also use your PC to sideload Android app APK files and launch them.
Note: This functionality is only available for customers who are engaged in the Windows Insider Program as of the time of writing this post (21st October’21).
Getting your Windows 11 Computer Ready
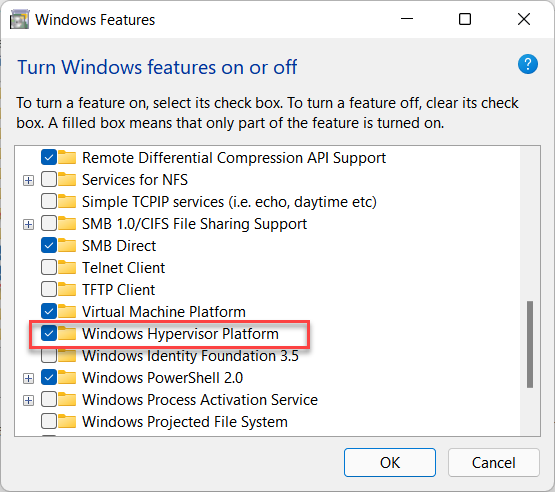
Before you start downloading and installing Android apps on your Windows device, make sure the optional features ‘Hyper-V’ and ‘Virtual Machine Platform’ are turned on.
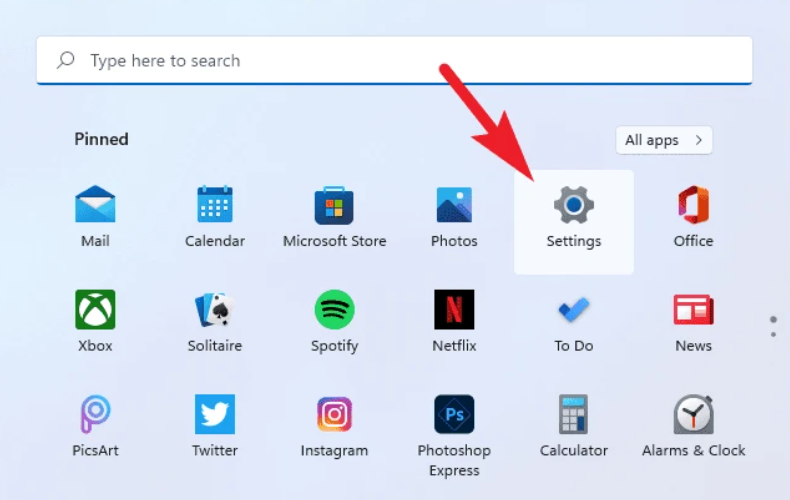
To begin, open the Settings app from your device’s Start Menu or by pressing the Windows + I keys.
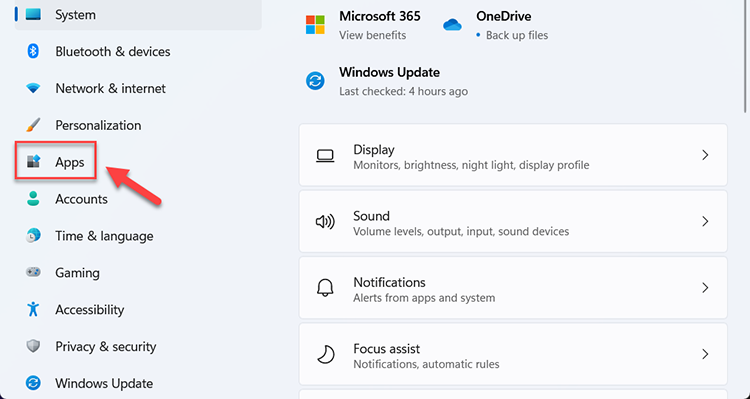
Then, on the left sidebar of the Settings box, select the ‘Apps‘ option.
Next, on the right side of the window, click the ‘Optional features’ option.

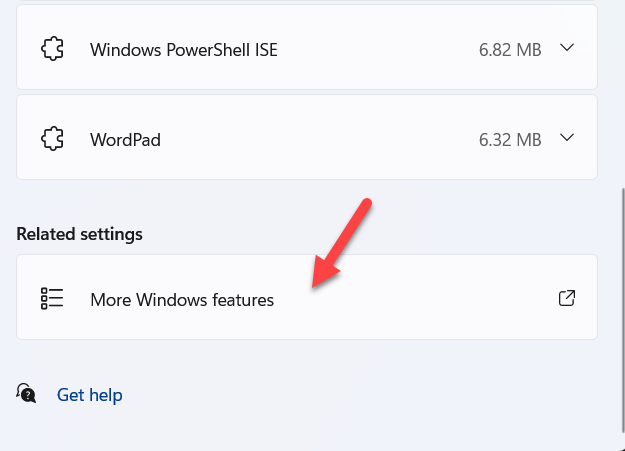
Afterward, under the ‘Related settings‘ section, click the ‘More Windows features‘ option. This will open a new window on your computer screen.
Locate the ‘Hyper-V‘ option in the ‘Windows Features’ window and choose it by clicking the checkbox next to it.
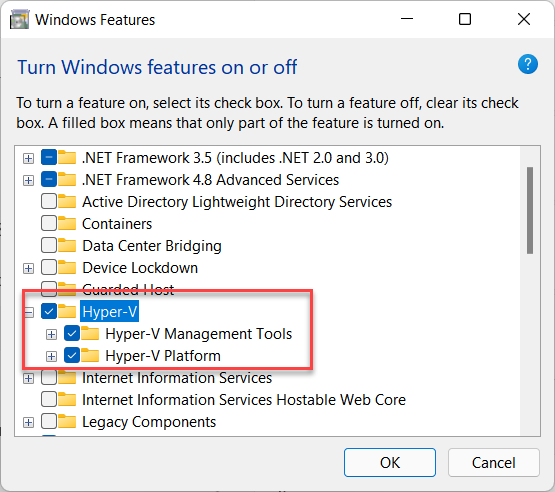
Then, swipe to the ‘Virtual Machine Platform‘ feature and choose it by clicking the checkbox next to it. Finally, click the ‘OK’ button to have both of these extra features installed on your Windows computer.
This operation will open a new window on your screen to download the necessary files; please wait patiently until the installation is finished.
Download and Install Windows Subsystem for Android with Amazon App Store
The Amazon Appstore is powered by the Windows Subsystem for Android, which is a new component layer on top of Windows 11 that consists of a Linux kernel and Android OS that plays Android apps on your computer.
For the uninitiated, the technical vocabulary may appear to be a little too complicated. However, Microsoft will release the ‘Windows Subsystem for Android’ as an app via the Microsoft Store, allowing consumers to download and install it quickly.
To begin, open the ‘Microsoft Store’ program from your Windows device’s Start Menu or search for it in Windows Search.
To search the Microsoft Store, go to the search bar and type ‘Windows Subsystem for Android,’ then click Enter on your keypad.
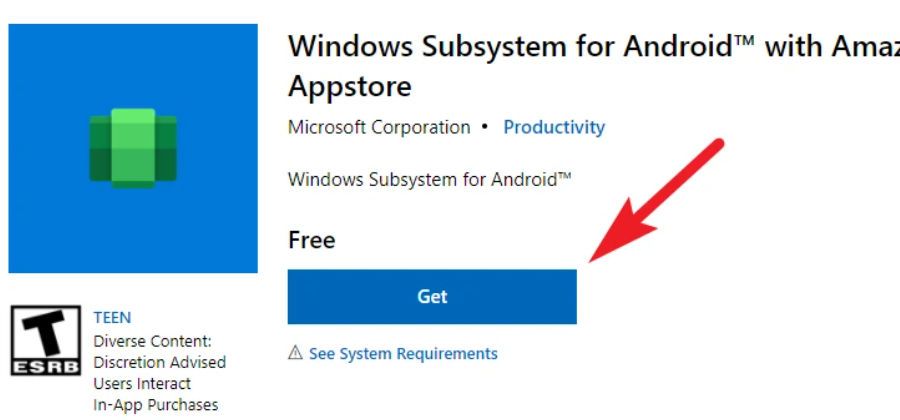
You may also access the software by going to microsoft.com/windows-subsystem-for-android… on the official Microsoft Store website. Then, on the webpage, click the ‘Get‘ button.
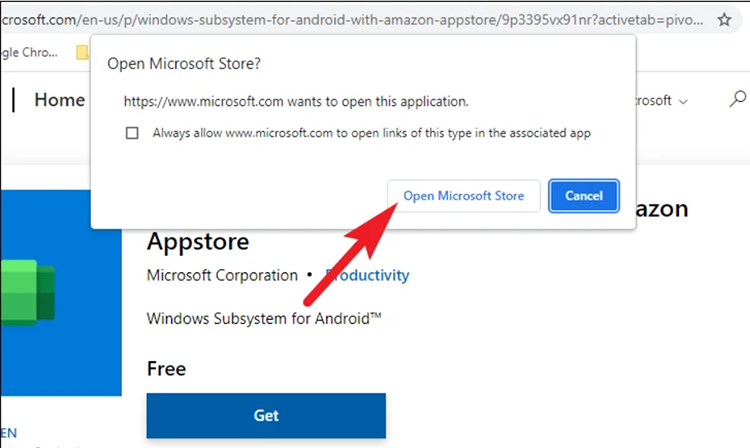
After that, you’ll see a prompt asking if you want to be forwarded to the Microsoft Store; select the ‘Yes‘ option. This will launch the Microsoft Store application on your Windows computer.
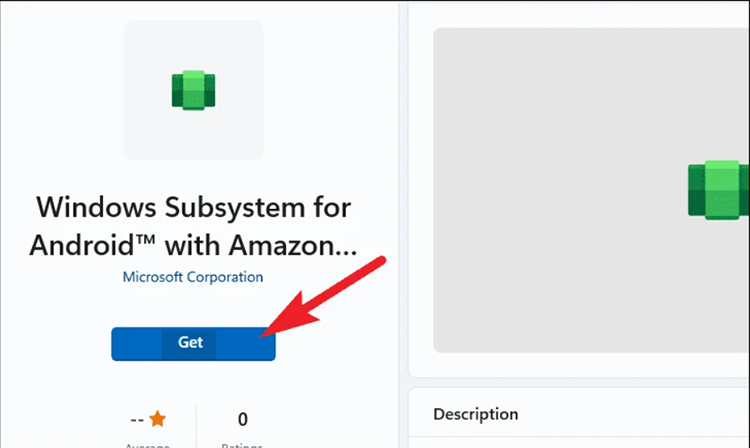
To install the app, go to the app page on the Microsoft Store and click the ‘Get/Install‘ button on the Microsoft Store window.
Manually Install Windows Subsystem for Android
If you are unable to download the Windows Subsystem for Android from the Microsoft Store for some purpose, you can directly install it on your system by downloading the installation package.
Pre-requisites
1. Windows Subsystem for Android msixbundle (Link)
ProductId: 9P3395VX91NR, Ring: SLOW
2. Amazon App Store for Windows msixbundle (Optional)
Install Windows Subsystem for Android using Windows Terminal
It’s really simple to install Windows Subsystem for Android on your system when you have the installation package.
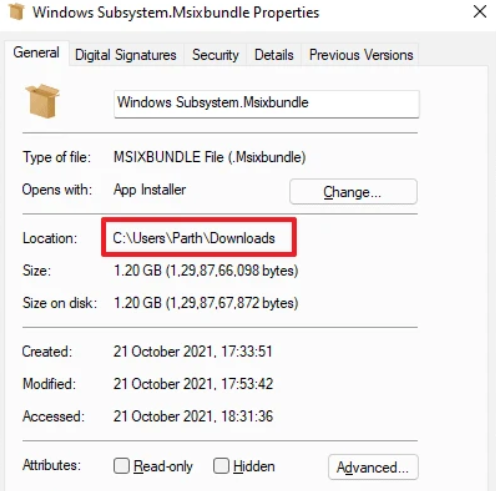
Before you start the installation, go to the folder where the installer package is located and right-click on it. Then select ‘Properties‘ from the drop-down menu. This will open a new window on your computer screen.

Then, to the right of the ‘Location:’ field, select the path and keep it ready because it will be necessary during the installation process.
Then, on your keyboard, press Windows+X the combination to bring up the Windows super user menu. Then, from the drop-down menu, select ‘Windows Terminal (Administrator)’ to open an elevated Windows Terminal window.
Then, to install the software on your computer, execute or copy and paste the following command.
Add-AppxPackage -Path “<copied path>\<package name>.msixbundle”
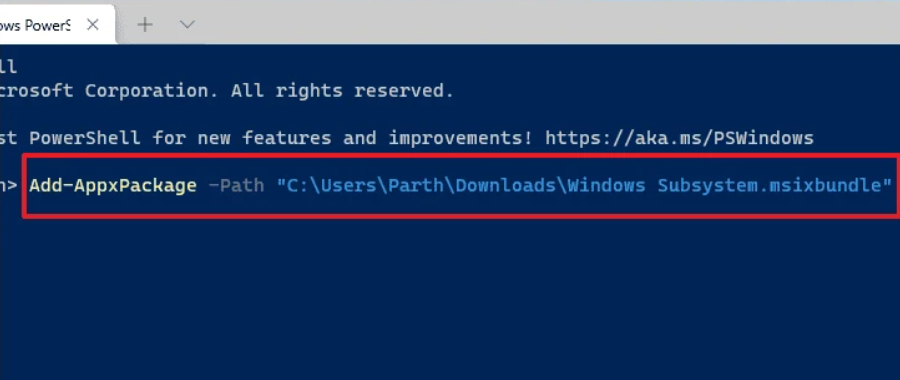
Note: Replace the <copied path> placeholder with the path address you copied earlier, along with <package name> placeholder with the exact name of the package in the command below.
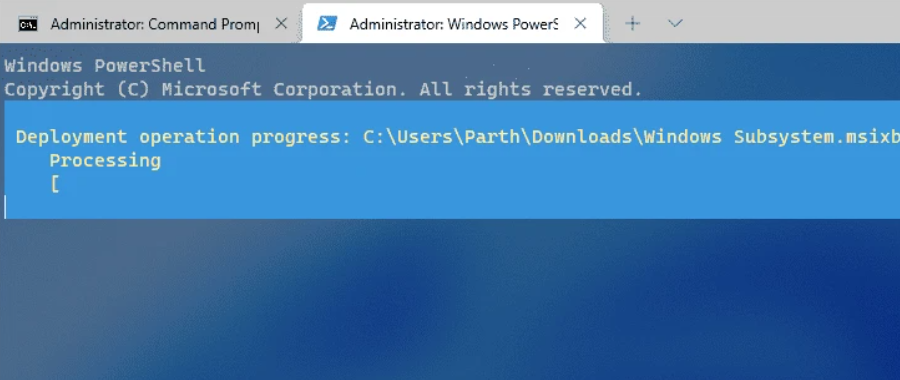
Powershell will now begin installing the package on your system; please wait for it to complete.
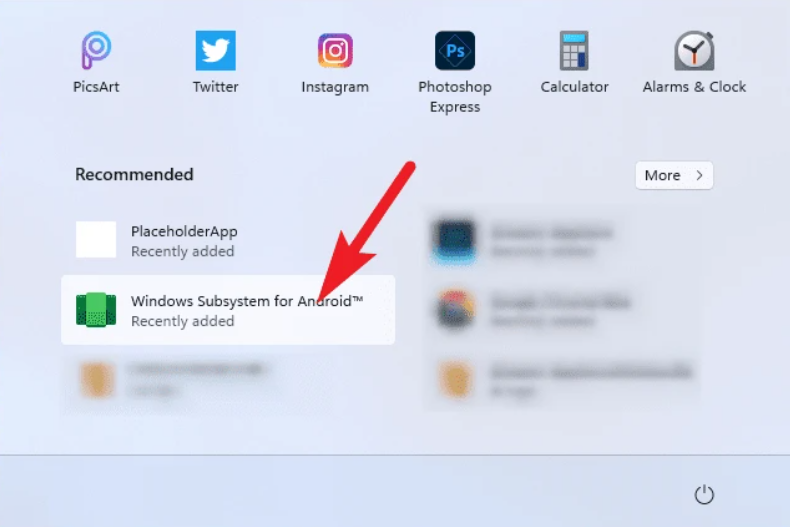
You’ll find the software under the ‘Recommended’ part of the Windows Start Menu once it’s been installed.
Some users are reportedly unable to use the ‘Amazon Appstore’ and the ‘Windows Subsystem for Android’. If this is also the case for you, you’ll need to download and install the Amazin Appstore individually.
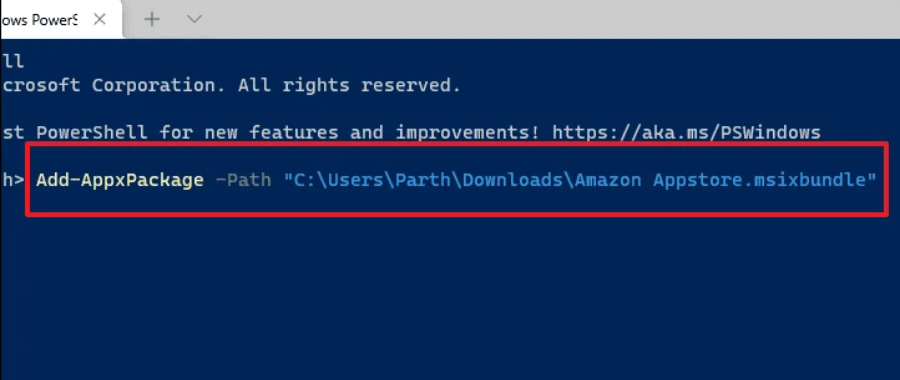
Return to the Windows Terminal’s elevated window to do that. Then, in the PowerShell window, write or copy+paste the following command and press Enter to install the app on your PC.
Add-AppxPackage -Path “<directory path>\<package name>.msixbundle
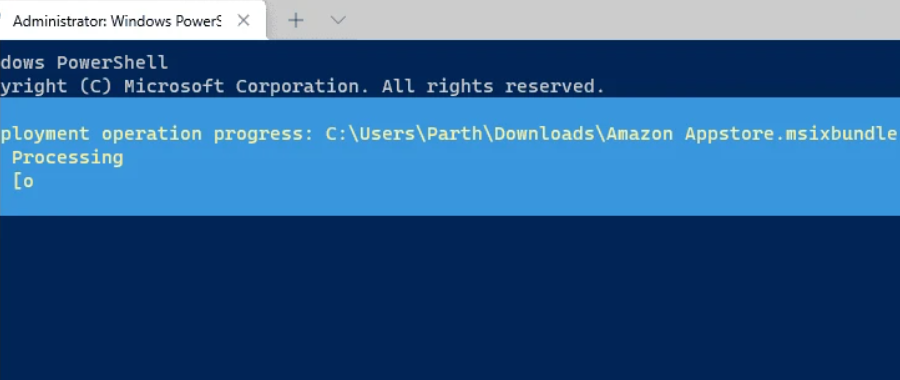
Powershell will now install the software on your machine; please wait while it completes its task.
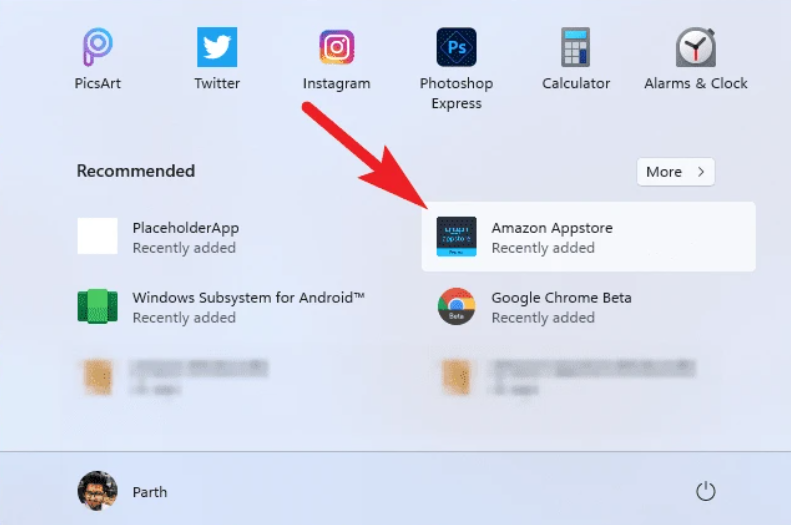
The Amazon Appstore will appear in the ‘Recommended’ part of the Start Menu once it has been loaded on the machine.
Installing Android Apps on Windows 11 using Amazon Appstore
You’re ready to use Android apps on your PC after you’ve installed the Windows subsystem for Android and the Amazon Appstore on your computer.
To begin, open the Start Menu and select the ‘All apps’ option from the flyout’s top right corner.
Then, from the alphabetically arranged list, find the ‘Amazon Appstore’ and click on it to open the app.
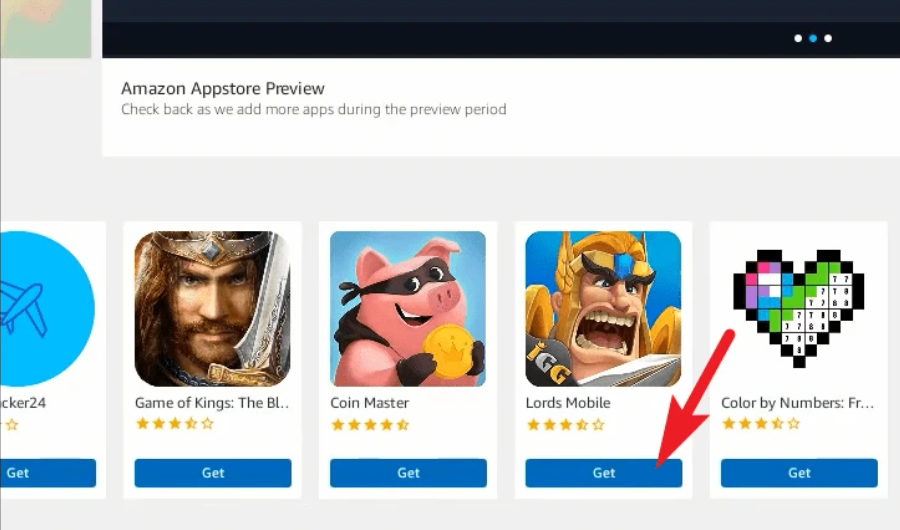
At the first start of the app, you’ll be prompted to sign in with your Amazon account. The Amazon Appstore home screen will appear once you’ve finished.
Hit on the ‘Get‘ button accessible on individual app tiles to install any app of your choosing.
How to Sideload Android Apps on Windows 11 via APK Files
You can sideload apps on Windows 11 in addition to those available through the Amazon Appstore if you have a .apk file for the app you want to install.
To begin, go to developer.android.com/platform-tools on the official Android developer website. Then navigate to the ‘Downloads’ area and select ‘Download SDK Platform-Tools for Windows.’ An overlay window will appear on your screen as a result of this action.
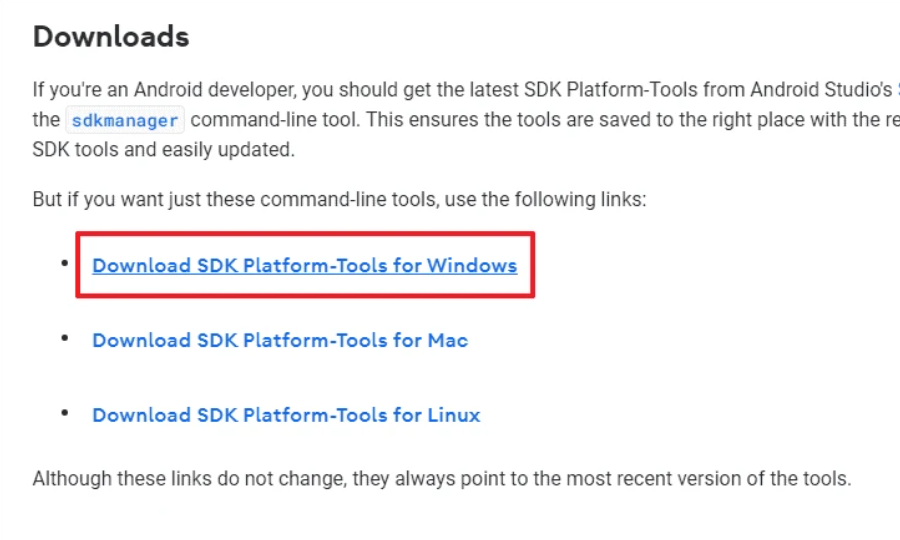
After that, scroll down and check the box next to ‘I have read and agree with the following terms and conditions,’ and then click the ‘Download Android SDK Platform-Tools for Windows‘ button to start the download.
Go to the download location and right-click on the zipped folder when it’s finished downloading. Then, from the context menu, select ‘Extract all’ to extract the folder.
Next, navigate to the folder where your .apk file is located. Using the context menu or the CTRL + C key, copy the file. Then, using the CTRL + V key, paste the file into the extracted folder.
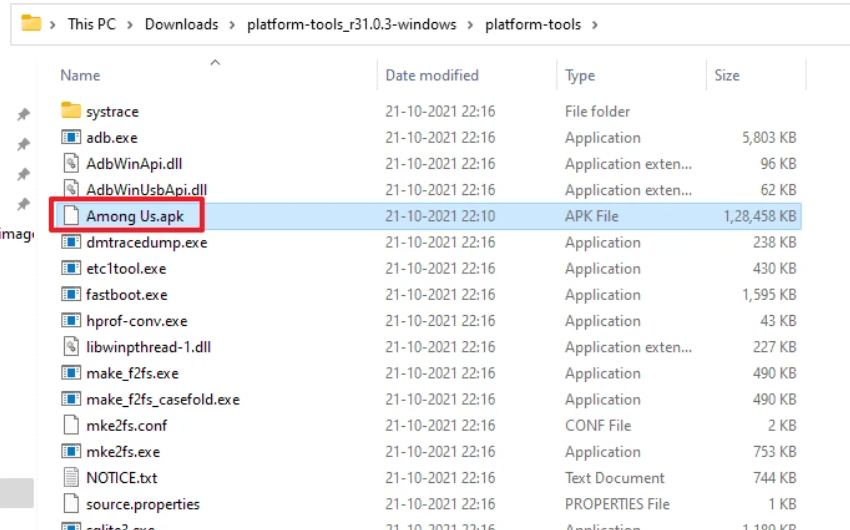
Note: Make sure to copy the name of the file you wish to install and keep it handy as it will be needed in further steps.
Open Start Menu and select the ‘All apps‘ button in the upper right corner of the flyout.
Then, scroll down to find and open the ‘Windows Subsystem for Android‘ tile.
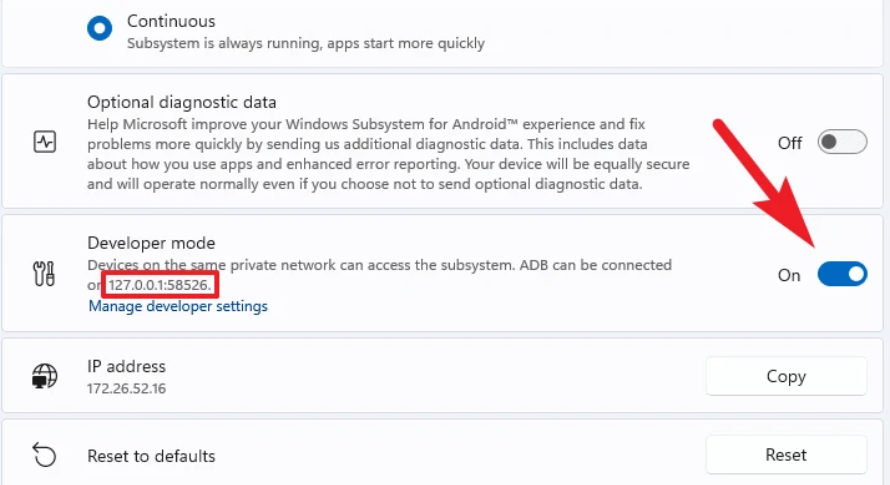
Locate the ‘Developer mode’ option in the WSA window and flip the following switch to the ‘On’ position. Take note of the tile’s IP address as well.
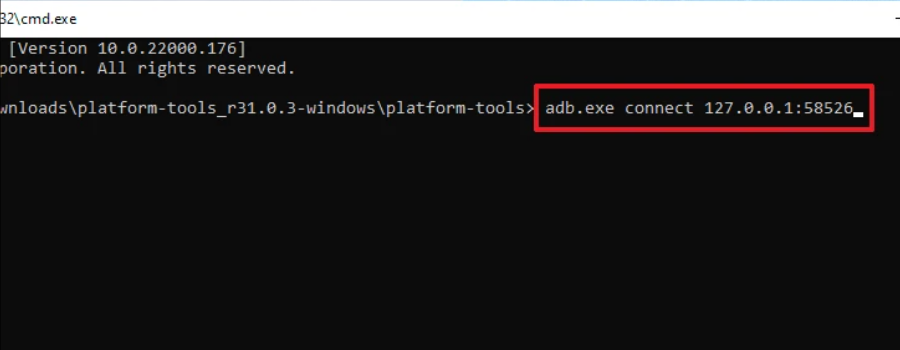
Return to the extracted folder and type cmd. into the folder’s address bar. Then, on your keyboard, press Enter to open a Command Prompt window in the current directory.
To connect to Android Debug Bridge, write or copy+paste the following command (ADB).
adb.exe connect <IP address>
Note: Replace the <IP address> placeholder with the IP address present on the ‘Developer options’ tile of the Windows Subsystem for Android window.
Then, to sideload the application on your Windows PC, write or copy+paste the following command.
adb.exe install <file name>.apk
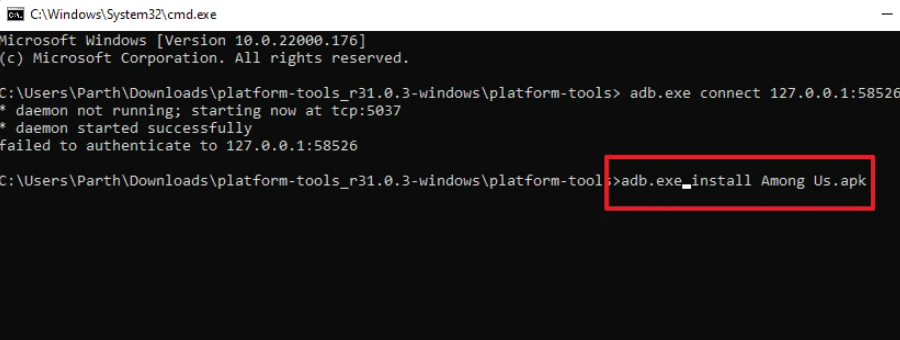
Note: Make sure to replace <file name> placeholder with your current file name to install the .apk on your system.
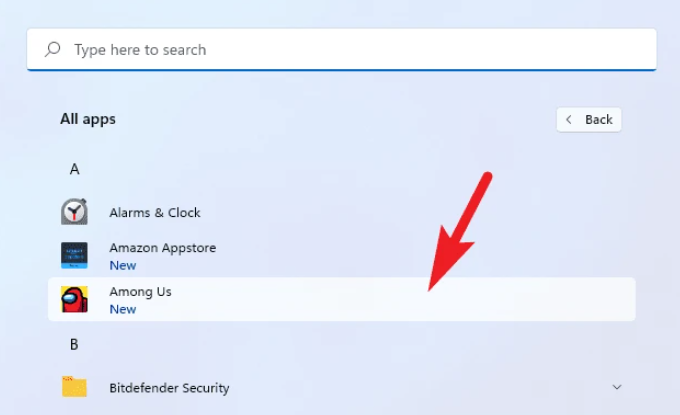
A notice will appear on the screen when the software has been successfully installed.
Finally, go to the Start Menu and select ‘All apps‘ from the drop-down menu. Then, from the alphabetically arranged list, scroll down to find your app and click on it to launch it.
In this video, we are gonna show you how to run Android apps on Windows 11 without needing to install any emulators or third-party tools:
That’s how you can use your Windows 11 PC to run Android apps.

")

 & Mac OS")

