In this tutorial, we are gonna show you how to install a .cab file in Windows 10.
A cabinet is a single file, usually with a .cab extension, that stores compressed files in a file library. Some Windows 10 updates are redistributed in the .cab archive format.
You can use the DISM /Add-Package command with Windows cabinet (.cab) files to remove or install updates, language packs, service packs and to disable or enable Windows features.
How To To Install CAB file in Command Prompt
1. Open a Command Prompt with administrator privilege. You can search for “cmd”, right-click on the result, and click “Run as administrator”.
2. When the Command Prompt window appears, type the command below, then press Enter.
DISM /Online /Add-Package /PackagePath:”Full path of .cab file“
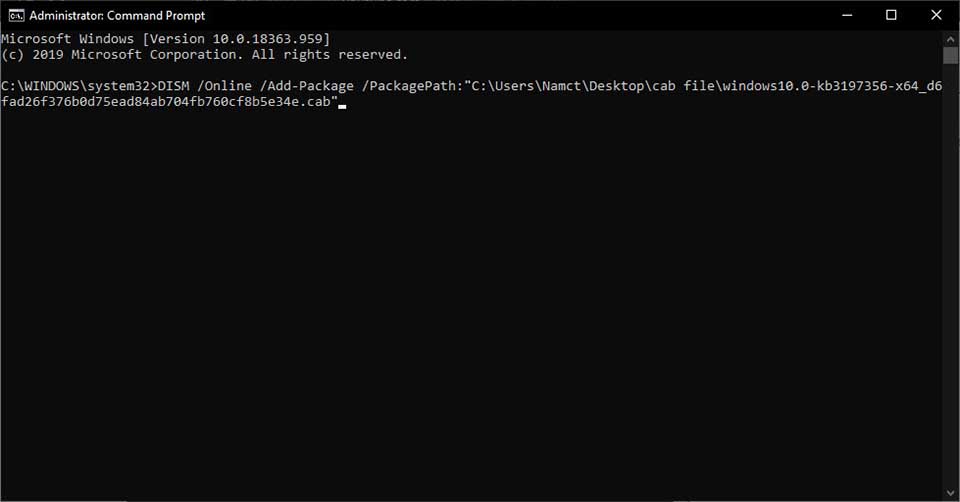
Substitute Full path of .cab file with the actual full path of the .cab file’s location.
For example: DISM /Online /Add-Package /PackagePath:”C:\Users\Namct\Desktop\cab file\windows10.0-kb3197356-x64_d6fad26f376b0d75ead84ab704fb760cf8b5e34e.cab”
DISM /Online /Add-Package /PackagePath:”C:\Users\Brink\Desktop\windows10.0-kb3197356-x64_d6fad26f376b0d75ead84ab704fb760cf8b5e34e.cab”
3. If prompted to restart the computer, type “Y” when ready to do so.
In this video, we will show you how to install a CAB file in Windows 10.
That’s about it.
Related Posts:
 & Mac OS") Download CamHiPro For PC (Windows 11/10) & Mac OS
Download CamHiPro For PC (Windows 11/10) & Mac OS How to Download and Install iTunes on Windows 11
 4 Best Tools to Convert MOV to AVI In High Quality
") How to Create a Windows VPS Image on DigitalOcean…
How to Create a Windows VPS Image on DigitalOcean…3 Methods to Extend C Drive in Windows 11/10 (Easily)
 How to Change the Boot Screen Logo on Windows 10/11
