In this tutorial, learn how to enable Hyper-V in Windows 10 either via “Turn Windows Features on or off” window or using Windows PowerShell.
Before activating and using Hyper-V, your system must meet the following basic requirements.
– You must be running Windows 10 Pro, Enterprise, or Education edition.
– Your system should have 64-bit processor by AMD or Intel with Second Level Address Translation (SLAT).
– The system must have CPU support for VM Monitor Mode Extension (VT-c on Intel CPUs).
– A minimum of 4 GB memory on your system.
– You must have virtualization technology enabled in BIOS settings of your computer.
When above requirements meet by your system, the only you have ability to enable and use Hyper-V. Here are the steps to enable Hyper-V in your Windows 10.
How To Enable Hyper-V In Windows 10
Method 1. Using DISM & Via Windows PowerShell
1. Click Start menu and type “Powershell“. Then right-click on Windows PowerShell in the result and select Run as administrator.
2. In administrative Windows PowerShell window, excute the following command:
DISM /online /Enable-Feature /All /FeatureName:Microsoft-Hyper-V
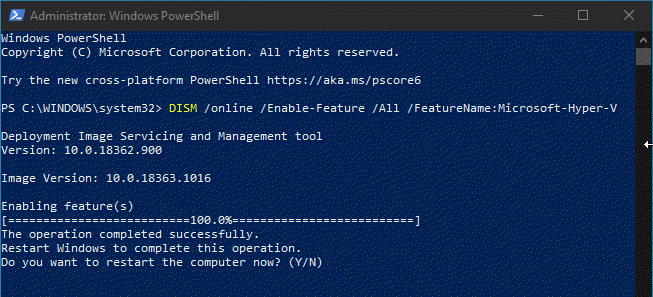
Now the Hyper-V should be enabled.
Method 2. Using Turn Windows Feature On Or Off
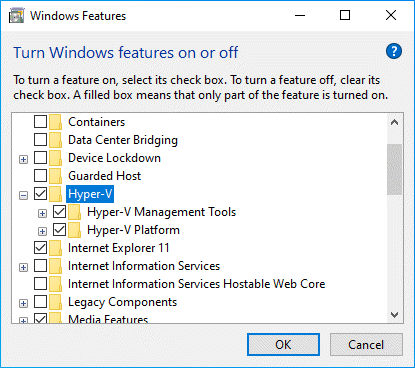
1. Type “Turn Windows Features on or off” in the search box from the Start menu. From results, opt “Turn Windows Features On or Off“.
2. In the Turn Windows Features on or off window, select the Hyper-V option. Also select sub-options to use all features of Hyper-V. Click OK.
Hope something helps you. If you have any question then you can ask in the comment section below.

")

")
 & Mac OS")
