In this tutorial, learn how to download and install Ubuntu on VirtualBox.
Let me explain first what is VirtualBox?
Oracle VirtualBox is a software that allows users to run multiple operating systems in a single machine and to freely switch between OS instances running simultaneously. It can create and manage guest virtual machine each with a guest operating system and its own virtual environment.
For example, you can run Linux on your Windows PC, run Windows server on your Linux server, run Linux or Windows on your Mac, while running your other existing applications.
Disk space and memory are the only problems that you’ll get when creating multiple virtual machines on your system computer.
Install Ubuntu on VirtualBox
Why do you need to install VirtualBox on Windows 10?
- It’s totally free.
- VirtualBox is easy to use and install.
- It can run everywhere from laptops to small embedded systems.
- If you can not able to set up a physical lab then VirtualBox allows you to create a virtual lab to start practicing ethical hacking skills.
- You can run and experience any operating system safely.
- It’s good for testing and disaster recovery since it can be easily backed-up, copied, and transported between hosts.
What is Ubuntu?
Ubuntu is an open-source software operating system that runs from the desktop, to the cloud, to all your internet connected things.
Why should you use Ubuntu Linux?
- It’s free.
- Ubuntu is user-friendly.
- It’s secure. Say no to anti-virus.
- Low system requirements.
- Tons of free software in the Software Center.
- It’s open-source.
- Improved compatibility, included drivers.
- Supportive Ubuntu community.
Before you start, you will need to download VirtualBox and the Ubuntu ISO for Virtualbox, you can download them from this below link:
How To Install Ubuntu on VirtualBox in Windows 10
Step 1. First, install Virtualbox on Windows 10 PC.
Step 2. Setup for Ubuntu in VirtualBox
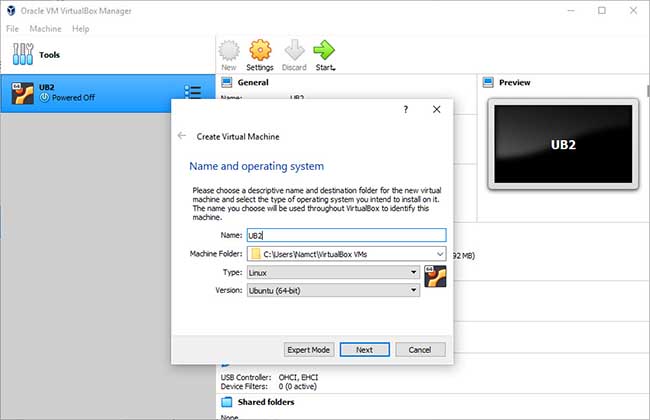
1. Launch VirtualBox and click “New” to create a virtual machine.
2. Type “Ubuntu” as the name, choose “Linux” as the type, and choose “Ubuntu (64-bit)” as the version.
Note: Choose any amount of memory you wish, but don’t add more than 50 percent of your total RAM.
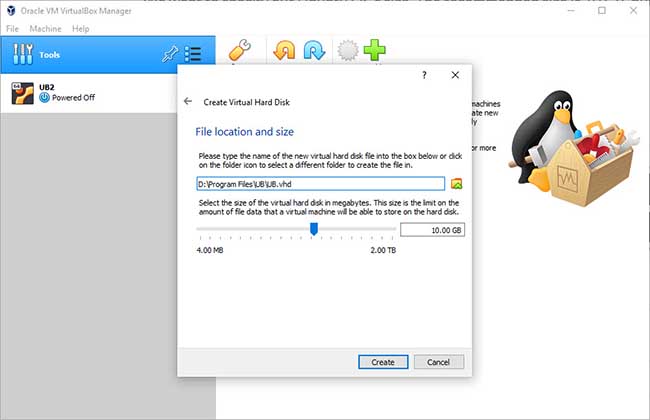
3. Moving on, select the “Create a virtual hard disk now” option so you can later define your Ubuntu OS virtual hard disk size.

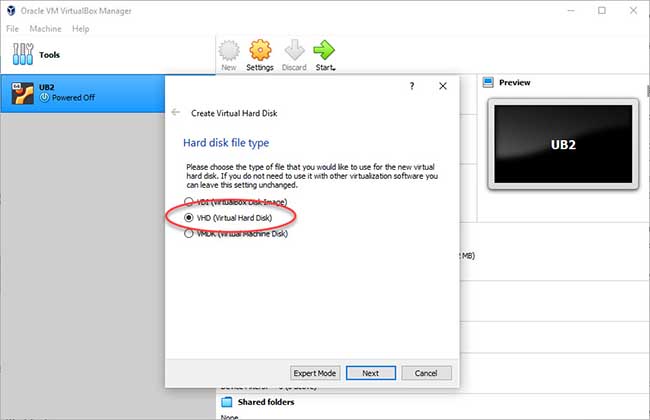
4. Here, you select “VHD (Virtual Hard Disk)“.
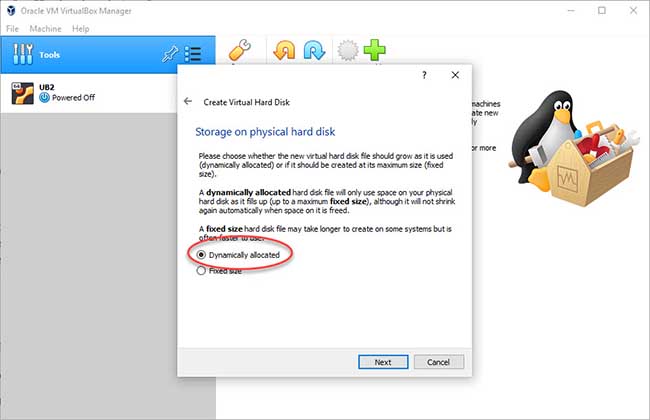
5. Then, you select “Dynamically allocated“. This will dynamically allocate storage on your physical hard disk.
6. Now, you need to specify your Ubuntu OS’s size. You can set the size if you wish, the recommended minimum size is 10 GB.
7. After creating a virtual hard disk, you have to set up the Ubuntu disk image file (.iso).
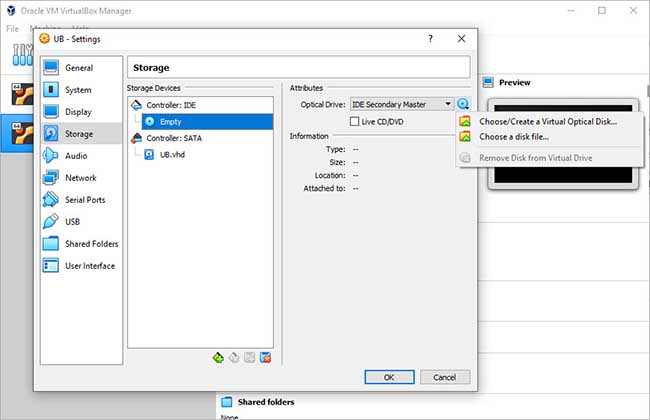
You can download the Ubuntu disk image file from this above link. Here are the steps to set up the Ubuntu disk image file:
– Go to Settings and then click “Storage“.
– In storage devices, select “Empty”
– In attributes, select the disk image and “Choose Virtual Optical Disk File“.
– Browse to the Ubuntu 18.04 ISO file and select it.
– Click OK.
8. Now everything is done and ready to install Ubuntu OS on VirtualBox.
Step 3. Install Ubuntu on VirtualBox
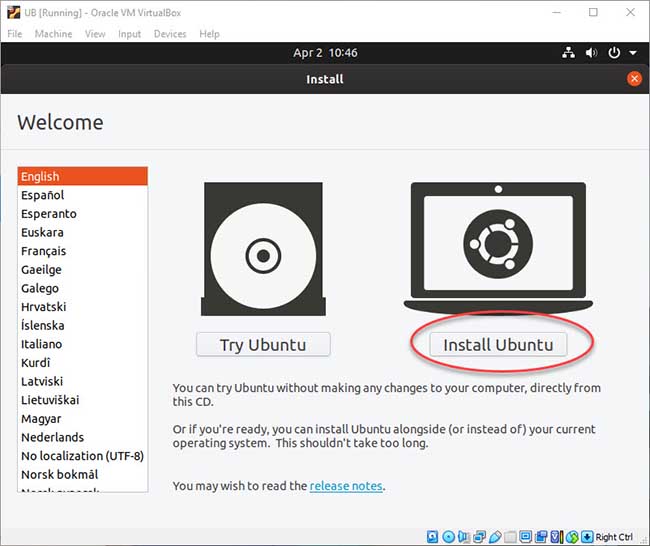
1. Select the created virtual machine. It’s on the left side of the VirtualBox window. Click on the Start button. Ubuntu will begin running.
2. Click “Install Ubuntu“.
3. Choose your keyboard layout. Click “Continue“.

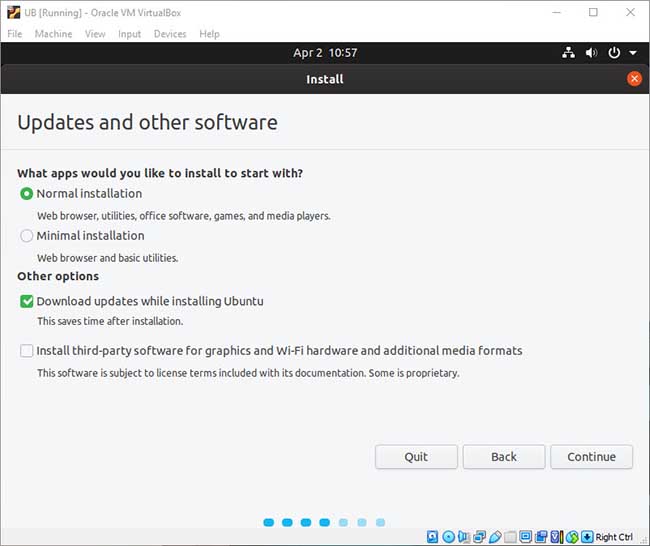
4. Select “Normal installation” in the “Updates and other software” section. Click “Continue“.
5. Select “Erase disk and install Ubuntu” in “Installation type”. Click “Install Now“.
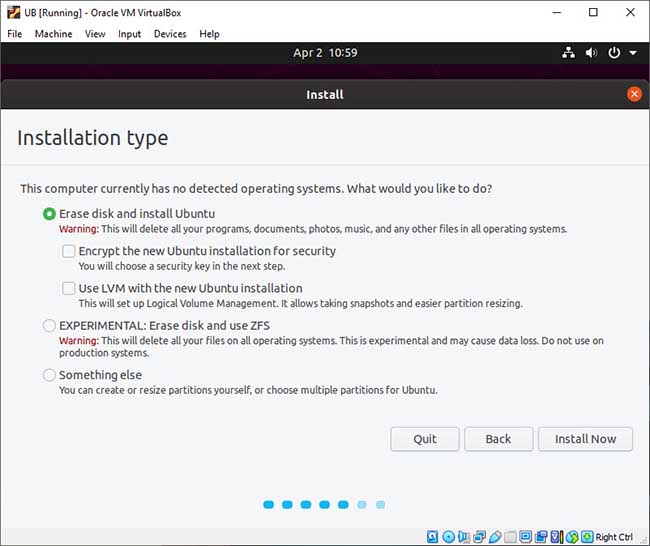
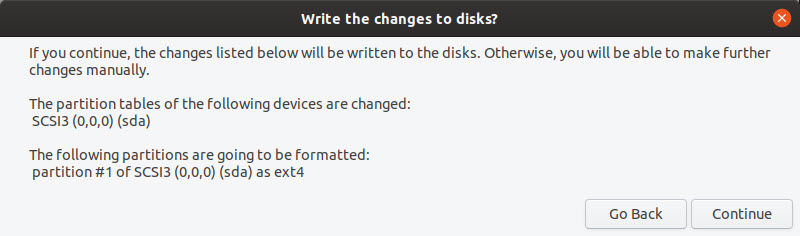
6. Click “Continue” when prompted.
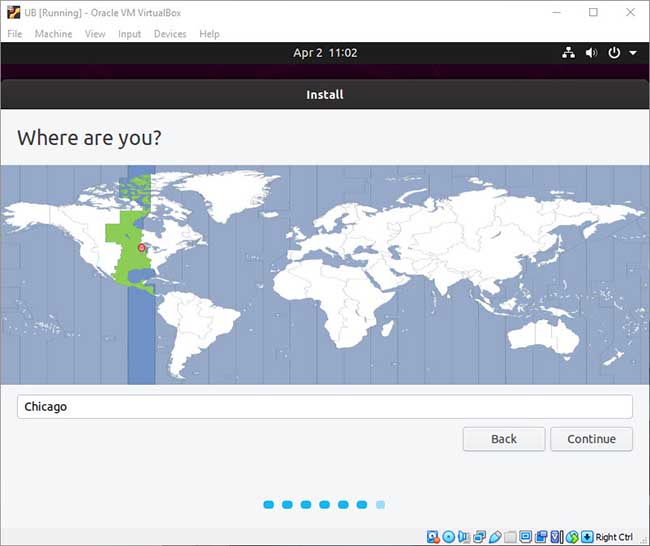
7. Select your current location. Click “Continue“.
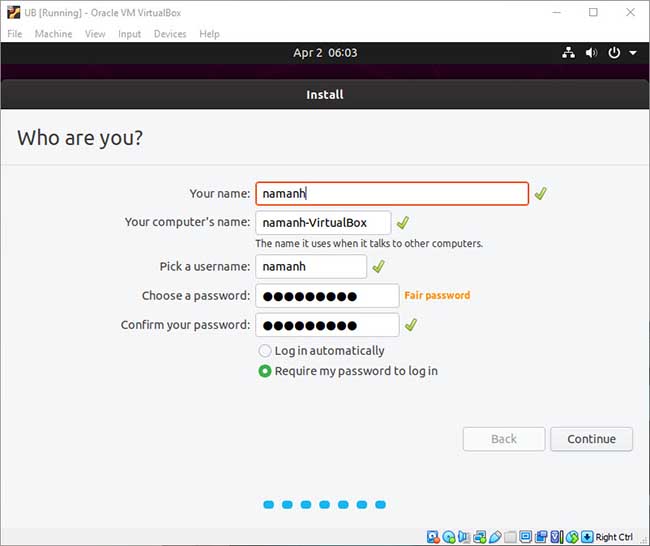
8. Now, enter your name & your computer’s name and create a password. Click “Continue“.
9. You’ll see Ubuntu installing. Wait for Ubuntu to finish installing.
10. After the installation, restart it. After logging in, you’ll see the Ubuntu desktop.
Congratulations! You have successfully installed Ubuntu in VirtualBox.
See also: How to make Ubuntu full screen in VirtualBox
Hope something helps you.

![How to Configure Proxy Settings on Android Devices [FREE]](https://windows10freeapps.com/wp-content/uploads/2024/12/setting-up-a-proxy-for-a-wi-fi-network-1-150x150.jpeg "How to Configure Proxy Settings on Android Devices [FREE]")

")
