In this tutorial, learn How to fix high CPU usage by Antimalware Service Executable (MsMpEng.exe) in Windows 10.
Let me explain first that what is Antimalware Service Executable (MsMpEng.exe)?
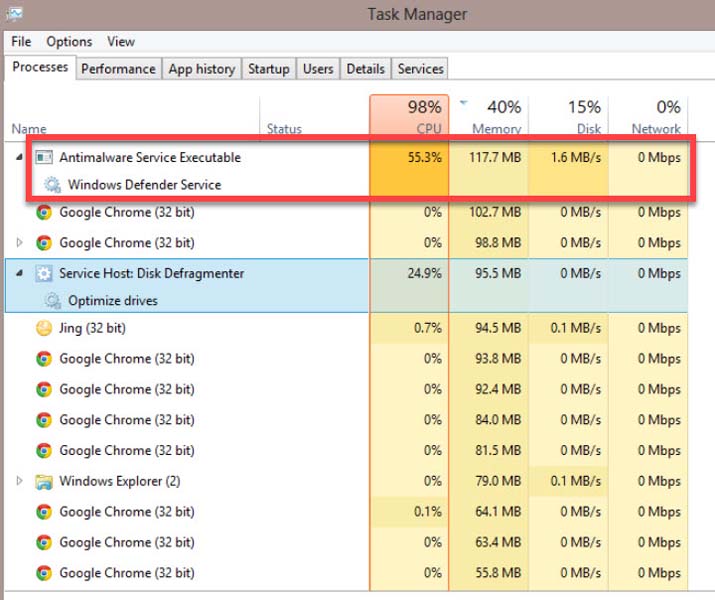
Are you using Windows Defender to protect your system from malware and cyberattacks? If so, press Ctrl + Shift + Esc to open the Windows Task Manager, then you will search for a process called Antimalware Service Executable and its corresponding file msmpeng.exe. This process lets Windows Defender provide a Real-Time Protection feature and continuously monitor your system against malicious programs and spyware. But it can also be the cause of 100% CPU usage and high CPU usage.
Another Windows Defender feature that may be responsible for lag, hanging and other system disruptions is its Full Scan. Full Scan performs a comprehensive check of all files on your system, so it relies heavily on the CPU and is not afraid to use any resources your system has available.
Read more: How To Fix High CPU or Disk Usage by Ntoskrnl.exe on Windows 10
If you’re also victim of this problem, here is how to fix it:
Quick Fix for Windows 10 Antimalware Service Executable High CPU Usage
Method 1. Add Antimalware Service Executable to Windows Defender’s exclusion list
When performing a system scan, Windows Defender checks every single file on your computer – even itself. This is one of the most common reasons for system lag. In order to fix this problem, you just instruct Windows Defender to exclude itself from the scan. To do that, follow these steps below:
Step 1. Open Windows Task Manager by pressing Ctrl + Shift + Esc.
Step 2. When Task Manager window opens, find Antimalware Service Executable. Right click on it and click Open File Location.
Step 3. Then you copy the full path of Antimalware Service Executable (MsMpEng.exe).
Step 4. Now, click the Start menu, type “windows defender” and select the Windows Defender Security Center from the list results.
Step 5. Click on Virus & threat protection > Virus & threat protection settings.
Step 6. Go to Exclusions section and click Add or remove exclusions.
Step 7. In the next screen, click on Add an extension, select File and paste the path to Antimalware Service Executable in the address bar. Moving on, click Open and Windows Defender will skip the file during its scan.
Method 2. Change Defender’s Schedule
As mentioned above, you do know the 100% disk usage error is happening when Windows Defender is running a full scan. Hence, a good way to fix the problem will be in changing Windows Defender’s scheduling options. It means that you will schedule the scans to take place at an appropriate time when you’ll be unlikely to notice the increased CPU usage
Step 1. Press Windows Key + R then put taskschd.msc in Run dialog box. Click OK to open Task Scheduler.
Step 2. In the navigation pane on the left, navigate to the following path: Task Scheduler Library > Microsoft > Windows > Windows Defender.
Step 3. When you have gone into the Windows Defender folder, find the service name called “Windows Defender Scheduled Scan“. And then, you double click on it.
Step 4. Once when Windows defender scheduled scan properties window pops up, go to the Conditions tab, uncheck all options and after that click OK. This will delete your scheduled scans.
Step 5. To protect your system, you need to schedule a new scan. Now you double click Windows Defender Scheduled Scan, go to the Triggers tab and click New…
I would recommend monthly scans at a time when you’re less likely to feel the drain on your CPU.
Step 6. Repeat the process for the three remaining services: Windows Defender Verification, Windows Defender Cleanup, Windows Defender Cache Maintenance.
Step 7. Reboot the machine.
Also, you can disable the Windows Defender Scheduled Scans by right-clicking and click Disable. This will stop all other Automatic Maintenance tasks who runs shortly after when your operating system get starts.
Method 3. Disable Windows Defender
You should be able to fix this problem by disabling Windows Defender altogether. Keep in mind that doing so leaves your system vulnerable to a range of malware and virus, thus you should install an effective anti-malware software on your computer before turning off Windows Defender. Now I will guide you how to disable Windows Defender using Registry.
Step 1. Press Windows Key + R then put regedit in Run dialog box. Click OK to open the Registry Editor.
Step 2. When Registry Editor window opens, go to this path:
HKEY_LOCAL_MACHINE\SOFTWARE\Policies\Microsoft\Windows Defender
Step 3. Then, you locate a registry entry named DisableAntiSpyware, double click it and set its value data to 1.
If you do not find a registry entry named DisableAntiSpyware, right click on the blank space and select New > DWORD (32 bit) Value. Ensure you do name this new key Called DisableAntiSpyware. Double click it and set the value to 1.
Step 4. You can now close Registry Editor window and restart your computer.
VIDEO TUTORIAL:
Method 4. Check for malware infections
If the problem remains after applying all above fixes, I’ll highly suggest you use Malwarebytes Anti-Malware (30-day free trial) to check your computer for any malware that may be affecting your computer’s ability to run securely and smoothly.
By following the methods described in this tutorial, you’ll be able to fix high CPU usage by Antimalware Service Executable (MsMpEng.exe) in Windows 10.
Hope something helps you. If you have any other Windows 10 error you can see for the solution on my webiste.


")
 & Mac OS")

