Backuping your apps and safeguarding your phone against faulty software using Titanium Backup is highly useful, although the UI isn’t the most pleasant. For that reason, we’ve put up a quick start guide.
Since its release in 2011, Titanium Backup has been one of the most popular programs on the market. You can use it to back up all of your phone’s vital data, including apps, settings, and even WiFi passwords.
A system or app-killing bug occurs infrequently on Android since the operating system is so well-maintained. Even yet, it’s always better to be cautious than sorry, because you never know when a problematic update or malicious software will cause an issue. If you want to use your newfound root privileges to remove applications or to install modified versions of Android, then it is imperative that you back up your smartphone.
Before you can use Titanium Backup, you’ll need a rooted phone. After that, you’ll need to allow the app root access to your phone, which is a straightforward process. Once you run Titanium Backup, you’ll be prompted by Superuser, and you may choose to grant it permanent access so you won’t be prompted again.
Before we go any farther, let me issue a word of warning. Do not attempt to restore system apps or their data between ROMs while using Titanium Backup to restore applications in between installing ROMs. This may result in several crashes. System data will not be compatible with individual apps.
We may begin now that everything has been set up.
Performing a mass backup
Titanium Backup’s black and grey style isn’t the most welcoming at first sight, and it might use a facelift. But don’t let it discourage you; whatever you need may be found in a matter of minutes.
Although it may seem counterintuitive, the best option for creating a large-scale backup is actually tucked away in a different menu than the Backup/Restore tab. As an alternative, press the Menu button on your phone and pick the “Batch actions” option under the “General” section. It should be the second choice in this portion of the menu.
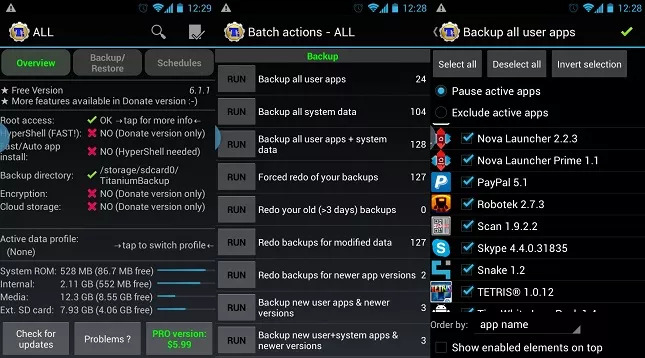
Right here is where you’ll find all you need to know about backing up your apps and system data. Bookmarks, WiFi details, and calendar events are all examples of system data. “Backup all user applications + system data” or at least “backup all user apps” is recommended if this is your first time conducting a full backup. To further customize your backup, click “Run” and you’ll be presented with a number of other options. The backup will begin after you hit the green check mark in the upper right corner.
If you’ve installed a lot of huge programs, be prepared for this to take some time.
“Backup new user applications” under the “Batch activities” menu is the ideal option if you’ve previously made backups and merely want to make a backup of newer apps installed recently. The “Backup/Restore” option on the Titanium site also allows you to pick specific apps for backup.
Creating a recovery backup .zip file
If you encounter a significant fault that stops your device from starting correctly, such as corruption in a system file or a bugged out launcher, none of the aforementioned backups will be any use. Where recovery is suitable can be found. Backups can be restored from zip files without having to boot into Android, which is convenient. For those who frequently switch ROMs, this is a donation-only option that may be useful.
Once you’ve returned to the batch options, scroll down to the “Recovery Mode” section. As an alternative to creating a separate.zip file for each app, you may create a separate.zip file for each piece of data that you’d like to back up.
Enter ClockworkMod recovery and select the option to install zip from SDCard if you ever need to restore your device.
Scheduled backups
As a result, it’s doubtful anybody will remember to back up their data once a week or once a month, even if they did. Fortunately, a scheduled backup option has been added to Titanium Backup.
Tap the “Schedules” tab on the main menu and you’ll see two possibilities. You may plan backups for just data that has changed since the previous time you backed up by selecting the “redo backups for updated data” option. This might be anything from games to app data modifications.
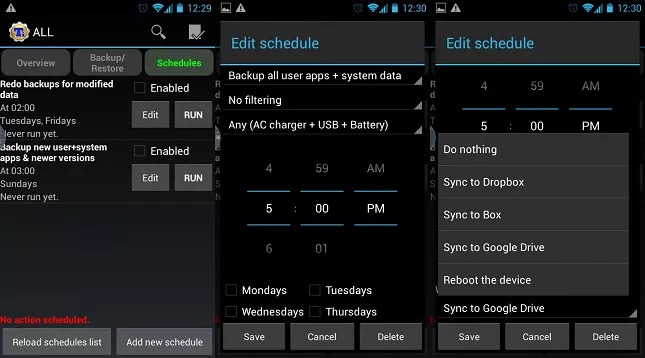
Aside from the first choice, the second option is the most significant since it will back up any new applications and system data that have been added since the last update. To make alterations to the timetable, select “edit” from the drop-down menu. Backups may be scheduled at any time, but users can also specify the device’s battery level before they begin, which helps prevent device shutdowns in the middle of the backup. Users can also specify which filters to apply and what to do when the backup is complete.
Restoring from backup
In the event that your phone has a slight breakdown, you’ll be able to restore your applications and settings, but that’s only the beginning.
Again, you’ll find a variety of alternatives for bulk data restoration in the batch activities. After a wipe, selecting “Restore missing applications and data” will restore any lost data. Alternately, you may restore all applications and their data, which would overwrite any previously installed apps. If you’re reinstalling your operating system, you may also choose to only restore newer versions of user programs.
You’ll be most likely interested in the “restore missing applications + all system data” option, which would restore everything to its original state. I cannot stress enough how important it is not to restore system data if you’re changing ROMs.
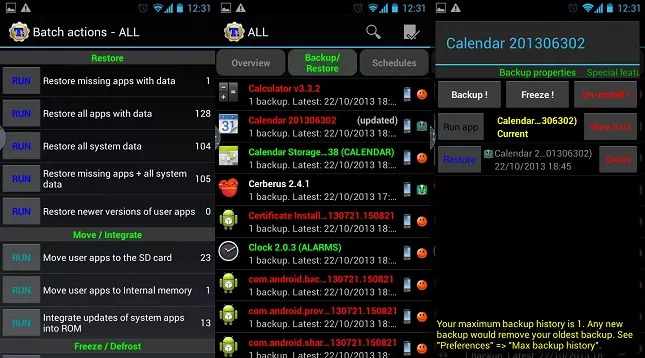
The backup/restore option on the home page can be used to restore a previously stored version of a program that has acquired a problem, such as after a faulty update. Apps and data are listed here, and you may select what you want from the drop-down menu. Once you’ve tapped it, a drop-down menu will emerge with a list of all of your existing backups, as well as options for creating new ones. Manage your individual app backups here, or you may click on a specific date to restore the app to that point in time.
Managing bloatware
You’ve undoubtedly seen the Freeze feature when looking at the individual programs. If you want to stop an app from operating without having to uninstall it, you may use the app-freezing feature. Typically, this is used to remove unwanted factory-installed programs. In order to stop annoying activities from running or test how your phone will react before deleting applications, you’ll need to pay for this feature, but it’s well worth it.
With root access, Titanium Backup can delete bloatware and other undesirable applications. It’s important to back up your applications and system first, ideally with a recovery zip file, before attempting to uninstall any pre-installed software. Failure to do so can result in force closure problems and potentially leave your device totally useless.
Special features
If you’d want to get the most out of your backups, Titanium backup has several sophisticated options that you may take use of.
Once Titanium’s main menu has been opened, scroll down to the “Import Backup” section and select “Import Backup.” There is no need to keep all of your backups on your phone, since the data can be quickly transferred between your PC and phone.
If you don’t have enough internal capacity, you may also relocate applications to the SD card. However, this might cause certain applications to fail, thus it should only be used on software that doesn’t interact with any other component of Android, like games.
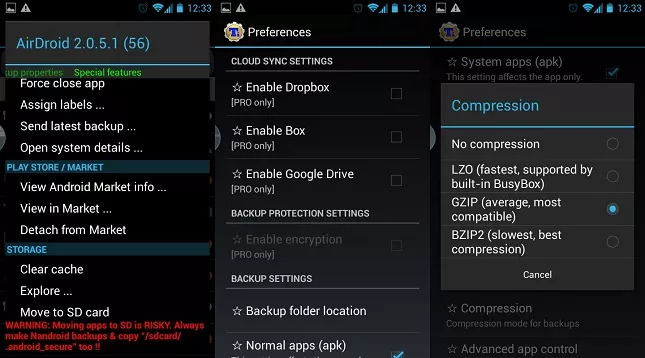
Titanium Backup has a plethora of choices under the configurations menu, including modifications to the kind of compression used to produce backups, the maximum amount of copies to maintain for each program, and the ability to preserve market links for apps. If you choose, you may keep some applications connected to the marketplace while disconnecting them from automatic updates altogether.
Cloud backups
For customers who purchase the PRO version, the option to transmit backup data to other web services, such as Dropbox and Google Drive, is included. Even if you don’t require these choices in order to clean your SD card, or if your SD card develops a defect, these alternatives are quite useful. Tap the menu button on your phone and select “Preferences” to see the “cloud sync settings” choices.
In this video, we are gonna show you how to use Titanium backup on Android:
Our Titanium Backup tutorial has come to an end. Hopefully, that’s all you need to ensure that your phone doesn’t go down the drain.

![How to Configure Proxy Settings on Android Devices [FREE]](https://windows10freeapps.com/wp-content/uploads/2024/12/setting-up-a-proxy-for-a-wi-fi-network-1-150x150.jpeg "How to Configure Proxy Settings on Android Devices [FREE]")
")


