A short while ago, the DVD gained popularity as a source of music. Back then, the majority of people owned a sizable DVD collection. It is out of date and mostly forgotten by today’s generation. However, we cannot dispute that individuals still desire to burn music to DVD today. If you’re among those for whom music is a burning passion, this post will teach you. Thus, continue reading to find out more about how to achieve it.
Can I Burn Music to DVD?
The answer to the question of whether music can be burned to a DVD is yes!
You may burn your music playlist onto a DVD-R or DVD-RW disk if your computer has a built-in DVD burner. However, the produced DVDs can only be played on your computer—not a standard DVD player.
People were already doing this back then, therefore it is still not shocking. The majority of those who engage in it are drivers. For automotive use, they burn music to DVDs; a lot of motorists enjoy listening to music while driving.
To burn music for use on a DVD player, you must first convert the music into music videos.
To find out how, continue reading.
How to Burn Music to DVD
How to Burn Music Videos Onto a DVD Disc
For converting music to DVDs, AnyMP4 DVD Creator is a reliable tool. DVDs from a variety of digital formats, including MP4, MOV, MKV, MTS, FLV, TS, WMV, and AVI, can be burned with it. It can still be used with downloaded music videos from the internet, even though the program does not support any audio formats.
Stated differently, the music videos will be compiled and burned onto a DVD. With this program, you can use disc types including DVD-R, DVD+R, DVD-RW, DVD+RW, DVD-5, DVD-9, DVD-RAM, DVD-ROM, DVD-DL, and more.
With the help of this tool, you may burn downloaded videos to DVD in addition to creating DVD ISO files from downloaded music videos and storing them locally for backup. Nevertheless, you shouldn’t panic if a blank DVD isn’t available! It is still possible to burn the DVD, save it as a playable folder, and keep it on your hard drive. Next, use your DVD player to navigate the folder containing the DVD files.
Step 1. You may download and install AnyMP4 DVD Creator for free on your computer by clicking the button.
AnyMP4 DVD Creator for Windows AnyMP4 DVD Creator for Mac
Make sure a blank DVD is in your computer’s drive before you start the burning procedure. You can still burn the music video, though, if you don’t have a blank DVD on hand. That being said, a playable folder will be saved with the burned file.
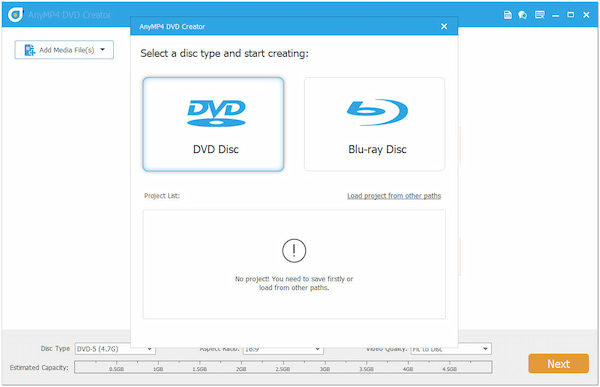
Step 2. You’ll be prompted to select the disc type to use when the software launches. Select “DVD” as the disc type.
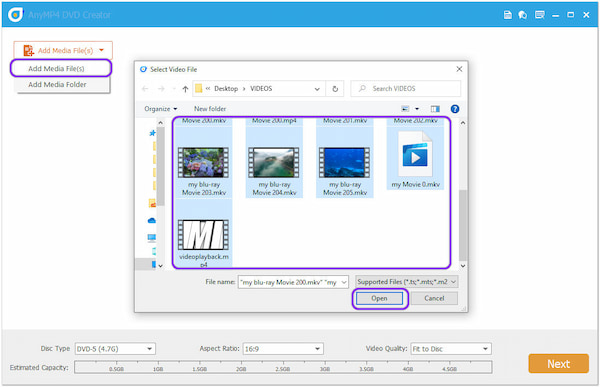
To import the music video you want to burn, click the Add Media File button in the window that appears. A local file folder will appear on your screen; please pick it. To import the file into the application, choose the music video and click Open.
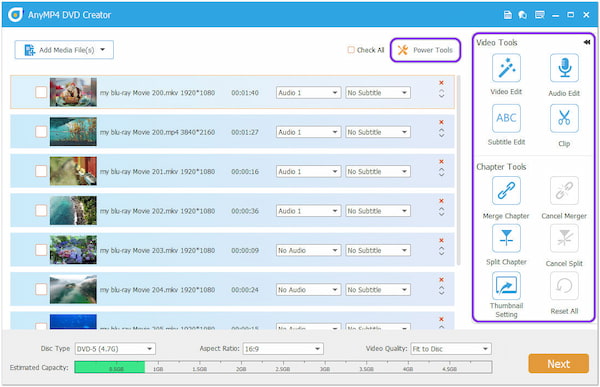
Step 3. To make any changes to the music video before burning it, select the Power Tools option. This page allows you to alter video, audio, and subtitles, among other things. Click Next to continue after you’ve finished editing your music video.
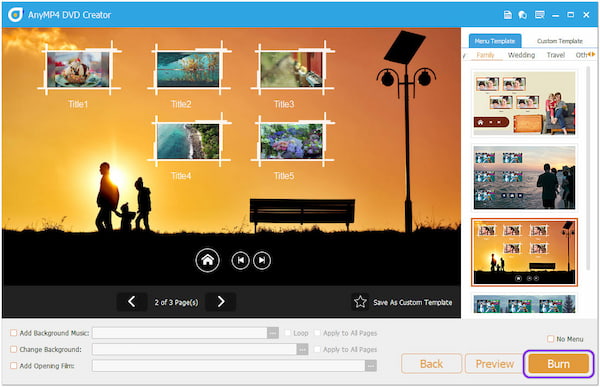
Step 4. Select a menu template based on what you require. Then, to go to the next window, click the Burn button. Modify the other required parameters as well as the burning settings. The burning procedure will then start when you click the Start button.
How to Make a Photo DVD With Music
Did you know that AnyMP4 DVD Creator can create a photo DVD with music in addition to burning music to DVDs? Indeed! Yes, you read correctly. You will find that this program contains a lot of sophisticated editing features if you explore it thoroughly. You can create a photo DVD with music with this tool, which is one of its primary advantages.
AnyMP4 DVD Creator for Windows AnyMP4 DVD Creator for Mac
AnyMP4 DVD Creator comes equipped with audio and video editing tools in addition to the ability to create photo DVDs with music. You can edit the music video using the application before burning music to DVD RW. In addition to editing audio tracks, you may rotate videos, modify subtitles, combine chapters, and more. Here are some instructions for making a photo DVD with music.
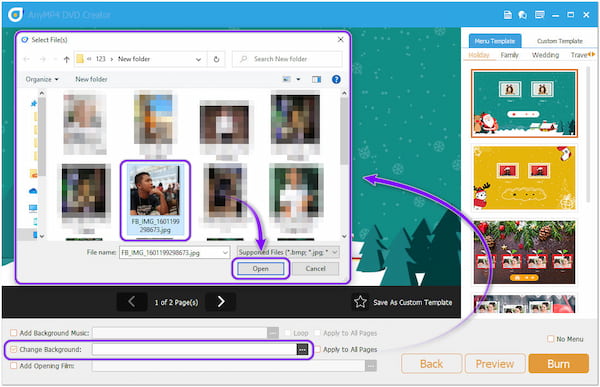
Step 1. In the menu template area of the program, you can create a photo DVD with music. In the main interface, first check the box labeled “Change Background” located on the lower left corner. From the local folder that appears on your screen, pick a picture. To import the image, click Open after that.
Step 2. Once the photo has been added, check the box labeled Apply to All Pages. Click the Add Background Music box to add music to your photo DVD. Similar to the previous step, choose your local file to import the background music from and click Open to start playing it.
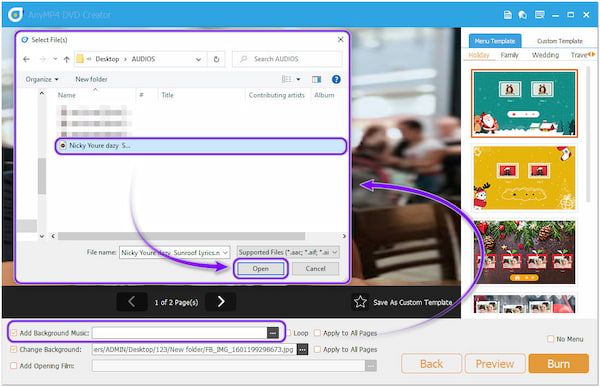
After selecting the background track, check the box labeled “Apply to All Pages.” You can add an opening film in addition to altering the background and adding background music.
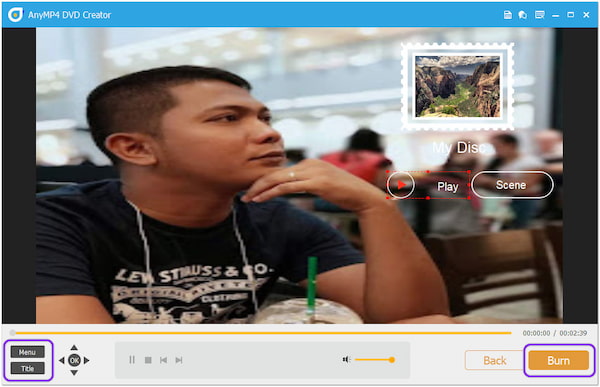
Step 3. To see a preview of your work, click the Preview button. To see a preview of the result, click the Menu button. On the other side, click the Title button to view the titles you uploaded. Let’s say you are happy with the result. Press the “Burn” button.
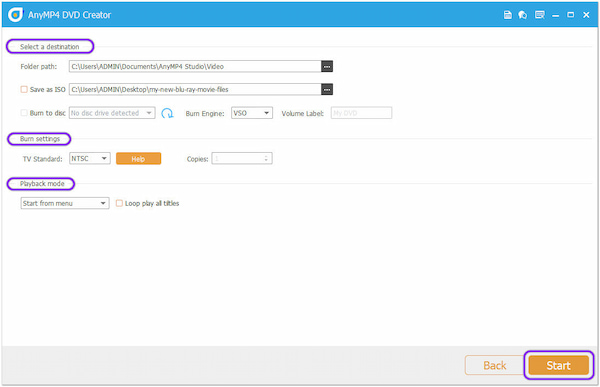
Step 4. In this window, choose the photo DVD with music’s destination. As necessary, adjust the burning parameters and other settings. After that, to process the output, click the Start button below.
By following the instructions mentioned above, burning music videos to DVD is easy as 1, 2, 3. In addition, you also learn how to make a photo DVD with music. Simple right? With the help of a single program, you can create two different functions. AnyMP4 DVD Creator is a worthwhile program; it guarantees every user a straightforward burning process and other extensive features. You can share this post with your loved ones so that you can help them too.


![How to Configure Proxy Settings on Android Devices [FREE]](https://windows10freeapps.com/wp-content/uploads/2024/12/setting-up-a-proxy-for-a-wi-fi-network-1-150x150.jpeg "How to Configure Proxy Settings on Android Devices [FREE]")
 & Mac OS For Free")
 & Mac OS")
