If you see the notice “Your organization manages updates on this PC” while checking eligibility for Windows 11, here’s how to resolve the situation.
Even when you verify the eligibility of personal Windows computers, the notice Your organization manages updates on this PC appears.
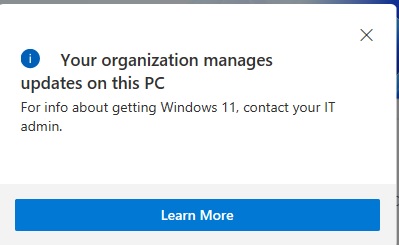
Your organization manages updates on this PC
This problem may arise if you have a school or work account linked to your computer.
You may rapidly fix this issue by making a few changes in the Group Policy Editor.
To fix various PC problems, we recommend Restoro PC Repair Tool:
This software will fix common computer faults, protect you from file loss, malware, and hardware failure, and optimize your PC to run at its best. In three simple actions, you can immediately fix PC problems and eradicate viruses:
1. Download Restoro PC Repair Tool, which includes patent-pending technologies (patent available here).
2. Click Start Scan to look for Windows faults that may be causing your computer difficulties.
3. To correct issues that are hurting your computer’s security and performance, click Repair All.
With the release of Windows 11 came a handy little tool called PC Health Check, which allows users to see if their current Windows PCs fulfill the minimal system requirements for this new operating system.
Despite checking on a personal computer, several of the interested users were met with the message Your organization manages updates on this PC.
Users who encountered this problem were unable to use the program to check their Windows computer’s eligibility for Windows 11 and were instead forced to manually check the minimum requirements of Windows 11.
What does Your organization manages updates on this PC mean?
As a result, the PC Health Check program on your system will display this notice, indicating that you are either not logged in as an administrator or do not have administrator privileges on the machine.
If you’re using a Microsoft Family account and a parent or caregiver is configured as the primary system administrator, that’s another possibility.
Furthermore, this problem might occur on Windows workstations with associated corporate or educational accounts.
On the other hand, because a Microsoft account is required for Windows 11, utilizing a local account on a Windows computer could be the cause of this notice.
Though there are numerous reasons why this problem has arisen, you do not need to be concerned. The following are some quick and simple adjustments that will undoubtedly cure the issue.
How To Fix “Your organization manages updates on this PC” Error
Method 1. Use an administrator account
1. Click on the Start Menu and select the Settings option.
2. On the left panel of the Settings box, click on the Accounts option. Click on the Your info tile on the left side of the window.
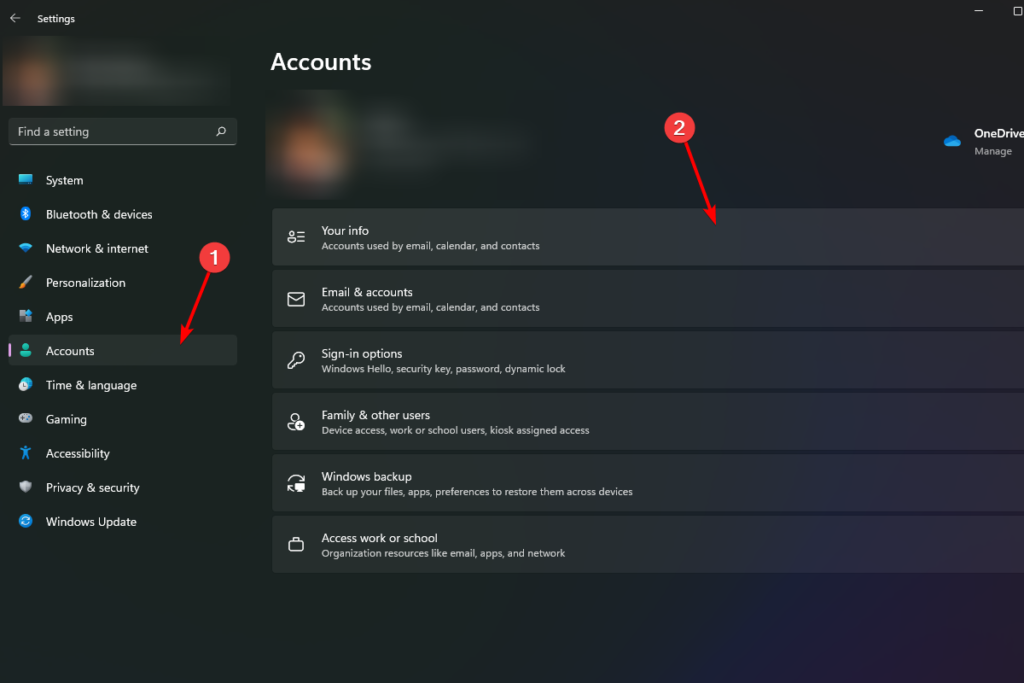
3. As a result, your account role will be prominently displayed next to your name. Unless it says Administrator, you need to speak with your system administrator about upgrading your account or obtaining the administrator account’s login information.

It’s likely that you’re not running an administrator account, as was the case prior. It is critical that an administrator account or credentials are in place on the system before doing anything else.
The problem will almost certainly be resolved if you log in as an administrator. After logging in with an administrator account, go to the following solutions.
Method 2. Disconnect work or school account
Here are the steps to disconnect work or school accounts:
1. Click the Start Menu , then select the Settings option.
2. In the left panel of the screen, click the Accounts tab, and then on the Access work or school tile on the left side of the window.
3. After that, on the school or work account tile, click the Disconnect button.
4. After disconnecting the work or school account, restart your computer and launch the PC Health Check software from the Start Menu.
Method 3. Edit Windows Registry
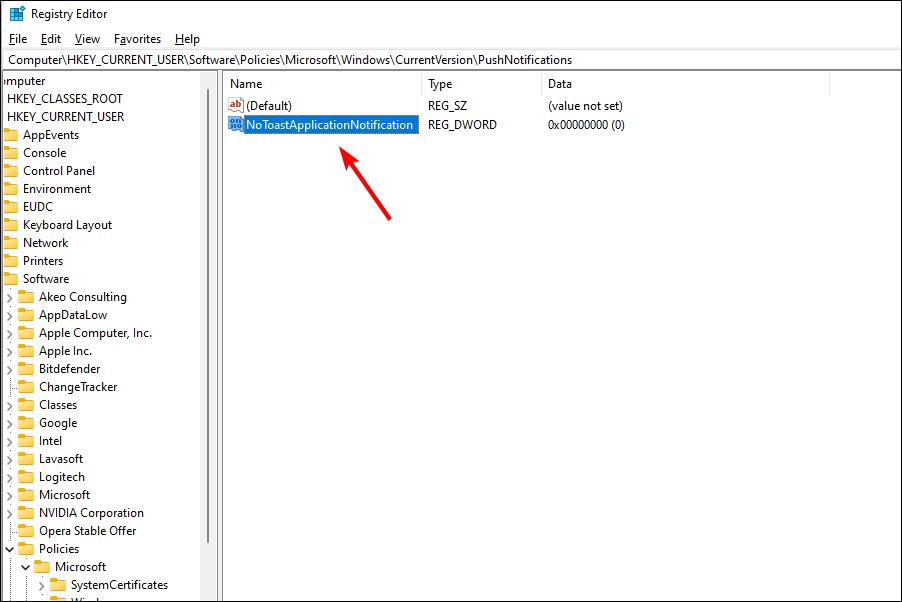
1. Press Windows Key + R then type regedit and click OK to open the Registry Editor.
2. Go to the following path:
Computer\HKEY_CURRENT_USER\Software\Policies\Microsoft\Windows\CurrentVersion\PushNotifications
3. After that, double-click the NoToastApplicationNotification file.
4. In the Value data: field, type 0 and click the OK.
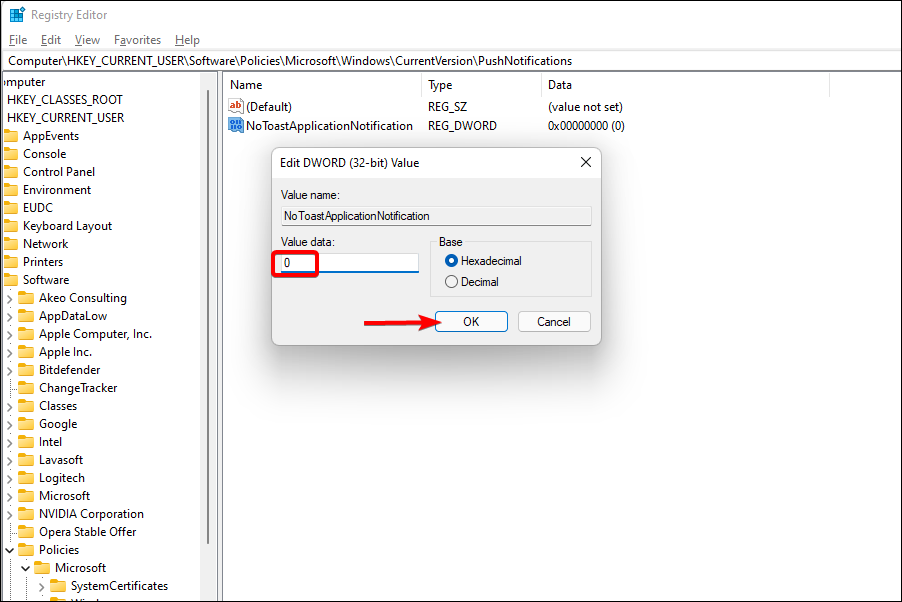
5. Close Registry Editor and restart your system.
Method 4. Change Group Policy Editor Settings
Note: Only Windows Pro editions come with Group Policy Editor. Because this method necessitates the use of a Group Policy Editor, it is limited to a certain group of Windows users.
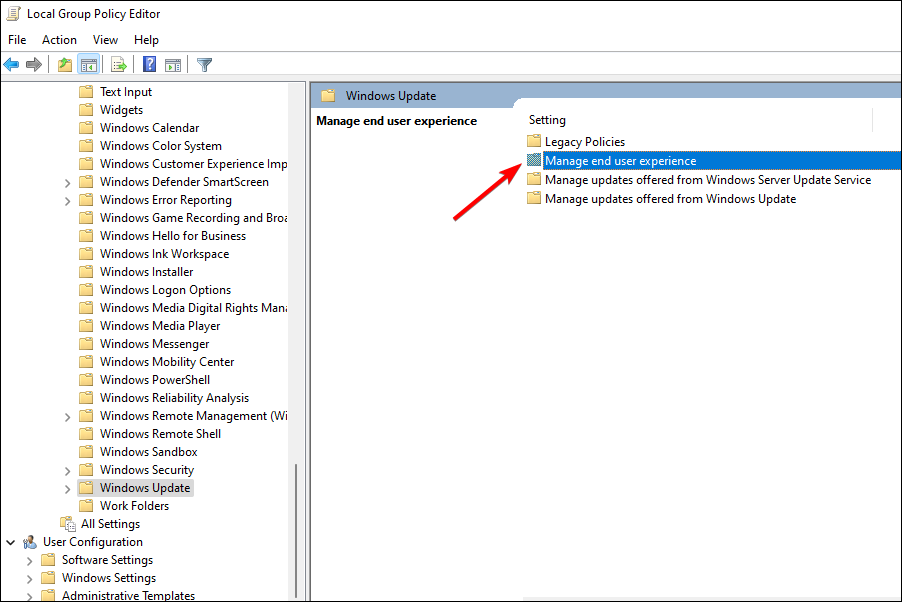
1. Press Windows Key + R then type gpedit.msc and click OK to open Group Policy Editor.
2. Go to the following directory. Locate and double-click the Manage end user experience directory on the right side of the window.
Computer Configuration/Admisistrative Templates/ Windows Components/ Windows Update
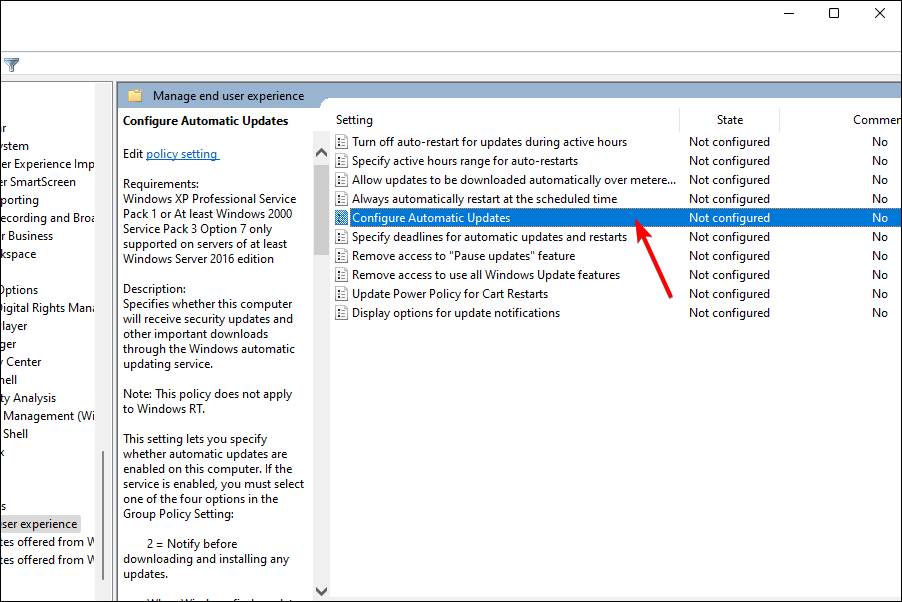
3. Double-click Configure Automatic Updates.
4. After that, click the radio button next to the Not Configured option to pick it. Then, to confirm, click Apply, and then OK to exit the window.
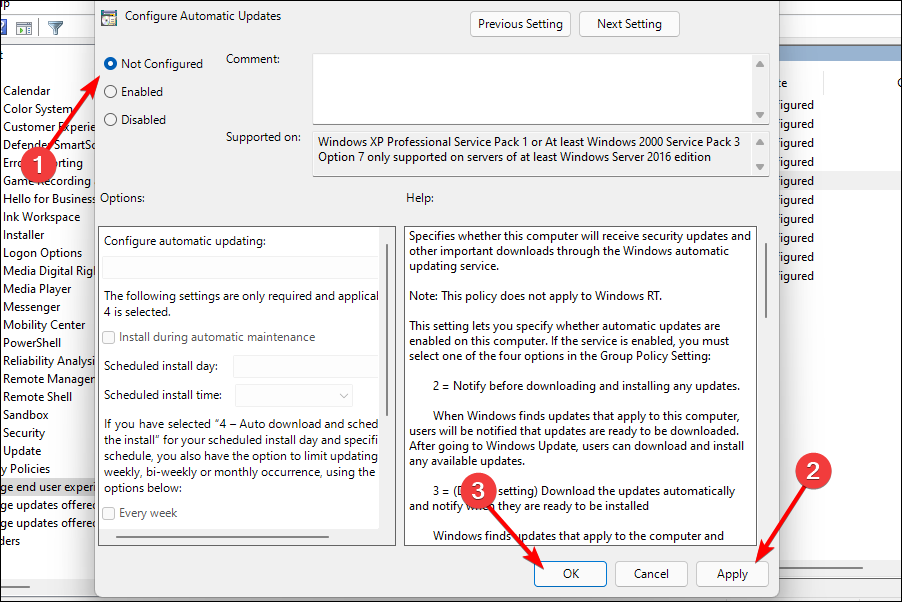
5. Restart your Windows machine and run the PC Health Check software.
Because this method necessitates the use of a Group Policy Editor, it is limited to a certain group of Windows users. There are, however, lots of other reliable options for non-professional users.
Method 5. Change Diagnostic data settings
1. Click the Start Menu and select the Settings.
2. Then, from the window’s left sidebar, select the Privacy & security tab. Then, on the right side of your screen, click the Diagnostic & Feedback tile.
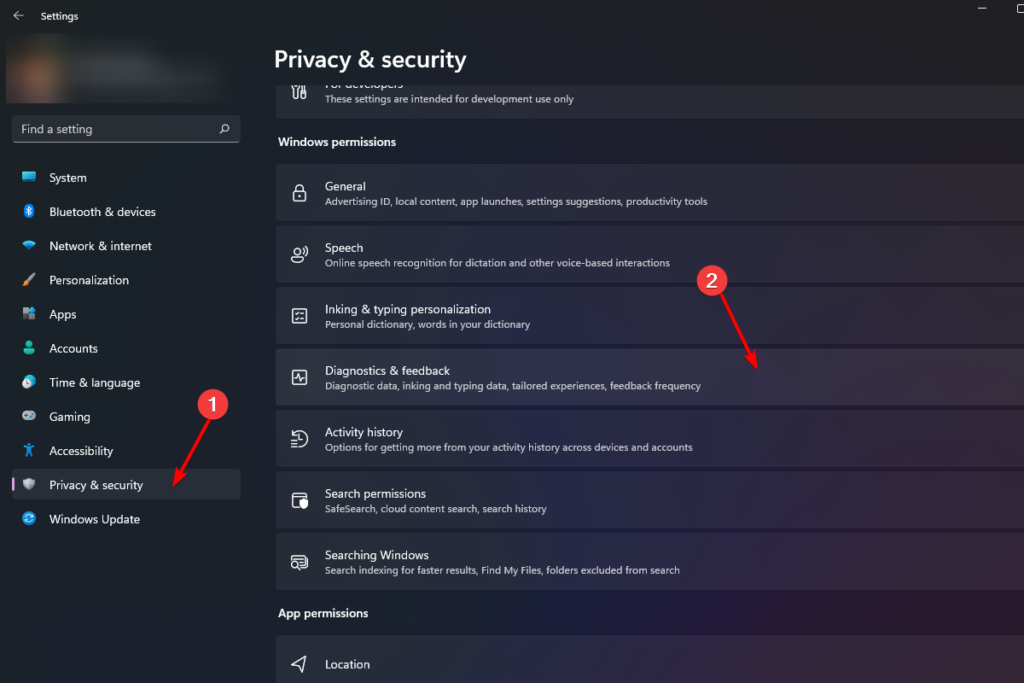
3. Then, in the Send optional diagnostic data section, toggle the switch to the On position.
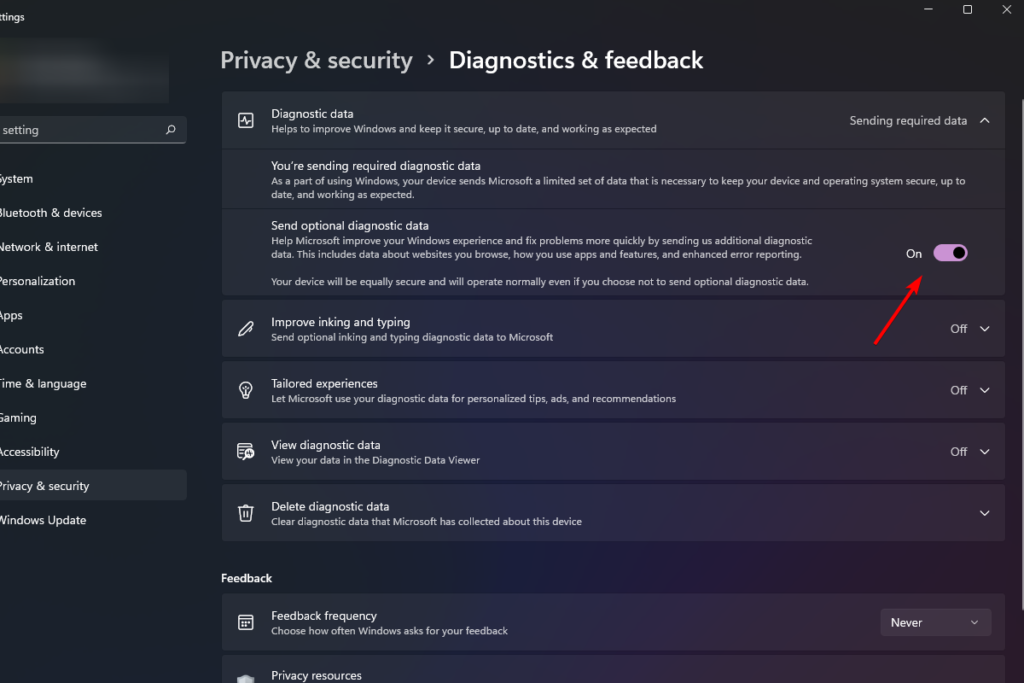
4. Then, restart your computer and use the PC Health Check app to check its health. By now, your problem should be solved.
If the problem is caused by inadequate data being supplied to Microsoft, altering the Diagnostic data will completely address the problem.
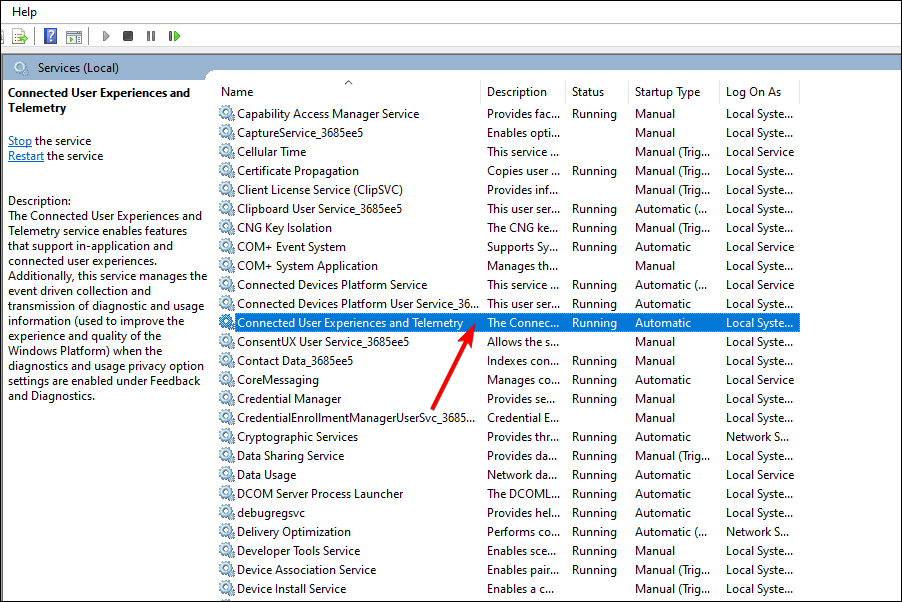
Method 6. Enable telemetry
1. Press the Windows + R keys to open run command box. Then type services.msc in run box, and press Enter.
2. Then, from the services window, double-click on the Connected user experience and telemetry option to launch it. This will bring up a new window on your screen.
3. Select the Automatic option from the drop-down menu next to the Startup type column.
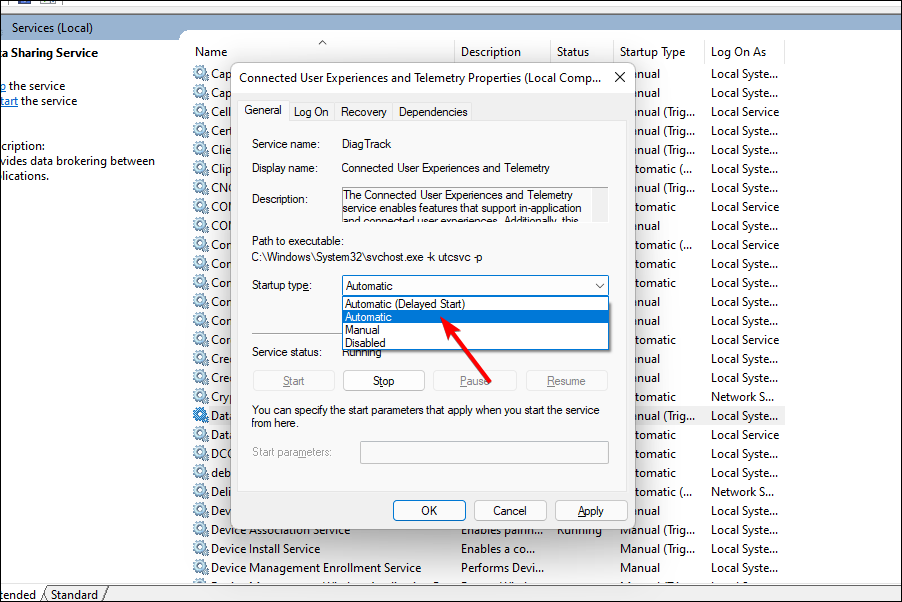
4. Then, to save the changes, click the Apply button, and then the OK button to dismiss the window.
5. Reboot your system and launch the PC Health Check software.
What can I do when getting the message saying This PC can’t run Windows 11?
With the options listed above, you should be able to resolve the issue in no time. However, for many users, another concern comes to light as a result of this.
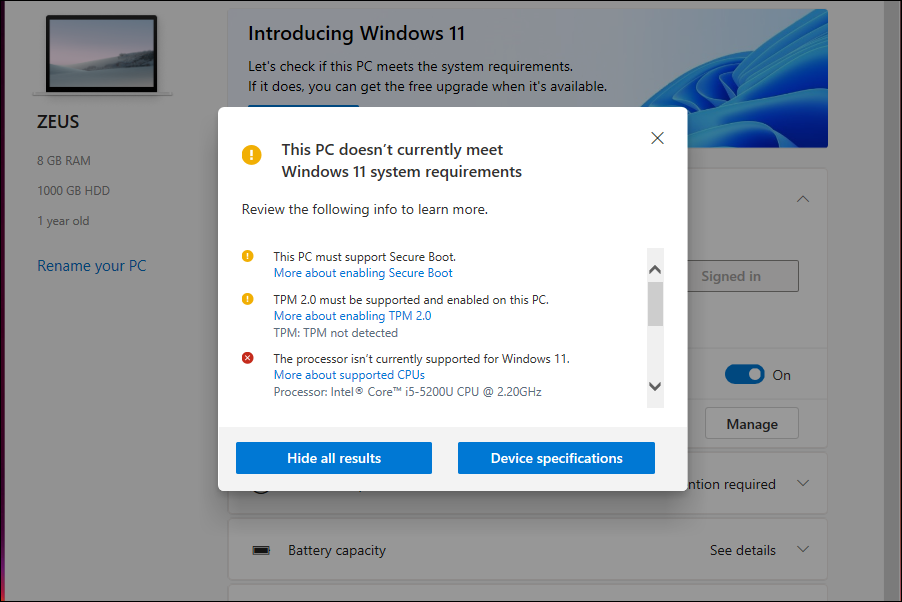
There are some strange minimum requirements for Windows 11 that many machines appear to be unable to meet, and as a result, will not be able to run the desired operating system.
If your computer happens to be one of the unfortunate ones, it is up to you to solve the message saying This PC can’t run Windows 11.
In addition to the above-mentioned issue, a number of users have expressed dissatisfaction with the inaccessibility of settings. If this is also the case for you, be sure to read our blog article on several parameters that are controlled by your organization’s problem.
Check this video for more help:
If you have any more questions or recommendations, please let us know in the comments box below, and we will respond in the shortest time.

![How to Configure Proxy Settings on Android Devices [FREE]](https://windows10freeapps.com/wp-content/uploads/2024/12/setting-up-a-proxy-for-a-wi-fi-network-1-150x150.jpeg "How to Configure Proxy Settings on Android Devices [FREE]")
")

 & Mac OS")
