This article was written for version V17.0.8.2, future versions may differ slightly.
Let me explain first what is DDU?
Display Driver Uninstaller (DDU) is a driver removal tool that can help you completely remove AMD (ATI), NVIDIA and Intel graphics drivers, Realtek audio driver from your system, without leaving leftovers behind (such as registry keys, folders, files, driver store). Over time these leftover files can cause compatibility issues, such as drivers failing to install, reducing performance or system crashes/freezes. By using DDU you can remove these leftovers and solve many common issues related with GPU drivers.
Display Driver Uninstaller v18.0.2.2
Display Driver Uninstaller (DDU) V18.0.2.2 Released
You can download Driver Uninstaller (DDU) V18.0.2.2 Released from this link.
Requirement:
- Windows Vista SP2 up to Windows 10 1909 (18362.xxx November 2019) (anything higher is at your own risk)
- NVIDIA, AMD, Intel GPUs
- Microsoft .NET Framework 4.6 or higher.
Changelog:
- Rewrite the service removal order and functions.
- Added a new “hardware ID” for Nvidia USB-C removal.
- Fixed a typo on one of the existing ID for Nvidia USB-C.
- Nvidia USB Type-C additional registry removal.
- Set the removal of AMDKMPFD to false by default.
- Additional AMD services removal. (AODDriver).
- Russian.xml update.
- SHA1: 159840F7CC77760DE17B134BFA1D1E22F1565A92
How To Install Display Driver Uninstaller (DDU)
Step 1. Have your GPU/Audio drivers ready (but do not run them yet)
Before you go ahead and use DDU to remove our GPU drivers we would recommend beforehand you visit your GPU manufacturers website and download the appropriate drivers for your GPU and OS configuration.
Here are the official download links for AMD (ATI), NVIDIA and Intel drivers. Make sure you choose the right options such as OS version, language and architecture etc.
- AMD (ATI): https://www.amd.com/en/support
- NVIDIA: https://www.nvidia.com/Download/index.aspx
- Intel: https://downloadcenter.intel.com
– Note: With some computers you may have to download your GPU/Audio drivers from the OEMs website (HP, Dell, Lenovo etc.) – some GPUs may have custom hardware IDs that only officially work with the OEM specific drivers.
Step 2. Download Display Driver Uninstaller (DDU)
– After you’ve downloaded your GPU drivers, you download the latest version of DDU from this above link.
– Note: If you’re using Windows 10, we recommend you disconnect your PC from the Internet, this will prevent Windows 10 from automatically downloading GPU drivers.
Step 3. Install and run Display Driver Uninstaller (DDU)
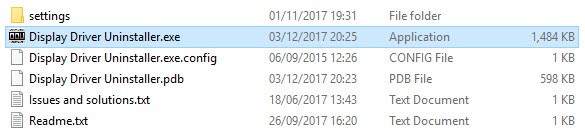
– Once you’ve download DDU, double click the exe and extract it wherever you want (except on a network drive, it must be on a local disk), we recommend you extract DDU to a “DDU” folder on the desktop, for ease of access.
– Open the DDU folder, you should see several files, read the “Readme” file, then run “Display Driver Uninstaller“.
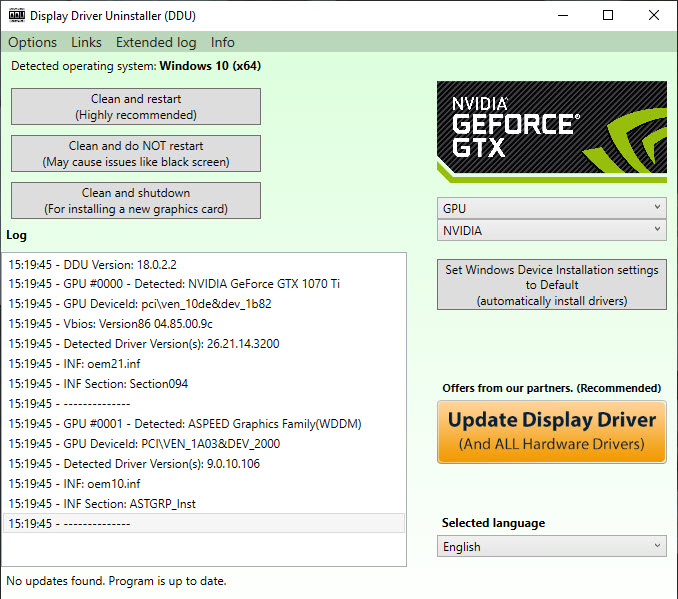
– After launching DDU, a screen window will display, instead of simply clicking one of the removal buttons we recommend you navigate to the options and tweak how DDU removes the drivers.
– We recommend you select the C:\AMD folders and C:\NVIDIA.These folders are the default locations where the AMD or NVIDIA driver installation files are unpacked, once the driver is installed these folders can safely be deleted.
– After that, exit the options menu and you can now remove your GPU drivers by using DDU.
Learn how to remove Graphics Card Drivers using Display Driver Uninstaller (DDU) with this detailed video tutorial.
Hope something helps you.


 & Mac OS")

![How to Configure Proxy Settings on Android Devices [FREE]](https://windows10freeapps.com/wp-content/uploads/2024/12/setting-up-a-proxy-for-a-wi-fi-network-1-150x150.jpeg "How to Configure Proxy Settings on Android Devices [FREE]")