Are you looking to install Windows Server on DigitalOcean? This tutorial will walk you through the entire process step by step so you can successfully set up a Windows Remote Desktop (RDP) on DigitalOcean.
Digitalocean $200 credit

See more: How to Create a Windows Image for VPS Deployment
How to Create a DigitalOcean Account and Get $200 in Free Credits (Valid for 60 Days)
To get started with setting up your Windows RDP, you’ll first need to create a DigitalOcean account and claim $200 worth of free credits, valid for 60 days. Just follow these simple steps using my special referral link:
1. Click the special link to access the DigitalOcean offer page:
2. On the offer page, click the Sign Up button. Enter your email address and create a password.
3. Check your email for a verification message from DigitalOcean. Follow the link inside to verify your email address.
4. Add a payment method (credit/debit card or PayPal) to complete your account setup.
???? Note: DigitalOcean won’t charge you. A small, temporary charge may appear for verification purposes and will be refunded shortly.
5. This payment verification step is required to confirm your billing details and prevent spam or abuse.
6. Once verified, your account will be credited with $200, ready to use!
7. Keep in mind: The $200 credit is valid for 60 days from the moment it’s added — so make sure to take full advantage of it while it lasts.
Step 1: Create a Droplet on DigitalOcean
Log in to your DigitalOcean account.
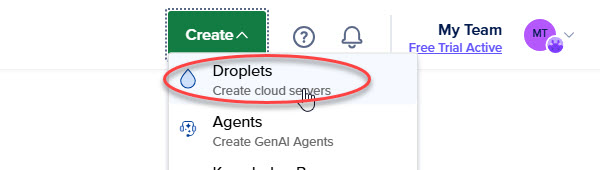
Click Create → Droplets.
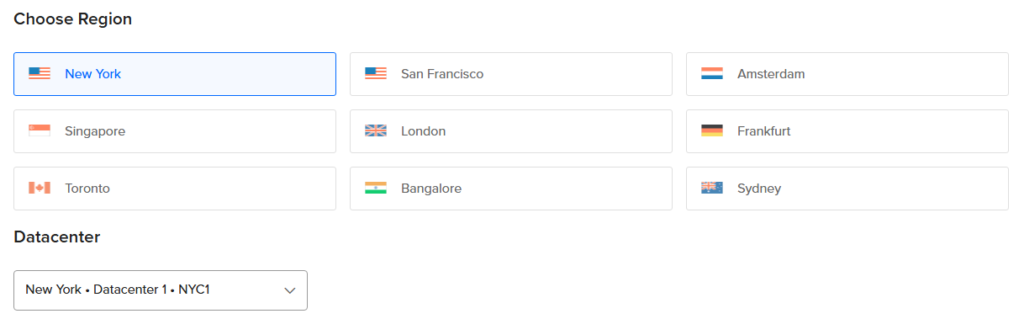
Select a Region: Choose a region closest to your location for better connectivity.
Select an Image: Choose Ubuntu (any version) as the base OS.
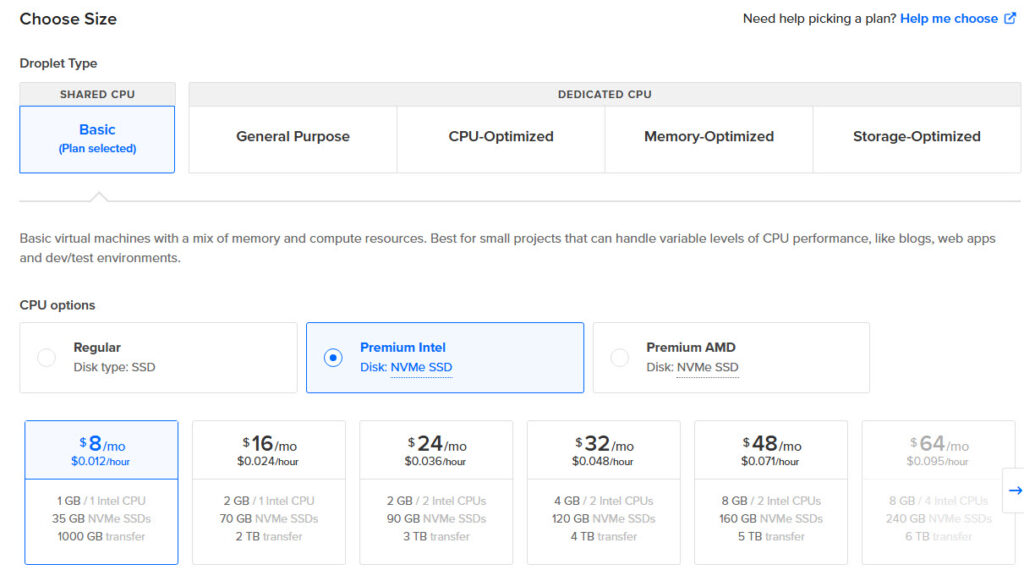
Select CPU Options: Pick any CPU configuration based on your requirements.
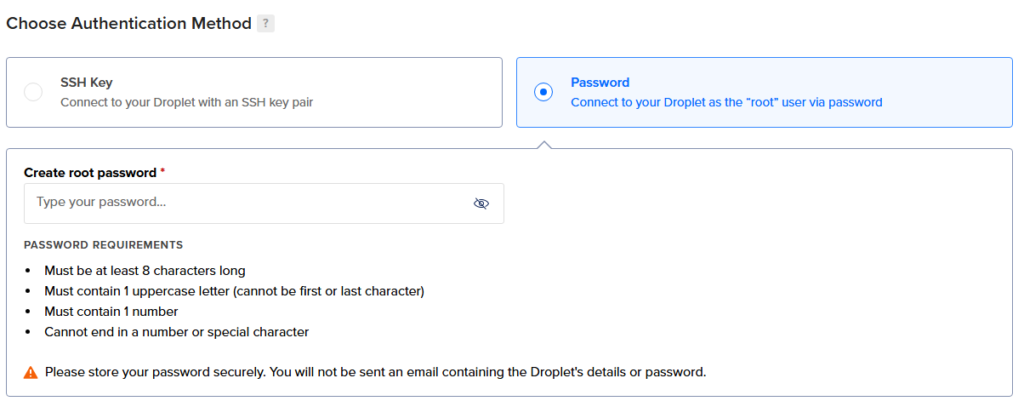
Set a Password: You need to set a password, but it won’t be used because Windows Server will have a different password.
Host Name: Enter a name for your droplet (you can name it anything).
Click Create Droplet.
⚠️ Important: Follow these steps carefully, and don’t skip any part to avoid installation issues.
Step 2: Enable Recovery Mode
Once the Droplet is created, go to the Droplet Settings.
Click Recovery.
Turn off the droplet.
Click Boot from Recovery ISO.
Now, turn on the droplet.
Step 3: Access the Recovery Console
Click Access → Launch Recovery Console.
In the console, type “6” and press Enter.
Copy the Windows Server download URL here.
Paste the URL into the console to start the download.
The download will take approximately 25-30 minutes.
Step 4: Finalizing Windows Installation
Once the download is complete, close the console.
Go back to Droplet Settings → Recovery.
Click Boot from Hard Drive.
Turn on the droplet.
Step 5: Access Windows Server
Click Access → Launch Recovery Console.
Open Command Prompt.
The Network Connections window will open.
Right-click on the active network and select Properties.
Click on Internet Protocol Version 4 (TCP/IPv4) and then click Properties.
Enter the following details:
IP Address: Enter the static IP of your droplet.
Subnet Mask: This will be auto-filled.
Default Gateway: Enter your droplet’s gateway.
Preferred DNS Server: 8.8.8.8
Alternate DNS Server: 8.8.4.4
Click OK, then Close.
Step 6: Configure Windows Server
Open Administrative Tools.
Click Computer Management → Disk Management.
Right-click the middle partition and select Extend Volume.
Step 7: Set Up User and Password
Open Local Users and Groups.
Change the username.
Right-click on the username and select Change Password.
Set a new password.
Step 8: Update Windows Server
Go to Update & Security → Check for Updates.
Let Windows install updates (this may take 5-6 minutes).
Once the updates are installed, restart the server.
The update process will take around 3-4 minutes.
Step 9: Connect to Windows Server via RDP
Open Remote Desktop Connection on your computer.
Enter your DigitalOcean droplet’s IP address.
Log in using your Windows username and password.
You are now successfully connected to your Windows Virtual Machine on DigitalOcean!
Conclusion
You have now successfully installed Windows Server on DigitalOcean and can access it remotely using Remote Desktop (RDP). This setup allows you to host applications, manage servers, and run Windows-based software on a cloud platform.


![How to Configure Proxy Settings on Android Devices [FREE]](https://windows10freeapps.com/wp-content/uploads/2024/12/setting-up-a-proxy-for-a-wi-fi-network-1-150x150.jpeg "How to Configure Proxy Settings on Android Devices [FREE]")
 & Mac OS")