In this article, learn how to change a Network in Windows 10.
If you want to rename the name of the network in Windows 10, this post will show you how.
You can easy to change your network connection in Windows 7, you simply go to the Network and Sharing Center and then select your connection to change its name.
In Windows 10, it’s a little harder to change the network. Here are the steps:
How to change network name in Windows 10?
Method 1. Change a Network Profile Name in RegEdit
1. On your keyboard, press the Windows logo key + R at the same time, and then type in regedit. Click OK to open Registry Editor.
2. When the Registry Editor appears, navigae to the following key:
HKEY_LOCAL_MACHINE\SOFTWARE\Microsoft\Windows NT\CurrentVersion\NetworkList\Profiles
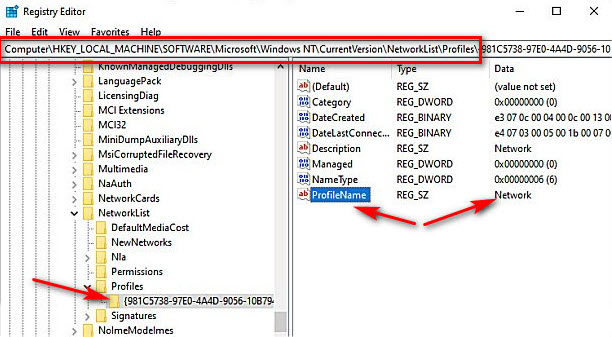
3. After that, select on the long GUID number and search for the ProfileName that matches the network name you are changing. Double-click ProfileName.
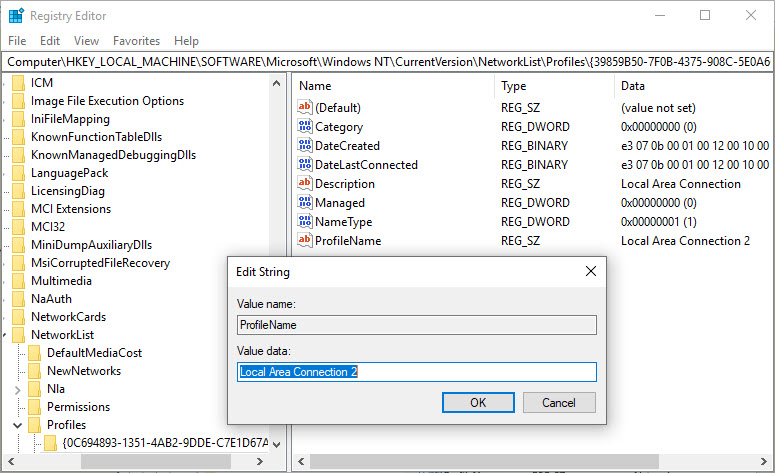
4. Type the new name in the Value data field.
Keeps in mind that you can’t have tabs and special characters, including * ? < > | \ / :
5. Close Registry Editor and restart your computer.
Your new Network name should occur the next time you check your Networks.
VIDEO TUTORIAL: How To Rename a Network Profile Name in Windows 10 using Registry Editor
Method 2. Change a Network Profile Name in Local Security Policy
Local Security Policy is only available in Windows 10 Enterprise or Windows 10 Pro. If you cannot open gpedit.msc in Windows 10 Home edition, check this post to learn how to add Group Policy Editor to Windows 10 Home
Step 1. Press Windows Key + R and type secpol.msc in Run dialog box and click OK.
Step 2. When the Local Security Policy window opens, go here:
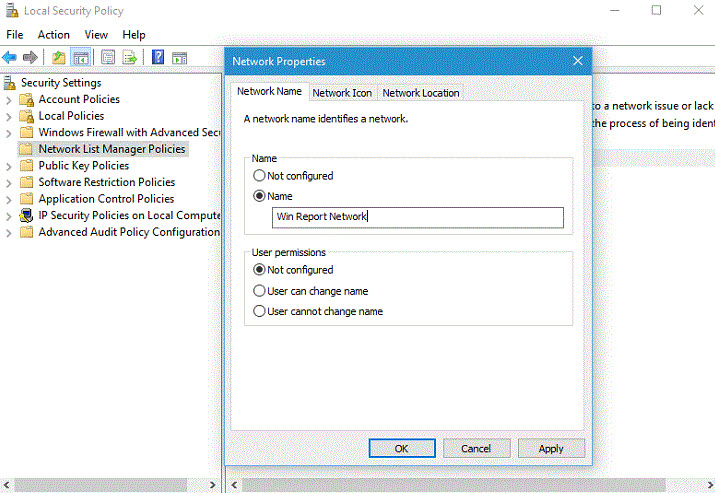
Security Settings > Network List Manager Policies
Step 3. In the right pane of above-shown window, double-click on your Network name.
Step 4. In the Properties windows under the Name section, click on Name. Type the desired network name and click on OK.
Step 5. Click Apply > OK and then restart your computer.
And that’s how you change the network in Windows 10. If you have any questions or comments, just reach for the comments section, below.

")

 & Mac OS")
